

Should you trust discretesearch.com?
Users, who are looking for a safe search engine, might find discretesearch.com virus appealing. However, it is worth noting that the browsing tool does not provide relevant search results. What is more, you might get soon annoyed by the enormous amount of ads cramming your computer. Redirects to unknown websites are also a prevalent occurrence. “Discreet search” is often cheap bait for fishing new users. As stated in its privacy policy, it disclaims of collecting any personal information. However, after analyzing its search results, specialists conclude that it is none other than a browser hijacker. Make a rush to start discretesearch.com removal. In that case, FortectIntego is a practical tool. It will help you remove discretesearch.com quickly and effectively.
While privacy in the cyber space is becoming a more escalated matter, many crooks and anonymous users try to exploit the growing concern for their personal profit. Discrete Search advocates providing you secret browsing services. By using this utility, your browsing history should not be visible to other users. However, even if it is true, there are drawbacks which outweigh the supposed benefits. Concerning the search qualities, you might notice that the search results are not the same as provided by Google or another legitimate browsing tool. Secondary and questionable websites occupy the initial positions rather than the official websites of your researched topic.
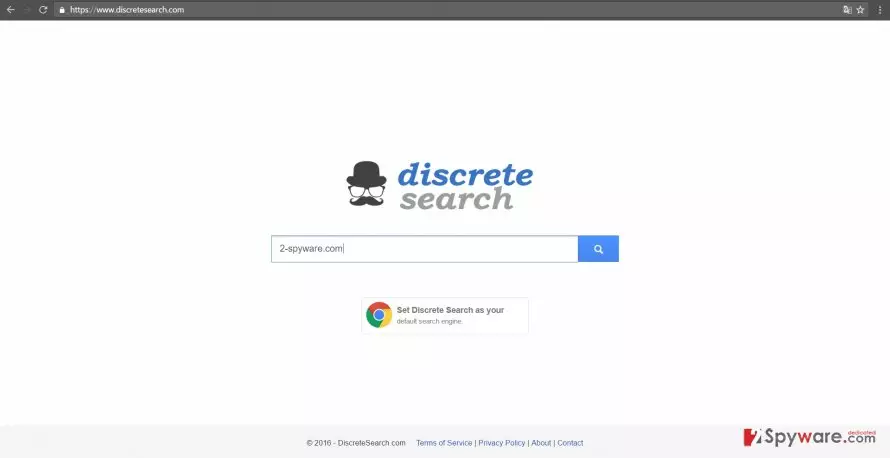
While using this utility, you might run into discretesearch.com redirect. Unfortunately, this phenomenon should not be taken too lightly as you might get carried to another website which is enhanced with malicious elements. The more of them get into your system, the slower your PC becomes. Taking into account the scandal of WOT (Web of Trust), when the owners of this tool disclaimed of collecting any personal and non-personal details, while, in reality, sold them to third parties, similar claims should not be taken for granted. If you delay the elimination of this website, you might notice that the hijacker adds additional questionable tools to your browser. They might only interrupt with your browsing sessions and slow down the overall browser’s processing speed.
So how did the hijacker get into your computer?
If you are wondering how this search engine got into your computer, you should recall whether you installed any new file converter or audio editing tool. If you rushed through the installation guide, then it is not surprising how discretesearch.com hijack took place. Next time you are about to install a new utility, make sure you opt for “Custom” settings rather than “Recommended.” Crooks tend to place their hijackers, adware or other PUPs under the latter mode. Since users are used to clicking “Next” and then hit the “Install,” the attachments remain unnoticed. However, do not lose your attentiveness thinking that choosing “Custom” will automatically prevent you from any hijack. When you select the latter mode, go through each stage carefully and unmark all irrelevant optional applications.
How long does it take to remove discretesearch.com?
Opting for the automatic method saves you a lot of time. Install an anti-spyware application and let it perform the uninstallation of the PUP. The program must be updated in order for it perform the elimination successfully. In addition, you can remove discretesearch.com virus manually as well. Follow the guidelines provided below. Remember that attention and cautiousness are crucial in completing full discretesearch.com removal. On the final note, before downloading any utility, check its rating in trusted websites. Reading the privacy reviews might also come in handy avoiding potentially fraudulent application.
Uninstall from Windows
Uninstall from Windows 10/8:
- Type Control Panel into the Windows search box and open the result.
- Under Programs, select Uninstall a program.


Uninstall from Windows 7/XP:
- Click on Windows Start > Control Panel (Windows XP users should click on Add/Remove Programs).
- In Control Panel, select Programs > Uninstall a program.


Remove the unwanted program:
- In the Programs and Features window, look for any recently installed suspicious entries, select them, and click Uninstall.
- If User Account Control appears, click Yes to confirm, then complete the removal.


Delete from macOS
Remove the unwanted application:
- From the menu bar, select Go > Applications.
- In the Applications folder, look for any suspicious entries, then drag them to Trash (or right-click and pick Move to Trash).


Delete leftover files and folders:
- Select Go > Go to Folder.
- Enter /Library/Application Support and remove any suspicious folders related to the unwanted program.
- Repeat the same check in the /Library/LaunchAgents and /Library/LaunchDaemons folders, deleting any suspicious entries.

- Finally, empty the Trash to permanently remove the leftovers.

Reset Internet Explorer
Remove dangerous add-ons:
- Open Internet Explorer, click on the Gear icon (IE menu) on the top-right corner of the browser
- Pick Manage Add-ons.
- You will see a Manage Add-ons window. Here, look for suspicious plugins. Click on these entries and select Disable.


Change your homepage if it was altered:
- Open IE and click on the Gear icon.
- Select Internet Options.
- In the General tab, delete the Home page address and replace it by your preferred one (for example, Google.com).
- Click Apply and then select OK.


Delete temporary files:
- Press on the Gear icon and select Internet Options.
- Under Browsing history, click Delete...
- Select relevant fields and press Delete.


Reset Internet Explorer:
- Click on Gear icon > Internet options and select Advanced tab.
- Select Reset.
- In the new window, check Delete personal settings and select Reset.


Remove from Microsoft Edge
Delete unwanted extensions from MS Edge:
- Select Menu (three horizontal dots at the top-right of the browser window) and pick Extensions.
- From the list, pick the extension and click on the Gear icon.
- Click Remove.


Clear cookies and other browser data:
- Click on the Menu (three horizontal dots at the top-right of the browser window) and select Settings > Privacy, search, and services..
- Under Clear browsing data, pick Choose what to clear.
- Select Cookies and other site data and Cached images and files. (apart from passwords, although you might want to include Media licenses as well, if applicable) and click on Clear.


Restore new tab and homepage settings:
- Click the menu icon and choose Settings.
- Then find On startup section.
- Click Remove next to any suspicious startup page.
Reset MS Edge if the above steps did not work:
- Press on Ctrl + Shift + Esc to open Task Manager.
- Click on More details arrow at the bottom of the window.
- Select Details tab.
- Now scroll down and locate every entry with Microsoft Edge name in it. Right-click on each of them and select End Task to stop MS Edge from running.


Instructions for Chromium-based Edge
Delete extensions from MS Edge (Chromium):
- Open Edge and click select Settings > Extensions.
- Delete unwanted extensions by clicking Remove.


Clear cache and site data:
- Click on Menu and go to Settings.
- Select Privacy, search and services.
- Under Clear browsing data, pick Choose what to clear.
- Under Time range, pick All time.
- Select Clear now.


Reset Chromium-based MS Edge:
- Click on Menu and select Settings.
- On the left side, pick Reset settings.
- Select Restore settings to their default values.
- Confirm with Reset.
- This will disable extensions and reset startup pages but will not delete bookmarks, saved passwords, or browsing history.


Remove from Mozilla Firefox (FF)
Remove dangerous extensions:
- Open Mozilla Firefox browser and click on the Menu (three horizontal lines at the top-right of the window).
- Select Add-ons.
- In here, select the unwanted extension and click Remove.


Reset the homepage:
- Click three horizontal lines at the top right corner to open the menu.
- Choose Settings.
- Under Home, set your preferred homepage and new tab settings.
Clear cookies and site data:
- Click Menu and pick Settings.
- Go to Privacy & Security section.
- Scroll down to locate Cookies and Site Data.
- Click on Clear Data...
- Select Cookies and Site Data and Temporary cached files and pages, then click Clear.


Reset Mozilla Firefox
If clearing the browser as explained above did not help, reset Mozilla Firefox:
- Open Mozilla Firefox browser and click the Menu.
- Go to Help and then choose Troubleshooting Information.

- Under Give Firefox a tune up section, click on Refresh Firefox...
- Once the pop-up shows up, confirm the action by pressing on Refresh Firefox.



Remove from Google Chrome
Delete malicious extensions from Google Chrome:
- Open Google Chrome, click on the Menu (three vertical dots at the top-right corner) and select More tools > Extensions.
- In the newly opened window, you will see all the installed extensions. Uninstall all suspicious extensions related to the unwanted program by clicking Remove.


Clear cache and web data from Chrome:
- Click on Menu and pick Settings.
- Under Privacy and security, select Clear browsing data.
- Select Browsing history, Cookies and other site data, as well as Cached images and files.
- Click Clear data.


Change your homepage:
- Click menu and choose Settings.
- Look for a suspicious site in the On startup section.
- Click on Open a specific or set of pages and click on three dots to find the Remove option.
Reset Google Chrome:
If the previous methods did not help you, reset Google Chrome to eliminate all the unwanted components:
- Click on Menu and select Settings.
- In the Settings, scroll down and click Advanced.
- Scroll down and locate Reset and clean up section.
- Now click Restore settings to their original defaults.
- Confirm with Reset settings.


Delete from Safari
Remove dangerous extensions:
- Open Safari, click Safari in the menu at the top-left of the screen, and select Preferences.
- Go to the Extensions tab, look for any suspicious entries, and click Uninstall to remove them.


Clear history and website data:
- Click Safari in the menu and pick Clear History.
- Set Clear to all history and confirm with Clear History.


Reset Safari:
- Click Safari in the menu and select Preferences > Advanced.
- Enable Show Develop menu in menu bar.
- From the menu bar, click Develop and select Empty Caches.


Was this guide helpful?
2 comments