

What should you do when you see Winter Waldo pop-ups?
When Winter Waldo virus settles on the device, you might notice an increasing number of commercial offers and pop-ups on your browser. Such phenomenon is not surprising since the plug-in is classified as adware. In other words, it is the application which is specifically designed to display commercial offers and redirect you to its partners’ domains or persuade you into purchasing shady application. While, usually, adware-type applications do not cause any severe consequences, there are some samples appearing which target netizens’ personal data [1]. In short, if you installed this browser plug-in on your computer, make a rush to remove Winter Waldo. For that, you can use FortectIntego. It will speed up the entire process.
Let us present key facts why adware application should not be ignored and instead removed it right away. Advertising on the Internet might earn quite a delicate amount of money if done properly. Naturally, the website which receives a huge amount of visitors’ traffic earns income for its owners. In some cases, some hosts make a deal with suspicious users and use their support while they display the advertising content. Thus, they may fill their domains with adware [2]. Speaking of WinterWaldo.com PUP, it targets younger generations of the virtual community who like to liven up their browsing by a couple of short games. While these entertaining games have its own advantages, the drawbacks of the plug-in might significantly outweigh them. For instance, Winter Waldo redirect happens to be one of the most bothersome features. Due to this tendency, you might find yourself in other gaming sites. Keep in mind that some of them might contain highly unpleasant “surprises” – malware [3]. Even an innocent game might contain an ominous payload within.
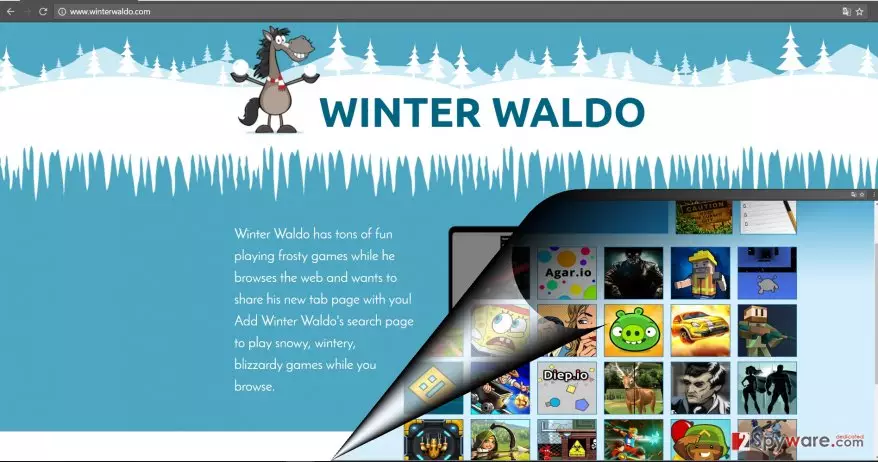
What is more, if you are self-conscious about your activity on the Internet, you should know that these Winter Waldo ads do not only promote games and other websites, but they might contribute to the installation of adware cookies. In other words, this PUP gathers identifies your geographical location, spies your browsing activities, session duration and referrer URL [4]. What is more, unlike other domains, which gather technical information about your operating system, this PUP gets a hold of unique identifier. All in all, such information might seem insignificant, but it might be traded with other advertising companies or even with fraudsters. Thus, proceed to Winter Waldo removal.
The transmission preferences of the adware
Usually, such PUPs are distributed via “bundling” technique. Its main principle lies in attaching unwanted elements such as adware, browser hijackers and other questionable toolbars to freeware. Crooks even point their attention to mainstream networks and applications to place their adware [5]. When you are about to install a newly downloaded application, keep in mind that unwanted elements might be hidden under “Recommended” settings. Thus, when users click on it and dash away, they usually overlook the attachments. In order not to repeat the same mistake again, install applications in another way. Specifically, select “Custom” settings and then watch for unnecessary add-ons to escape Winter Waldo hijack next time. Only when you unmark all of the applications, start the installation of your intended software.
Quick Winter Waldo removal instructions
There are two methods how you can eliminate the adware. Remove Winter Waldo virus with the assistance of anti-spyware application. Update and run the scan. This tool is a practical tool in confronting more exquisite virus infections. You can also perform manual Winter Waldo removal. Find the instructions displayed below. Lastly, keep in mind that “bundling” serves not only for distributing adware but for more destructive virtual threats. Stay vigilant and browse carefully.
Uninstall from Windows
Uninstall from Windows 10/8:
- Type Control Panel into the Windows search box and open the result.
- Under Programs, select Uninstall a program.


Uninstall from Windows 7/XP:
- Click on Windows Start > Control Panel (Windows XP users should click on Add/Remove Programs).
- In Control Panel, select Programs > Uninstall a program.


Remove the unwanted program:
- In the Programs and Features window, look for any recently installed suspicious entries, select them, and click Uninstall.
- If User Account Control appears, click Yes to confirm, then complete the removal.


Delete from macOS
Remove the unwanted application:
- From the menu bar, select Go > Applications.
- In the Applications folder, look for any suspicious entries, then drag them to Trash (or right-click and pick Move to Trash).


Delete leftover files and folders:
- Select Go > Go to Folder.
- Enter /Library/Application Support and remove any suspicious folders related to the unwanted program.
- Repeat the same check in the /Library/LaunchAgents and /Library/LaunchDaemons folders, deleting any suspicious entries.

- Finally, empty the Trash to permanently remove the leftovers.

Reset Internet Explorer
Remove dangerous add-ons:
- Open Internet Explorer, click on the Gear icon (IE menu) on the top-right corner of the browser
- Pick Manage Add-ons.
- You will see a Manage Add-ons window. Here, look for suspicious plugins. Click on these entries and select Disable.


Change your homepage if it was altered:
- Open IE and click on the Gear icon.
- Select Internet Options.
- In the General tab, delete the Home page address and replace it by your preferred one (for example, Google.com).
- Click Apply and then select OK.


Delete temporary files:
- Press on the Gear icon and select Internet Options.
- Under Browsing history, click Delete...
- Select relevant fields and press Delete.


Reset Internet Explorer:
- Click on Gear icon > Internet options and select Advanced tab.
- Select Reset.
- In the new window, check Delete personal settings and select Reset.


Remove from Microsoft Edge
Delete unwanted extensions from MS Edge:
- Select Menu (three horizontal dots at the top-right of the browser window) and pick Extensions.
- From the list, pick the extension and click on the Gear icon.
- Click Remove.


Clear cookies and other browser data:
- Click on the Menu (three horizontal dots at the top-right of the browser window) and select Settings > Privacy, search, and services..
- Under Clear browsing data, pick Choose what to clear.
- Select Cookies and other site data and Cached images and files. (apart from passwords, although you might want to include Media licenses as well, if applicable) and click on Clear.


Restore new tab and homepage settings:
- Click the menu icon and choose Settings.
- Then find On startup section.
- Click Remove next to any suspicious startup page.
Reset MS Edge if the above steps did not work:
- Press on Ctrl + Shift + Esc to open Task Manager.
- Click on More details arrow at the bottom of the window.
- Select Details tab.
- Now scroll down and locate every entry with Microsoft Edge name in it. Right-click on each of them and select End Task to stop MS Edge from running.


Instructions for Chromium-based Edge
Delete extensions from MS Edge (Chromium):
- Open Edge and click select Settings > Extensions.
- Delete unwanted extensions by clicking Remove.


Clear cache and site data:
- Click on Menu and go to Settings.
- Select Privacy, search and services.
- Under Clear browsing data, pick Choose what to clear.
- Under Time range, pick All time.
- Select Clear now.


Reset Chromium-based MS Edge:
- Click on Menu and select Settings.
- On the left side, pick Reset settings.
- Select Restore settings to their default values.
- Confirm with Reset.
- This will disable extensions and reset startup pages but will not delete bookmarks, saved passwords, or browsing history.


Remove from Mozilla Firefox (FF)
Remove dangerous extensions:
- Open Mozilla Firefox browser and click on the Menu (three horizontal lines at the top-right of the window).
- Select Add-ons.
- In here, select the unwanted extension and click Remove.


Reset the homepage:
- Click three horizontal lines at the top right corner to open the menu.
- Choose Settings.
- Under Home, set your preferred homepage and new tab settings.
Clear cookies and site data:
- Click Menu and pick Settings.
- Go to Privacy & Security section.
- Scroll down to locate Cookies and Site Data.
- Click on Clear Data...
- Select Cookies and Site Data and Temporary cached files and pages, then click Clear.


Reset Mozilla Firefox
If clearing the browser as explained above did not help, reset Mozilla Firefox:
- Open Mozilla Firefox browser and click the Menu.
- Go to Help and then choose Troubleshooting Information.

- Under Give Firefox a tune up section, click on Refresh Firefox...
- Once the pop-up shows up, confirm the action by pressing on Refresh Firefox.



Remove from Google Chrome
Delete malicious extensions from Google Chrome:
- Open Google Chrome, click on the Menu (three vertical dots at the top-right corner) and select More tools > Extensions.
- In the newly opened window, you will see all the installed extensions. Uninstall all suspicious extensions related to the unwanted program by clicking Remove.


Clear cache and web data from Chrome:
- Click on Menu and pick Settings.
- Under Privacy and security, select Clear browsing data.
- Select Browsing history, Cookies and other site data, as well as Cached images and files.
- Click Clear data.


Change your homepage:
- Click menu and choose Settings.
- Look for a suspicious site in the On startup section.
- Click on Open a specific or set of pages and click on three dots to find the Remove option.
Reset Google Chrome:
If the previous methods did not help you, reset Google Chrome to eliminate all the unwanted components:
- Click on Menu and select Settings.
- In the Settings, scroll down and click Advanced.
- Scroll down and locate Reset and clean up section.
- Now click Restore settings to their original defaults.
- Confirm with Reset settings.


Delete from Safari
Remove dangerous extensions:
- Open Safari, click Safari in the menu at the top-left of the screen, and select Preferences.
- Go to the Extensions tab, look for any suspicious entries, and click Uninstall to remove them.


Clear history and website data:
- Click Safari in the menu and pick Clear History.
- Set Clear to all history and confirm with Clear History.


Reset Safari:
- Click Safari in the menu and select Preferences > Advanced.
- Enable Show Develop menu in menu bar.
- From the menu bar, click Develop and select Empty Caches.


Did this guide help?
2 comments
Cronus45
And people add such plug-in?
perfectus435
Its better such adware rather than file-encrypting malware.