

DealWifi or Mystart.dealwifi.com? Is any of these programs causing you some troubles? Even though one of them is adware, and the other one is browser hijacker, both of them are related, spreading around the Internet these days, and may infiltrate your computer without your consent. While both of them are very different – their purpose is more or less the same, which is to make people visit affiliate websites and thus generate income from advertising. Since in our blog Mystart.dealwifi.com hijacker is already presented, in this particular case, we want to introduce you with DealWifi by RAFO Technology.
What is known about DealWifi adware:
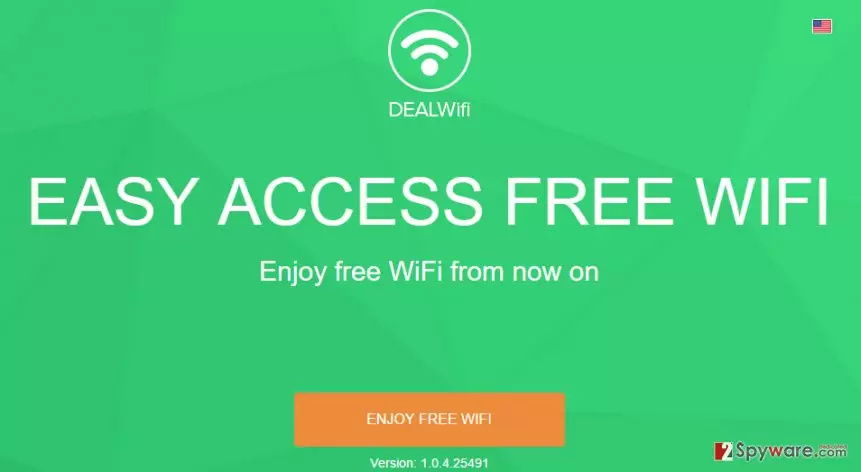
DealWifi is a browser add-on developed and maintained by RAFO technology. As stated on the official website, it “is an easy-to-use software that turns your laptop/PC into a Wi-Fi wireless access point. Anyone nearby can surf the Internet through your sharing.” However, it is categorized as ‘adware’, and we will explain why. Once installed, it takes over all web browsers that are installed on a computer (Google Chrome, Mozilla Firefox, Internet Explorer) and then starts initiating various activities to promote affiliate parties. Consequently, each time you web browser may expose you tens of commercial advertisements (banners, pop-ups, interstitial, and others).
In order to see which of the ads are brought by the adware and which are brought by the website that you are viewing, look whether they contain slogans like, for example, “Ads by DealWifi”, “Powered by DealWifi”, “DealWifi Ads”, and so on. The ones generated by the adware should not be clicked because they are filled with the third-party content. It means that DealWifi redirects can make you visit either unpopular third-party websites or domains that are used for spreading other PUPS. Besides, this adware can display catchy-looking ads since it can collect browsing-related information about its users (search queries, URLs visited, clicks, IP address, clicks, etc.). Finally, it may corrupt various Windows settings, including start-up and registries, which is why you browser’s performance may slightly or significantly diminish. Finally, this adware tends to inject Mystart.dealwifi.com redirect virus and set it as a default start page and search provider. Thus, to prevent this from happening, run FortectIntego and remove DealWifi virus as soon as you notice its ads during browsing.
Potentially unwanted programs that are closely related to DealWifi:
Search.dealwifi.com. It is a URL that opens a suspicious search engine. Due to questionable functionality and ability to cause web redirects, it has been assigned to potentially unwanted programs’ group. It is judged to be a browser hijacker, which infects user’s system along with DealWifi software. Once installed, it modifies user’s previously set browser homepage settings and makes the indicated search engine appear on browser’s startup. Clicking on search results can be dangerous because they can be filled with third-party links, many of such are sponsored. They can open possibly dangerous websites, so it is advisable to remove Search.DealWifi.com from the system without a doubt.
Mystart.dealwifi.com. Being another product by RAFO Technology, this suspicious search engine does not seem secure. According to our research, it integrates sponsored results in between regular search results, waiting for the victim to click them. It is recommended to stay away from this search engine because it might trigger redirects to pre-determined Internet sites that can be insecure. On top of that, Mystart.dealwifi.com redirect virus can make the computer perform slowly and cause other inconveniences, so it is highly recommended to get rid of it along with DealWifi software. Mystart3.dealwifi.com. Another version of bogus search engine that can appear instead of victim’s previous homepage after the discussed computer parasite infiltrates into the system. Just like previously mentioned browser hijackers, Mystart3.dealwifi.com redirect virus seems to be just as an untrustworthy and undesirable program like its “relatives.” As a search tool, it cannot provide any beneficial features, but only make your computer perform poorly and trigger shocking redirects to potentially dangerous third-party websites to monetize users’ clicks. It goes without saying that such program should be excluded from the computer system as soon as possible.
RAFO Technology virus. RAFO Technology is a company that has developed DealWifi adware. When the user installs this program, starts receiving annoying ads, notices suspicious changes in browser settings and other strange occurrences happening on the system. This company’s vision is to monetize its products; however, it seems that it advertises all sorts of third-parties via its products, which does not make this company seem trustworthy. It is possible that some of the links it integrates into its products can lead users to suspicious or even possibly dangerous websites. It is clear that RAFO Technology should not be trusted since its products are mainly distributed using software bundling technique, which means that they typically hijack users’ systems without their consent. If you think that you have one of this company’s products on your PC, we strongly recommend you to think about RAFO Technology virus removal.
Methods used to distribute this software:
PUP is an acronym for potentially unwanted program. This category is used for describing programs that spread by ‘bundling’. Therefore, the fact that security experts consider DealWifi to be a PUP means that it is distributed with the help of other freewares and sharewares. In other words, it is usually bound with free software like, for instance, download manager of media player and spread as an ‘optional component’ along with it. Unfortunately, but third-party plug-ins, toolbars, add-ons and other applications are typically disguised under Advanced or Custom installation mode. Thus, people who miss selecting this method may end up with DealWifi and a bunch of other PUPs on the system. Therefore, don’t forget to check expanded settings and deselect all ‘optional components’ that are disclosed there.
How to uninstall DealWifi adware?
Deal Wifi redirects can become a real torture since it may be difficult to find relevant information. On top of that, you may be exposed to unreliable websites and tricked into installing other PUPs. Therefore, you are strongly advised to remove this adware along with a hijacker that it may install on your web browser. For that, you may use the guide below:
Uninstall from Windows
Uninstall from Windows 10/8:
- Type Control Panel into the Windows search box and open the result.
- Under Programs, select Uninstall a program.


Uninstall from Windows 7/XP:
- Click on Windows Start > Control Panel (Windows XP users should click on Add/Remove Programs).
- In Control Panel, select Programs > Uninstall a program.


Remove the unwanted program:
- In the Programs and Features window, look for any recently installed suspicious entries, select them, and click Uninstall.
- If User Account Control appears, click Yes to confirm, then complete the removal.


Delete from macOS
Remove the unwanted application:
- From the menu bar, select Go > Applications.
- In the Applications folder, look for any suspicious entries, then drag them to Trash (or right-click and pick Move to Trash).


Delete leftover files and folders:
- Select Go > Go to Folder.
- Enter /Library/Application Support and remove any suspicious folders related to the unwanted program.
- Repeat the same check in the /Library/LaunchAgents and /Library/LaunchDaemons folders, deleting any suspicious entries.

- Finally, empty the Trash to permanently remove the leftovers.

Remove from Microsoft Edge
Delete unwanted extensions from MS Edge:
- Select Menu (three horizontal dots at the top-right of the browser window) and pick Extensions.
- From the list, pick the extension and click on the Gear icon.
- Click Remove.


Clear cookies and other browser data:
- Click on the Menu (three horizontal dots at the top-right of the browser window) and select Settings > Privacy, search, and services..
- Under Clear browsing data, pick Choose what to clear.
- Select Cookies and other site data and Cached images and files. (apart from passwords, although you might want to include Media licenses as well, if applicable) and click on Clear.


Restore new tab and homepage settings:
- Click the menu icon and choose Settings.
- Then find On startup section.
- Click Remove next to any suspicious startup page.
Reset MS Edge if the above steps did not work:
- Press on Ctrl + Shift + Esc to open Task Manager.
- Click on More details arrow at the bottom of the window.
- Select Details tab.
- Now scroll down and locate every entry with Microsoft Edge name in it. Right-click on each of them and select End Task to stop MS Edge from running.


Instructions for Chromium-based Edge
Delete extensions from MS Edge (Chromium):
- Open Edge and click select Settings > Extensions.
- Delete unwanted extensions by clicking Remove.


Clear cache and site data:
- Click on Menu and go to Settings.
- Select Privacy, search and services.
- Under Clear browsing data, pick Choose what to clear.
- Under Time range, pick All time.
- Select Clear now.


Reset Chromium-based MS Edge:
- Click on Menu and select Settings.
- On the left side, pick Reset settings.
- Select Restore settings to their default values.
- Confirm with Reset.
- This will disable extensions and reset startup pages but will not delete bookmarks, saved passwords, or browsing history.


Remove from Mozilla Firefox (FF)
Remove dangerous extensions:
- Open Mozilla Firefox browser and click on the Menu (three horizontal lines at the top-right of the window).
- Select Add-ons.
- In here, select the unwanted extension and click Remove.


Reset the homepage:
- Click three horizontal lines at the top right corner to open the menu.
- Choose Settings.
- Under Home, set your preferred homepage and new tab settings.
Clear cookies and site data:
- Click Menu and pick Settings.
- Go to Privacy & Security section.
- Scroll down to locate Cookies and Site Data.
- Click on Clear Data...
- Select Cookies and Site Data and Temporary cached files and pages, then click Clear.


Reset Mozilla Firefox
If clearing the browser as explained above did not help, reset Mozilla Firefox:
- Open Mozilla Firefox browser and click the Menu.
- Go to Help and then choose Troubleshooting Information.

- Under Give Firefox a tune up section, click on Refresh Firefox...
- Once the pop-up shows up, confirm the action by pressing on Refresh Firefox.



Remove from Google Chrome
Delete malicious extensions from Google Chrome:
- Open Google Chrome, click on the Menu (three vertical dots at the top-right corner) and select More tools > Extensions.
- In the newly opened window, you will see all the installed extensions. Uninstall all suspicious extensions related to the unwanted program by clicking Remove.


Clear cache and web data from Chrome:
- Click on Menu and pick Settings.
- Under Privacy and security, select Clear browsing data.
- Select Browsing history, Cookies and other site data, as well as Cached images and files.
- Click Clear data.


Change your homepage:
- Click menu and choose Settings.
- Look for a suspicious site in the On startup section.
- Click on Open a specific or set of pages and click on three dots to find the Remove option.
Reset Google Chrome:
If the previous methods did not help you, reset Google Chrome to eliminate all the unwanted components:
- Click on Menu and select Settings.
- In the Settings, scroll down and click Advanced.
- Scroll down and locate Reset and clean up section.
- Now click Restore settings to their original defaults.
- Confirm with Reset settings.


Delete from Safari
Remove dangerous extensions:
- Open Safari, click Safari in the menu at the top-left of the screen, and select Preferences.
- Go to the Extensions tab, look for any suspicious entries, and click Uninstall to remove them.


Clear history and website data:
- Click Safari in the menu and pick Clear History.
- Set Clear to all history and confirm with Clear History.


Reset Safari:
- Click Safari in the menu and select Preferences > Advanced.
- Enable Show Develop menu in menu bar.
- From the menu bar, click Develop and select Empty Caches.


Did this guide help?
Be the first to comment