

TAP Provider V9 for Private Tunnel – a highly questionable service that takes over user's Internet connection and causes unwanted ads
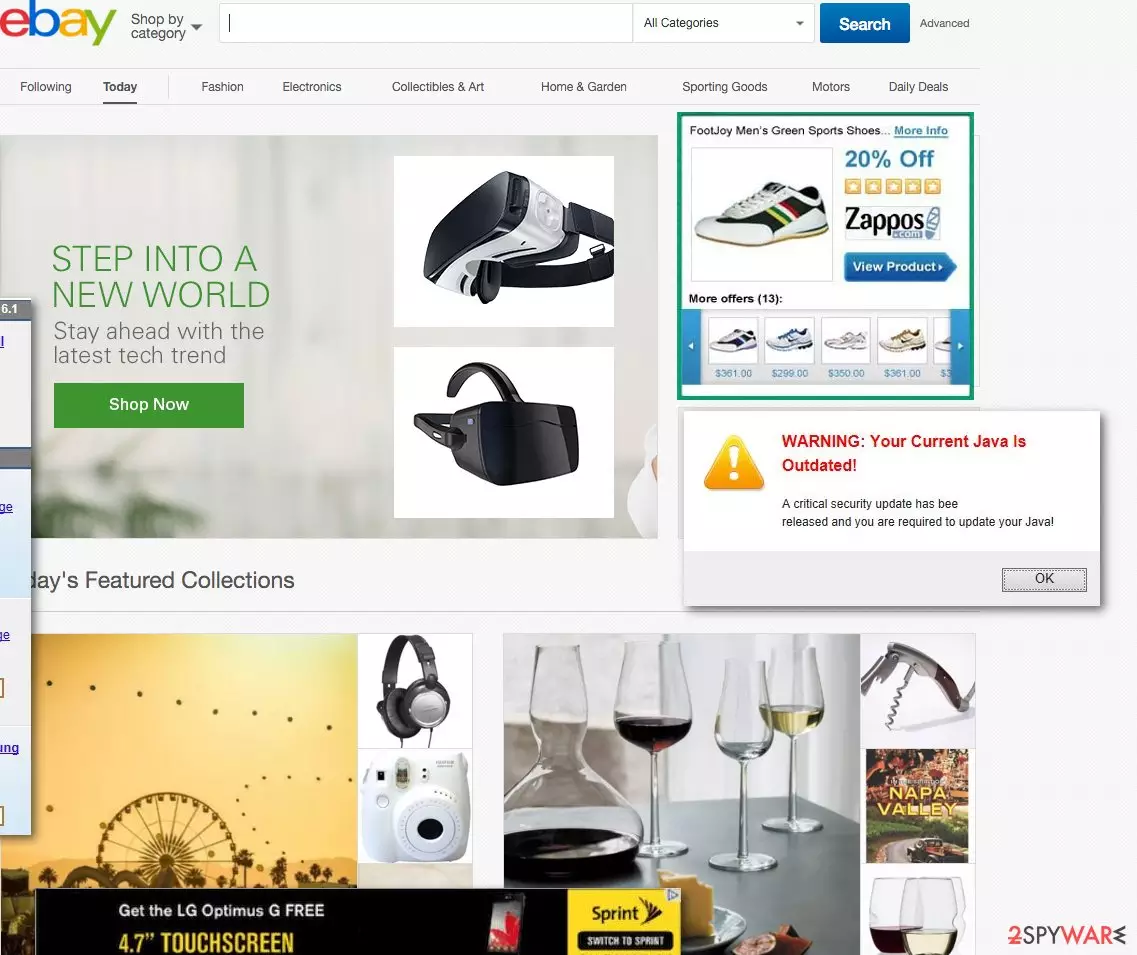
TAP Provider V9 for Private Tunnel – a virtual network interface used by KMSpico to activate office using a fake KMS server. However, if you have been suffering from the pop-up offering you to install this service, you should beware that, after adding it to the system, you can start seeing numerous annoying pop-up messages on your computer. According to PC security experts, you should stay away from the questionable program and always opt for official software downloads or updates.
| SUMMARY | |
| Name | TAP Provider V9 for Private Tunnel |
| Type | Adware |
| Connected to | KMSpico |
| Main dangers | Malware infections, disclosure of personal data to unknown sources |
| Symptoms | Compromised browser injected with ads, questionable redirects, fake search results, etc. |
| Distribution | Software bundling |
| Elimination | Download and install anti-malware tool for this |
According to users' complaints, annoying “Tap Provider V9 keeps asking to install” pop-up messages can reappear 20 times in a row.[1] The biggest number of complaints comes from the USA and Russia,[2] but this issue can be seen on every computer that uses KMSpico to install an illegal version of office.
There is no doubt that you should use this software with extra carefulness. Don't forget that it has already been misused by hackers. In addition, we do NOT recommend installing a private tunnel tool or TAP-Win32 Provider V9 Network adapters[3] as there is no explicit information about the program. Cancel such offers and check whether there is no dubious program generating these alerts.
This unwanted app should not be confused with TAP-Windows Adapter V9, which is a driver used by most of the VPN services to connect to the network services properly. Although users may encounter some problems with it, there are easy ways of fixing them – like reinstalling or disabling it. Nevertheless, this application is not malicious, and would not display any ads as this virus does.
Adware after-effects
Once the OpenVPN technologies virus[4] is installed, it starts generating third-party ads. The service has been collaborating with a number of third parties, so there is no surprise that it promotes its products and websites in the ads it generates. However, its aim is to keep the number of these ads as high as possible as the more ads the adware generates, the more chances there are for the users to click on them and brings profit. For this reason, the ads tend to be very intrusive.
Do not be surprised if the pop-ups, banners, in-texts, and other types of advertisements start flooding into your PC. It is all because your computer has been infected by the virus. In such case, you should close the browser and immediately run a scan of your computer with some reputable antivirus tool. We recommend FortectIntego or MalwarebytesMalwarebytes for this purpose. It will remove TAP Provider V9 for Private Tunnel network within a couple of minutes.
We should also warn you that displayed ads do not necessarily lead their users to the indicated sources. In other words, it is not certain that you will be lead to some online electronics shopping site after clicking on some ad, offering you an almost-too-good-to-be-true deal for purchasing a smartphone or a computer.
You should not delay the elimination, as the intruder negatively affects the performance of your browser. In addition, be aware of the fact that the pop-ups might direct you to browser-based tech support scams or malicious sites. Therefore, do not ignore redirects caused by TAP Provider V9 for Private Tunnel and proceed to the elimination of the adware.

OpenVPN technologies virus stick to the same distribution techniques
The distribution methods of adware programs are long-known for security experts. Yet the regular users are usually unaware of the ways potentially unwanted programs can sneak into their computers.
Note that the hijack cannot occur without your participation. In fact, if you see this program on your computer there are high chances that you have inadvertently installed it on your computer along with other freeware or shareware programs.
If your computer is still virus-free, you should keep it that way by obtaining reputable antivirus software and running regular system scans. It is also important to install new programs through the “Advanced” installation mode. Likewise, you will be able to spot PUP on time. Let us proceed to proper removal options.
You need to get rid of TAP Provider V9 from the PC
If you are already fed up with the ads offering you to install the random app similar pop-up messages, we recommend you run a full system scan with reputable anti-spyware and get rid of suspicious programs. It will remove TAP Provider V9 for the Private Tunnel virus automatically, and the whole procedure will last just a few minutes.
You should remember, though, that your antivirus should be updated to the latest version to be able to detect all the junk files on your PC. Of course, you can also try removing the associated files manually; however, you should keep in mind that these files may be difficult to detect.
If you think that you are experienced enough to get rid of this PUP manually, you can follow a guide that was prepared by our experts for the PUPremoval. In this case, you need to perform the steps that are given below and also open Task Scheduler to stop KMSpico, AutoKMS, or similar entries.
Uninstall from Windows
Uninstall from Windows 10/8:
- Type Control Panel into the Windows search box and open the result.
- Under Programs, select Uninstall a program.


Uninstall from Windows 7/XP:
- Click on Windows Start > Control Panel (Windows XP users should click on Add/Remove Programs).
- In Control Panel, select Programs > Uninstall a program.


Remove the unwanted program:
- In the Programs and Features window, look for any recently installed suspicious entries, select them, and click Uninstall.
- If User Account Control appears, click Yes to confirm, then complete the removal.


Delete from macOS
Remove the unwanted application:
- From the menu bar, select Go > Applications.
- In the Applications folder, look for any suspicious entries, then drag them to Trash (or right-click and pick Move to Trash).


Delete leftover files and folders:
- Select Go > Go to Folder.
- Enter /Library/Application Support and remove any suspicious folders related to the unwanted program.
- Repeat the same check in the /Library/LaunchAgents and /Library/LaunchDaemons folders, deleting any suspicious entries.

- Finally, empty the Trash to permanently remove the leftovers.

Remove from Microsoft Edge
Delete unwanted extensions from MS Edge:
- Select Menu (three horizontal dots at the top-right of the browser window) and pick Extensions.
- From the list, pick the extension and click on the Gear icon.
- Click Remove.


Clear cookies and other browser data:
- Click on the Menu (three horizontal dots at the top-right of the browser window) and select Settings > Privacy, search, and services..
- Under Clear browsing data, pick Choose what to clear.
- Select Cookies and other site data and Cached images and files. (apart from passwords, although you might want to include Media licenses as well, if applicable) and click on Clear.


Restore new tab and homepage settings:
- Click the menu icon and choose Settings.
- Then find On startup section.
- Click Remove next to any suspicious startup page.
Reset MS Edge if the above steps did not work:
- Press on Ctrl + Shift + Esc to open Task Manager.
- Click on More details arrow at the bottom of the window.
- Select Details tab.
- Now scroll down and locate every entry with Microsoft Edge name in it. Right-click on each of them and select End Task to stop MS Edge from running.


Instructions for Chromium-based Edge
Delete extensions from MS Edge (Chromium):
- Open Edge and click select Settings > Extensions.
- Delete unwanted extensions by clicking Remove.


Clear cache and site data:
- Click on Menu and go to Settings.
- Select Privacy, search and services.
- Under Clear browsing data, pick Choose what to clear.
- Under Time range, pick All time.
- Select Clear now.


Reset Chromium-based MS Edge:
- Click on Menu and select Settings.
- On the left side, pick Reset settings.
- Select Restore settings to their default values.
- Confirm with Reset.
- This will disable extensions and reset startup pages but will not delete bookmarks, saved passwords, or browsing history.


Remove from Mozilla Firefox (FF)
Remove dangerous extensions:
- Open Mozilla Firefox browser and click on the Menu (three horizontal lines at the top-right of the window).
- Select Add-ons.
- In here, select the unwanted extension and click Remove.


Reset the homepage:
- Click three horizontal lines at the top right corner to open the menu.
- Choose Settings.
- Under Home, set your preferred homepage and new tab settings.
Clear cookies and site data:
- Click Menu and pick Settings.
- Go to Privacy & Security section.
- Scroll down to locate Cookies and Site Data.
- Click on Clear Data...
- Select Cookies and Site Data and Temporary cached files and pages, then click Clear.


Reset Mozilla Firefox
If clearing the browser as explained above did not help, reset Mozilla Firefox:
- Open Mozilla Firefox browser and click the Menu.
- Go to Help and then choose Troubleshooting Information.

- Under Give Firefox a tune up section, click on Refresh Firefox...
- Once the pop-up shows up, confirm the action by pressing on Refresh Firefox.



Remove from Google Chrome
Delete malicious extensions from Google Chrome:
- Open Google Chrome, click on the Menu (three vertical dots at the top-right corner) and select More tools > Extensions.
- In the newly opened window, you will see all the installed extensions. Uninstall all suspicious extensions related to the unwanted program by clicking Remove.


Clear cache and web data from Chrome:
- Click on Menu and pick Settings.
- Under Privacy and security, select Clear browsing data.
- Select Browsing history, Cookies and other site data, as well as Cached images and files.
- Click Clear data.


Change your homepage:
- Click menu and choose Settings.
- Look for a suspicious site in the On startup section.
- Click on Open a specific or set of pages and click on three dots to find the Remove option.
Reset Google Chrome:
If the previous methods did not help you, reset Google Chrome to eliminate all the unwanted components:
- Click on Menu and select Settings.
- In the Settings, scroll down and click Advanced.
- Scroll down and locate Reset and clean up section.
- Now click Restore settings to their original defaults.
- Confirm with Reset settings.


Delete from Safari
Remove dangerous extensions:
- Open Safari, click Safari in the menu at the top-left of the screen, and select Preferences.
- Go to the Extensions tab, look for any suspicious entries, and click Uninstall to remove them.


Clear history and website data:
- Click Safari in the menu and pick Clear History.
- Set Clear to all history and confirm with Clear History.


Reset Safari:
- Click Safari in the menu and select Preferences > Advanced.
- Enable Show Develop menu in menu bar.
- From the menu bar, click Develop and select Empty Caches.


Did this guide help?
Be the first to comment