

How should you treat search.cubokit.com virus?
Search.cubokit.com virus happens to be another sample of browser hijackers belonging to the series of Safe Finder. There is a number of the latter questionable browsing tools roaming around. The company, Lukury Ltd, which releases them, had a small break, but now they returned having some hijackers up their sleeves. In any case, the browser hijacker is the sort of search engine which often falsely claims of ensuring fast surfing speed and providing relevant search results. In this case, this search engine does not try to allure users with such claims. On the other hand, it attempts to create an image of the reliable search engine. However, after a while, you will notice recurring redirect web pages, which pop up at the most inconvenient time. In addition, excessive advertising will be a prevalent issue as well. After all, do not waste time and remove search.cubokit.com with the help of an anti-spyware program, such as FortectIntego.
Let us present two main arguments why this search engine should not be used as a daily search provider. Firstly, you might not know of its ability to hijack computers. On the other hand, if you found it deliberately, after a short while of usage, you will notice search.cubokit.com redirect tendency. This phenomenon occurs either when you enter one the websites from the search result list or when you click on the ads popped while surfing. In any case, bear in mind that this occurrence might have negative effects on your device. Since Cubokit is supported by Safe Finder, you might be redirected to the domains monitored by anonymous third-parties. Their websites usually happen to be ad-supported domains which might also hide unwanted content – viruses. When the redirect web pages appear, avoid entering them, not to mention surfing there. By avoiding them, you might escape trojans, computer worms and other sorts of highly dangerous malware.
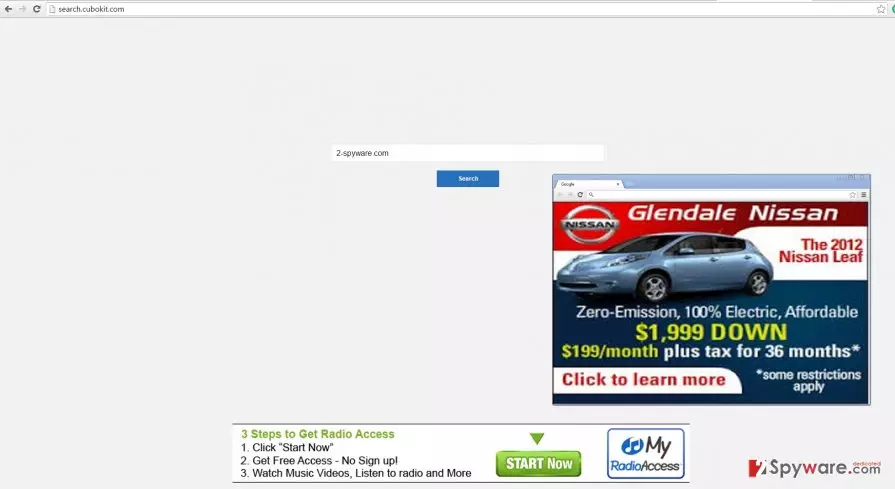
Secondly, the other negative aspect of this hijacker is that before it collects non-personal information which might include personal data. Though almost every legitimate domain does employ cookies, files, which help record the traffic of visitors, the browser hijackers tend to store the collected information and, therefore, transfer it to the advertising domains which support them. While this bargain is mutually beneficial, you, who uses this browser hijacker, suffer from the load of customized advertisements flooding the browser. In any case, it is high time you started search.cubokit.com removal process.
How does the hijacker infiltrate the PC?
There is a common tendency not to pay attention nor read Terms of Use or the installation process. You may admit that either you run a Java update or install a new audio player, after clicking the “Basic” settings and afterward “Install,” the other details do not receive your attention. As a result of this quality, you have missed Search.cubokit.com when you were installing the freeware lately. The hijacker successfully exploited your inattentiveness to invade the computer. We would like to suggest a few tips which would help you prevent the hijack of similar PUPs in the future. Upon installing something new, choose “Custom” settings. Afterward, make sure no add-ons are pre-marked.
Quick search.cubokit.com removal
If you are searching for a method which would save you from meddling with this hijacker, automatic elimination is the most fitting solution. The anti-spyware program will do all the job for you within few minutes. It will also proof-check the operating system for malignant files. In addition, it is possible to remove search.cubokit.com the usual way. Remember that you need to pay attention to the instructions while going through every stage not to miss any detail. Eliminating all related minor secondary files which are related to search.cubokit.com is of crucial importance as well.
Uninstall from Windows
Uninstall from Windows 10/8:
- Type Control Panel into the Windows search box and open the result.
- Under Programs, select Uninstall a program.


Uninstall from Windows 7/XP:
- Click on Windows Start > Control Panel (Windows XP users should click on Add/Remove Programs).
- In Control Panel, select Programs > Uninstall a program.


Remove the unwanted program:
- In the Programs and Features window, look for any recently installed suspicious entries, select them, and click Uninstall.
- If User Account Control appears, click Yes to confirm, then complete the removal.


Delete from macOS
Remove the unwanted application:
- From the menu bar, select Go > Applications.
- In the Applications folder, look for any suspicious entries, then drag them to Trash (or right-click and pick Move to Trash).


Delete leftover files and folders:
- Select Go > Go to Folder.
- Enter /Library/Application Support and remove any suspicious folders related to the unwanted program.
- Repeat the same check in the /Library/LaunchAgents and /Library/LaunchDaemons folders, deleting any suspicious entries.

- Finally, empty the Trash to permanently remove the leftovers.

Remove from Microsoft Edge
Delete unwanted extensions from MS Edge:
- Select Menu (three horizontal dots at the top-right of the browser window) and pick Extensions.
- From the list, pick the extension and click on the Gear icon.
- Click Remove.


Clear cookies and other browser data:
- Click on the Menu (three horizontal dots at the top-right of the browser window) and select Settings > Privacy, search, and services..
- Under Clear browsing data, pick Choose what to clear.
- Select Cookies and other site data and Cached images and files. (apart from passwords, although you might want to include Media licenses as well, if applicable) and click on Clear.


Restore new tab and homepage settings:
- Click the menu icon and choose Settings.
- Then find On startup section.
- Click Remove next to any suspicious startup page.
Reset MS Edge if the above steps did not work:
- Press on Ctrl + Shift + Esc to open Task Manager.
- Click on More details arrow at the bottom of the window.
- Select Details tab.
- Now scroll down and locate every entry with Microsoft Edge name in it. Right-click on each of them and select End Task to stop MS Edge from running.


Instructions for Chromium-based Edge
Delete extensions from MS Edge (Chromium):
- Open Edge and click select Settings > Extensions.
- Delete unwanted extensions by clicking Remove.


Clear cache and site data:
- Click on Menu and go to Settings.
- Select Privacy, search and services.
- Under Clear browsing data, pick Choose what to clear.
- Under Time range, pick All time.
- Select Clear now.


Reset Chromium-based MS Edge:
- Click on Menu and select Settings.
- On the left side, pick Reset settings.
- Select Restore settings to their default values.
- Confirm with Reset.
- This will disable extensions and reset startup pages but will not delete bookmarks, saved passwords, or browsing history.


Remove from Mozilla Firefox (FF)
Remove dangerous extensions:
- Open Mozilla Firefox browser and click on the Menu (three horizontal lines at the top-right of the window).
- Select Add-ons.
- In here, select the unwanted extension and click Remove.


Reset the homepage:
- Click three horizontal lines at the top right corner to open the menu.
- Choose Settings.
- Under Home, set your preferred homepage and new tab settings.
Clear cookies and site data:
- Click Menu and pick Settings.
- Go to Privacy & Security section.
- Scroll down to locate Cookies and Site Data.
- Click on Clear Data...
- Select Cookies and Site Data and Temporary cached files and pages, then click Clear.


Reset Mozilla Firefox
If clearing the browser as explained above did not help, reset Mozilla Firefox:
- Open Mozilla Firefox browser and click the Menu.
- Go to Help and then choose Troubleshooting Information.

- Under Give Firefox a tune up section, click on Refresh Firefox...
- Once the pop-up shows up, confirm the action by pressing on Refresh Firefox.



Remove from Google Chrome
Delete malicious extensions from Google Chrome:
- Open Google Chrome, click on the Menu (three vertical dots at the top-right corner) and select More tools > Extensions.
- In the newly opened window, you will see all the installed extensions. Uninstall all suspicious extensions related to the unwanted program by clicking Remove.


Clear cache and web data from Chrome:
- Click on Menu and pick Settings.
- Under Privacy and security, select Clear browsing data.
- Select Browsing history, Cookies and other site data, as well as Cached images and files.
- Click Clear data.


Change your homepage:
- Click menu and choose Settings.
- Look for a suspicious site in the On startup section.
- Click on Open a specific or set of pages and click on three dots to find the Remove option.
Reset Google Chrome:
If the previous methods did not help you, reset Google Chrome to eliminate all the unwanted components:
- Click on Menu and select Settings.
- In the Settings, scroll down and click Advanced.
- Scroll down and locate Reset and clean up section.
- Now click Restore settings to their original defaults.
- Confirm with Reset settings.


Delete from Safari
Remove dangerous extensions:
- Open Safari, click Safari in the menu at the top-left of the screen, and select Preferences.
- Go to the Extensions tab, look for any suspicious entries, and click Uninstall to remove them.


Clear history and website data:
- Click Safari in the menu and pick Clear History.
- Set Clear to all history and confirm with Clear History.


Reset Safari:
- Click Safari in the menu and select Preferences > Advanced.
- Enable Show Develop menu in menu bar.
- From the menu bar, click Develop and select Empty Caches.


Did this guide help?
3 comments
Miley
Yeah..right. Safely find malware.
Owen
Ive got enough of this browser hijacker. Now I need to choose the right security app.
Dereck
Quite an odd search engine.