

Should you be terrified of unlimited.co.in virus?
Unlimited.co.in virus comes in the form of a search engine. Nonetheless, we do not recommend using it as the primary browsing tool because it is classified as a browser hijacker. It is capable of hijacking your browser and replacing your homepage. Afterward, the overall performance of your browser might significantly deteriorate. If you are interested in the potential danger of this browsing tool and unlimited.co.in removal methods, read the following sections.
According to the domain address and the overall contents of the search entry suggestions provided on the homepage of this hijacker, it is obvious that the owners target the residents of India. What is more, they also attempted to make the browser attractive for the international audience. At first glance, this search engine might look as a practical search provider, it still fails to meet the standards of a reliable and legitimate browsing tool. Unlimited.co.in is supported by third-parties.
Unlimited hijacker is supported by third parties. Thus, the owners of this hijacker enable the partners to display their advertising material to you. If you take a look at its privacy notice, you will find out that they collect quite a lot of technical statistical information related to your browsing habits. In addition, they employ Goggle AdSence, which enables them to deliver you personalized commercial offers. However, not all users enjoy being under constant watch. Within time, your Inbox might be also loaded with customized spam emails.
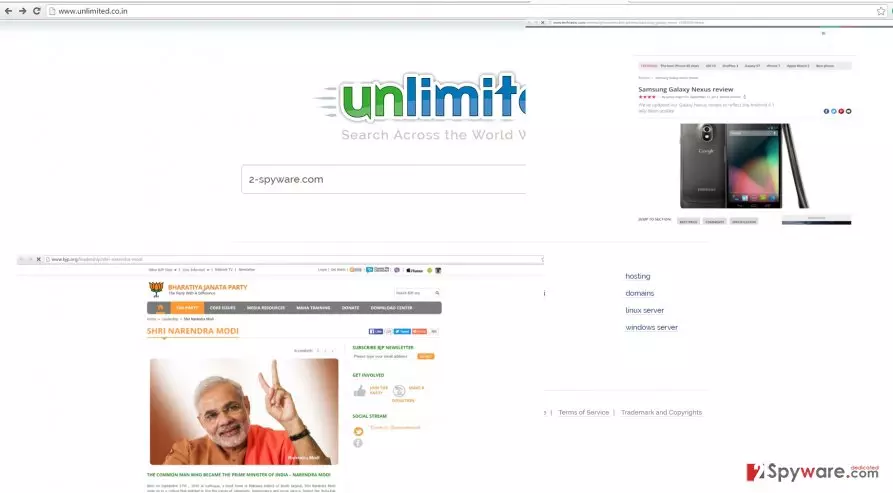
Furthermore, unlimited.co.in redirect issue might turn out into quite a troublesome phenomenon as well. It occurs when you either click on one of the search results or when you attempt to close advertisements. Despite how alluring or how intriguing content they might have, cancel those redirects at once. They might be infected with malevolent files. The longer you stay there, the more vulnerable your security of the OS becomes. Consequently, remove unlimited.co.in as soon as possible. For that purpose, FortectIntego is an effective program.
How does the browser hijacker infiltrate operating systems?
Do you remember recently installing a new application? The PUP might have exploited the opportunity to occupy the device via it. If you still do not understand how it happened, then we will gladly explain. There is a common vice among the majority of Internet users to avoid reading installation instructions. Due to this peculiarity, optional attachments, which travel along the free application, remain unnoticed. Consequently, after the installation process is complete, you might get bewildered unable to understand how and when the hijacker settled on the system. If you are willing to prevent the hijack of such unwanted tools in the future, select “Advanced” settings. This action will enable you to see unwanted add-ons. Only when you uncheck all the checkboxes of the attachments, initiate the installation of the primary program.
Remove unlimited.co.in from the computer
Fortunately, deleting the hijacker is not a tiresome nor challenging task. If you are searching for a quick and effective solution, an anti-spyware application is the most suitable choice. It will eliminate the hijacker within a couple of minutes. Keep the software updated for it to maintain and ensure the real-time protection of your entire operating system. Alternatively, you may choose manual unlimited.co.in removal. Find the instructions provided below. Lastly, next time you are about to opt for a new search engine, check its developers and user reviews. Other users’ reviews often provide important information.
Uninstall from Windows
Uninstall from Windows 10/8:
- Type Control Panel into the Windows search box and open the result.
- Under Programs, select Uninstall a program.


Uninstall from Windows 7/XP:
- Click on Windows Start > Control Panel (Windows XP users should click on Add/Remove Programs).
- In Control Panel, select Programs > Uninstall a program.


Remove the unwanted program:
- In the Programs and Features window, look for any recently installed suspicious entries, select them, and click Uninstall.
- If User Account Control appears, click Yes to confirm, then complete the removal.


Delete from macOS
Remove the unwanted application:
- From the menu bar, select Go > Applications.
- In the Applications folder, look for any suspicious entries, then drag them to Trash (or right-click and pick Move to Trash).


Delete leftover files and folders:
- Select Go > Go to Folder.
- Enter /Library/Application Support and remove any suspicious folders related to the unwanted program.
- Repeat the same check in the /Library/LaunchAgents and /Library/LaunchDaemons folders, deleting any suspicious entries.

- Finally, empty the Trash to permanently remove the leftovers.

Remove from Microsoft Edge
Delete unwanted extensions from MS Edge:
- Select Menu (three horizontal dots at the top-right of the browser window) and pick Extensions.
- From the list, pick the extension and click on the Gear icon.
- Click Remove.


Clear cookies and other browser data:
- Click on the Menu (three horizontal dots at the top-right of the browser window) and select Settings > Privacy, search, and services..
- Under Clear browsing data, pick Choose what to clear.
- Select Cookies and other site data and Cached images and files. (apart from passwords, although you might want to include Media licenses as well, if applicable) and click on Clear.


Restore new tab and homepage settings:
- Click the menu icon and choose Settings.
- Then find On startup section.
- Click Remove next to any suspicious startup page.
Reset MS Edge if the above steps did not work:
- Press on Ctrl + Shift + Esc to open Task Manager.
- Click on More details arrow at the bottom of the window.
- Select Details tab.
- Now scroll down and locate every entry with Microsoft Edge name in it. Right-click on each of them and select End Task to stop MS Edge from running.


Instructions for Chromium-based Edge
Delete extensions from MS Edge (Chromium):
- Open Edge and click select Settings > Extensions.
- Delete unwanted extensions by clicking Remove.


Clear cache and site data:
- Click on Menu and go to Settings.
- Select Privacy, search and services.
- Under Clear browsing data, pick Choose what to clear.
- Under Time range, pick All time.
- Select Clear now.


Reset Chromium-based MS Edge:
- Click on Menu and select Settings.
- On the left side, pick Reset settings.
- Select Restore settings to their default values.
- Confirm with Reset.
- This will disable extensions and reset startup pages but will not delete bookmarks, saved passwords, or browsing history.


Remove from Mozilla Firefox (FF)
Remove dangerous extensions:
- Open Mozilla Firefox browser and click on the Menu (three horizontal lines at the top-right of the window).
- Select Add-ons.
- In here, select the unwanted extension and click Remove.


Reset the homepage:
- Click three horizontal lines at the top right corner to open the menu.
- Choose Settings.
- Under Home, set your preferred homepage and new tab settings.
Clear cookies and site data:
- Click Menu and pick Settings.
- Go to Privacy & Security section.
- Scroll down to locate Cookies and Site Data.
- Click on Clear Data...
- Select Cookies and Site Data and Temporary cached files and pages, then click Clear.


Reset Mozilla Firefox
If clearing the browser as explained above did not help, reset Mozilla Firefox:
- Open Mozilla Firefox browser and click the Menu.
- Go to Help and then choose Troubleshooting Information.

- Under Give Firefox a tune up section, click on Refresh Firefox...
- Once the pop-up shows up, confirm the action by pressing on Refresh Firefox.



Remove from Google Chrome
Delete malicious extensions from Google Chrome:
- Open Google Chrome, click on the Menu (three vertical dots at the top-right corner) and select More tools > Extensions.
- In the newly opened window, you will see all the installed extensions. Uninstall all suspicious extensions related to the unwanted program by clicking Remove.


Clear cache and web data from Chrome:
- Click on Menu and pick Settings.
- Under Privacy and security, select Clear browsing data.
- Select Browsing history, Cookies and other site data, as well as Cached images and files.
- Click Clear data.


Change your homepage:
- Click menu and choose Settings.
- Look for a suspicious site in the On startup section.
- Click on Open a specific or set of pages and click on three dots to find the Remove option.
Reset Google Chrome:
If the previous methods did not help you, reset Google Chrome to eliminate all the unwanted components:
- Click on Menu and select Settings.
- In the Settings, scroll down and click Advanced.
- Scroll down and locate Reset and clean up section.
- Now click Restore settings to their original defaults.
- Confirm with Reset settings.


Delete from Safari
Remove dangerous extensions:
- Open Safari, click Safari in the menu at the top-left of the screen, and select Preferences.
- Go to the Extensions tab, look for any suspicious entries, and click Uninstall to remove them.


Clear history and website data:
- Click Safari in the menu and pick Clear History.
- Set Clear to all history and confirm with Clear History.


Reset Safari:
- Click Safari in the menu and select Preferences > Advanced.
- Enable Show Develop menu in menu bar.
- From the menu bar, click Develop and select Empty Caches.


Did this guide help?
2 comments
Ricky
Unlimited amount of pop-ups.
Jane
Even the domain address is suspicious.