

What is known about Search.klivs.com redirects?
Have you experienced annoying redirects while using Search.klivs.com search engine? If so, you should blame Search.klivs.com virus, which is responsible for these redirects. This controversial program can be called as a browser redirect virus or a browser hijacker, and it means it falls into the category of potentially unwanted programs (PUPs). Such programs are typically created for monetization purposes since their primary target is to make users click on sponsored links that lead to numerous third-party websites. Every time the user clicks on such links, the developers of this potentially unwanted program gets revenue, but sadly, websites that lie behind these links can be dangerous.
You can encounter these third-party links while searching the web via Klivs search engine. It promises to deliver a combination of Google, Bing and Yahoo search results, however, it must be noted that it integrates third-party links in these search results, too. Therefore, do not be surprised to be unexpectedly redirected to strange websites after clicking on random search results without thinking. You should not consider these results as 100% trustworthy, since the developer of this browser hijacker might not be liable for any damage or loss you might unexpectedly experience while exploring third-party websites accessible via this search engine.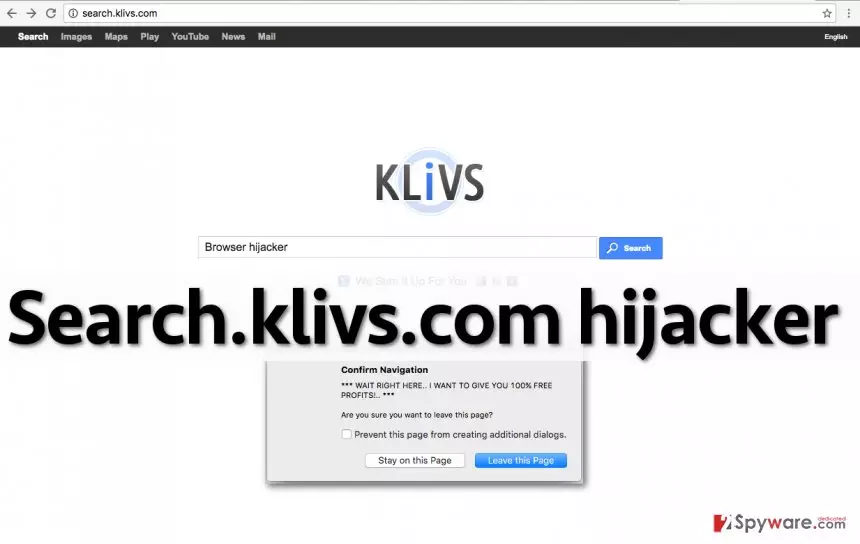
To put things shortly, it would be right to say that it is better to remove Search.klivs.com redirect virus from the system and use another search engine instead. For Search.klivs.com removal, you can use FortectIntego or MalwarebytesMalwarebytes software. We understand that some users are not interested in installing anti-malware programs, although it is highly recommended to do so. In case you wish to eliminate this browser hijacker manually, follow instructions provided at the end of this post.
How does this program get inside user’s computer system without asking for permission to be installed?
If you do not know how potentially unwanted programs spread, you should know that they travel alongside other free programs and are presented as “additional and recommended downloads.” The user can opt-out these additions if he/she wants to; however, many computer users fail to spot these additions, consequently, they get installed without user’s knowledge. What is surprising is that such distribution method is considered legitimate. If you do not want to let potentially unwanted programs to slither inside your PC unnoticed, you should check installation settings each time you download a new program to your PC. Remember that you should choose either Custom or Advanced settings and manually deselect all unwanted components. After finishing this step, you can proceed with the installation and complete it without any worries.
How to remove Search.klivs.com?
In case Search.klivs.com hijack has already happened, we suggest you to decide how you wish to uninstall this program. You can remove Search.klivs.com virus using FortectIntego software and scan your system for other threats at the same time, or, if you wish to, you can delete it manually by following instructions provided at the end of this post. Please let us know if you encounter any difficulties during Search.klivs.com removal procedure. We will gladly help you to address arising problems. Please remember to be careful the next time you install a new program on your system, and prevent PUPs from hijacking your system silently simply by altering software installation settings at all times.
Uninstall from Windows
Uninstall from Windows 10/8:
- Type Control Panel into the Windows search box and open the result.
- Under Programs, select Uninstall a program.


Uninstall from Windows 7/XP:
- Click on Windows Start > Control Panel (Windows XP users should click on Add/Remove Programs).
- In Control Panel, select Programs > Uninstall a program.


Remove the unwanted program:
- In the Programs and Features window, look for any recently installed suspicious entries, select them, and click Uninstall.
- If User Account Control appears, click Yes to confirm, then complete the removal.


Delete from macOS
Remove the unwanted application:
- From the menu bar, select Go > Applications.
- In the Applications folder, look for any suspicious entries, then drag them to Trash (or right-click and pick Move to Trash).


Delete leftover files and folders:
- Select Go > Go to Folder.
- Enter /Library/Application Support and remove any suspicious folders related to the unwanted program.
- Repeat the same check in the /Library/LaunchAgents and /Library/LaunchDaemons folders, deleting any suspicious entries.

- Finally, empty the Trash to permanently remove the leftovers.

Remove from Microsoft Edge
Delete unwanted extensions from MS Edge:
- Select Menu (three horizontal dots at the top-right of the browser window) and pick Extensions.
- From the list, pick the extension and click on the Gear icon.
- Click Remove.


Clear cookies and other browser data:
- Click on the Menu (three horizontal dots at the top-right of the browser window) and select Settings > Privacy, search, and services..
- Under Clear browsing data, pick Choose what to clear.
- Select Cookies and other site data and Cached images and files. (apart from passwords, although you might want to include Media licenses as well, if applicable) and click on Clear.


Restore new tab and homepage settings:
- Click the menu icon and choose Settings.
- Then find On startup section.
- Click Remove next to any suspicious startup page.
Reset MS Edge if the above steps did not work:
- Press on Ctrl + Shift + Esc to open Task Manager.
- Click on More details arrow at the bottom of the window.
- Select Details tab.
- Now scroll down and locate every entry with Microsoft Edge name in it. Right-click on each of them and select End Task to stop MS Edge from running.


Instructions for Chromium-based Edge
Delete extensions from MS Edge (Chromium):
- Open Edge and click select Settings > Extensions.
- Delete unwanted extensions by clicking Remove.


Clear cache and site data:
- Click on Menu and go to Settings.
- Select Privacy, search and services.
- Under Clear browsing data, pick Choose what to clear.
- Under Time range, pick All time.
- Select Clear now.


Reset Chromium-based MS Edge:
- Click on Menu and select Settings.
- On the left side, pick Reset settings.
- Select Restore settings to their default values.
- Confirm with Reset.
- This will disable extensions and reset startup pages but will not delete bookmarks, saved passwords, or browsing history.


Remove from Mozilla Firefox (FF)
Remove dangerous extensions:
- Open Mozilla Firefox browser and click on the Menu (three horizontal lines at the top-right of the window).
- Select Add-ons.
- In here, select the unwanted extension and click Remove.


Reset the homepage:
- Click three horizontal lines at the top right corner to open the menu.
- Choose Settings.
- Under Home, set your preferred homepage and new tab settings.
Clear cookies and site data:
- Click Menu and pick Settings.
- Go to Privacy & Security section.
- Scroll down to locate Cookies and Site Data.
- Click on Clear Data...
- Select Cookies and Site Data and Temporary cached files and pages, then click Clear.


Reset Mozilla Firefox
If clearing the browser as explained above did not help, reset Mozilla Firefox:
- Open Mozilla Firefox browser and click the Menu.
- Go to Help and then choose Troubleshooting Information.

- Under Give Firefox a tune up section, click on Refresh Firefox...
- Once the pop-up shows up, confirm the action by pressing on Refresh Firefox.



Remove from Google Chrome
Delete malicious extensions from Google Chrome:
- Open Google Chrome, click on the Menu (three vertical dots at the top-right corner) and select More tools > Extensions.
- In the newly opened window, you will see all the installed extensions. Uninstall all suspicious extensions related to the unwanted program by clicking Remove.


Clear cache and web data from Chrome:
- Click on Menu and pick Settings.
- Under Privacy and security, select Clear browsing data.
- Select Browsing history, Cookies and other site data, as well as Cached images and files.
- Click Clear data.


Change your homepage:
- Click menu and choose Settings.
- Look for a suspicious site in the On startup section.
- Click on Open a specific or set of pages and click on three dots to find the Remove option.
Reset Google Chrome:
If the previous methods did not help you, reset Google Chrome to eliminate all the unwanted components:
- Click on Menu and select Settings.
- In the Settings, scroll down and click Advanced.
- Scroll down and locate Reset and clean up section.
- Now click Restore settings to their original defaults.
- Confirm with Reset settings.


Delete from Safari
Remove dangerous extensions:
- Open Safari, click Safari in the menu at the top-left of the screen, and select Preferences.
- Go to the Extensions tab, look for any suspicious entries, and click Uninstall to remove them.


Clear history and website data:
- Click Safari in the menu and pick Clear History.
- Set Clear to all history and confirm with Clear History.


Reset Safari:
- Click Safari in the menu and select Preferences > Advanced.
- Enable Show Develop menu in menu bar.
- From the menu bar, click Develop and select Empty Caches.


Did this guide help?
4 comments
Arina
I am so disappointed with Search.klivs.com search engine. At first, I though that it is just a simple search engine, turns out it isnt. Just too many sponsored links between search results.
ty
Thanks for explaining how to remove this... This information helped me to uninstall this hijacker manually. :)
Sting
Finally I have got to put Google search back to its place! Thanks a lot!!!
Mirabelle
Search.klivs.com redirects were driving me insane. Thanks God this nightmare is over.