

How damaging is AutoConfigUrl virus?
If you are looking for the cause of excessive advertising or sluggish browser, you might find AutoConfigUrl virus on your computer. This adware causes a great deal of trouble: redirects to shady web pages, continuous pops up and the new toolbars get attached to the browser. We recommend you to remove AutoConfigUrl as soon as possible. You can do it with the help of anti-spyware application, such as FortectIntego. As you will get acquainted with the operation characteristics of this PUP later on, you should hurry up with the elimination. The longer the adware resides on the computer, the more chances are that you will need to counter multiple surfacing negative outcomes. It might endanger your operating system as additionally installed futile and questionable applications create vulnerabilities. As a result, the PC becomes more prone to attracting damaging virtual threats.
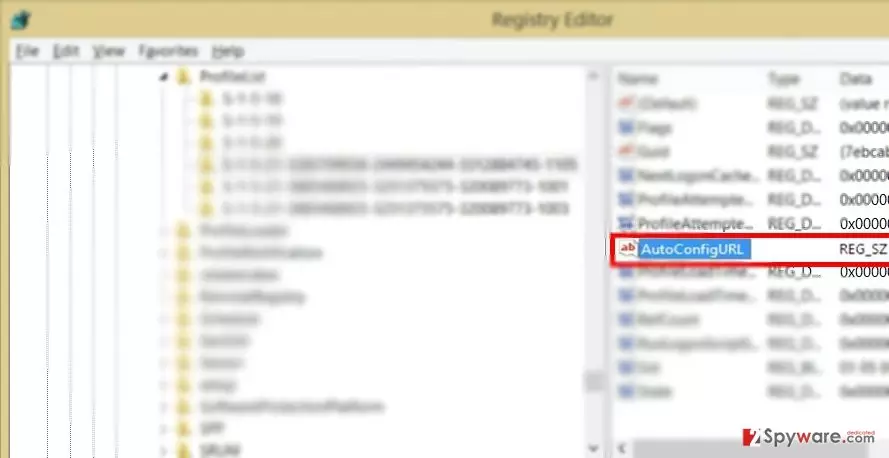
Speaking of its operation mode, the adware acts as a rogue file. Once it settles on the system, it loads tons of diverse AutoConfigUrl ads on your browser. Specifically, it even meddles with the registry keys. Moreover, the adware manages the following entries.
http://non-block.net/wpad.dat
http://nonblock.net/wpad.dat
http://nonblocks.com/wpad.dat
http://stoppblock.me/wpad.dat
http://un-blocking.com/wpad.dat
http://un-stop.net/wpad.dat
http://stoppblock.biz/wpad.dat
http://none-stop.net/wpad.dat
It injects Hijack.AutoConfigURL.PrxySvrRST entry on the system as well, thus fortifying the adware on the device. In relation to this, simply uninstalling its source application from the computer or resetting the browser might be insufficient. As a result, you get irritated by further ads. Even if you are watching Game of Thrones or reading news on CNN, the intrusive pop-ups distracting you from the previous activity. The main problem is not their frequency but their ability to direct to the domains which harbor viruses and malware within them. Thus, if you either get tempted by the intriguing headline or a video and follow the ad-link, you may find your system getting occupied by complicated and highly aggressive virtual threats after a while. As a result, AutoConfigUrl redirect turns out to be more than unpleasant issue.
When did I encounter this adware?
Though the adware might create many troubles, it invades system in quite an easy way. It does so simply by attaching itself to a free application. Few members of the virtual community pay attention to the installation guides. Thus, they fail to notice optional add-ons. Leaving them means to give permission for various browser hijackers and adware to enter the device. Likewise, you enabled AutoConfigUrl hijack. If you are willing not to do the same mistake in the future, remember these steps. Upon installing a new application, whether it’s a legitimate one and downloaded from the official source, choose “Advanced” mode. Afterward, watch for additional programs. If you regard them as shady and irrelevant, unmark them.
Remove AutoConfigUrl quickly and successfully
If you are looking for an effective but at the same time time-saving solution to deal with this PUP, then, automatic AutoConfigUrl removal is the right choice for you. You can do it with the help of a security application. Before you scan it, make sure it is updated. Since this adware operates in a more complex way and more aggressively, leaving its files among the registry, this option might serve as the one providing more guarantees. The application is created for dealing with similar computer pests. The software will remove AutoConfigUrl virus shortly. This case of the PUP confirms the suggestion: pay attention to what you are installing to avoid bothersome and malicious disturbances.
Uninstall from Windows
Uninstall from Windows 10/8:
- Type Control Panel into the Windows search box and open the result.
- Under Programs, select Uninstall a program.


Uninstall from Windows 7/XP:
- Click on Windows Start > Control Panel (Windows XP users should click on Add/Remove Programs).
- In Control Panel, select Programs > Uninstall a program.


Remove the unwanted program:
- In the Programs and Features window, look for any recently installed suspicious entries, select them, and click Uninstall.
- If User Account Control appears, click Yes to confirm, then complete the removal.


Delete from macOS
Remove the unwanted application:
- From the menu bar, select Go > Applications.
- In the Applications folder, look for any suspicious entries, then drag them to Trash (or right-click and pick Move to Trash).


Delete leftover files and folders:
- Select Go > Go to Folder.
- Enter /Library/Application Support and remove any suspicious folders related to the unwanted program.
- Repeat the same check in the /Library/LaunchAgents and /Library/LaunchDaemons folders, deleting any suspicious entries.

- Finally, empty the Trash to permanently remove the leftovers.

Reset Internet Explorer
Remove dangerous add-ons:
- Open Internet Explorer, click on the Gear icon (IE menu) on the top-right corner of the browser
- Pick Manage Add-ons.
- You will see a Manage Add-ons window. Here, look for suspicious plugins. Click on these entries and select Disable.


Change your homepage if it was altered:
- Open IE and click on the Gear icon.
- Select Internet Options.
- In the General tab, delete the Home page address and replace it by your preferred one (for example, Google.com).
- Click Apply and then select OK.


Delete temporary files:
- Press on the Gear icon and select Internet Options.
- Under Browsing history, click Delete...
- Select relevant fields and press Delete.


Reset Internet Explorer:
- Click on Gear icon > Internet options and select Advanced tab.
- Select Reset.
- In the new window, check Delete personal settings and select Reset.


Remove from Microsoft Edge
Delete unwanted extensions from MS Edge:
- Select Menu (three horizontal dots at the top-right of the browser window) and pick Extensions.
- From the list, pick the extension and click on the Gear icon.
- Click Remove.


Clear cookies and other browser data:
- Click on the Menu (three horizontal dots at the top-right of the browser window) and select Settings > Privacy, search, and services..
- Under Clear browsing data, pick Choose what to clear.
- Select Cookies and other site data and Cached images and files. (apart from passwords, although you might want to include Media licenses as well, if applicable) and click on Clear.


Restore new tab and homepage settings:
- Click the menu icon and choose Settings.
- Then find On startup section.
- Click Remove next to any suspicious startup page.
Reset MS Edge if the above steps did not work:
- Press on Ctrl + Shift + Esc to open Task Manager.
- Click on More details arrow at the bottom of the window.
- Select Details tab.
- Now scroll down and locate every entry with Microsoft Edge name in it. Right-click on each of them and select End Task to stop MS Edge from running.


Instructions for Chromium-based Edge
Delete extensions from MS Edge (Chromium):
- Open Edge and click select Settings > Extensions.
- Delete unwanted extensions by clicking Remove.


Clear cache and site data:
- Click on Menu and go to Settings.
- Select Privacy, search and services.
- Under Clear browsing data, pick Choose what to clear.
- Under Time range, pick All time.
- Select Clear now.


Reset Chromium-based MS Edge:
- Click on Menu and select Settings.
- On the left side, pick Reset settings.
- Select Restore settings to their default values.
- Confirm with Reset.
- This will disable extensions and reset startup pages but will not delete bookmarks, saved passwords, or browsing history.


Remove from Mozilla Firefox (FF)
Remove dangerous extensions:
- Open Mozilla Firefox browser and click on the Menu (three horizontal lines at the top-right of the window).
- Select Add-ons.
- In here, select the unwanted extension and click Remove.


Reset the homepage:
- Click three horizontal lines at the top right corner to open the menu.
- Choose Settings.
- Under Home, set your preferred homepage and new tab settings.
Clear cookies and site data:
- Click Menu and pick Settings.
- Go to Privacy & Security section.
- Scroll down to locate Cookies and Site Data.
- Click on Clear Data...
- Select Cookies and Site Data and Temporary cached files and pages, then click Clear.


Reset Mozilla Firefox
If clearing the browser as explained above did not help, reset Mozilla Firefox:
- Open Mozilla Firefox browser and click the Menu.
- Go to Help and then choose Troubleshooting Information.

- Under Give Firefox a tune up section, click on Refresh Firefox...
- Once the pop-up shows up, confirm the action by pressing on Refresh Firefox.



Remove from Google Chrome
Delete malicious extensions from Google Chrome:
- Open Google Chrome, click on the Menu (three vertical dots at the top-right corner) and select More tools > Extensions.
- In the newly opened window, you will see all the installed extensions. Uninstall all suspicious extensions related to the unwanted program by clicking Remove.


Clear cache and web data from Chrome:
- Click on Menu and pick Settings.
- Under Privacy and security, select Clear browsing data.
- Select Browsing history, Cookies and other site data, as well as Cached images and files.
- Click Clear data.


Change your homepage:
- Click menu and choose Settings.
- Look for a suspicious site in the On startup section.
- Click on Open a specific or set of pages and click on three dots to find the Remove option.
Reset Google Chrome:
If the previous methods did not help you, reset Google Chrome to eliminate all the unwanted components:
- Click on Menu and select Settings.
- In the Settings, scroll down and click Advanced.
- Scroll down and locate Reset and clean up section.
- Now click Restore settings to their original defaults.
- Confirm with Reset settings.


Delete from Safari
Remove dangerous extensions:
- Open Safari, click Safari in the menu at the top-left of the screen, and select Preferences.
- Go to the Extensions tab, look for any suspicious entries, and click Uninstall to remove them.


Clear history and website data:
- Click Safari in the menu and pick Clear History.
- Set Clear to all history and confirm with Clear History.


Reset Safari:
- Click Safari in the menu and select Preferences > Advanced.
- Enable Show Develop menu in menu bar.
- From the menu bar, click Develop and select Empty Caches.


Did this guide help?
3 comments
RickyGrig
This one was a real burden.
orangejuice1687
Just forget to update the anti-virus and you get this frustrating virus...
dorian4473
They keep getting worse and worse...