

What is known about Solo-Bar.net browser hijacker?
When Solo-Bar.net virus steps into the computer system, bad things start to happen. It is a typical “new tab and homepage for [browser name]” type of infection, which changes these browser settings with or without user’s knowledge. You can add it to your browsers by your wish or install it unwillingly, but you will definitely understand how annoying it is and how hard can it be to remove Solo-Bar. As soon as it gets access to victim’s computer system, it finds Chrome and adds a particular extension to it. Solo Bar makes sure that your browser won’t open any other page on a startup but a suspicious no-name search engine, which delivers altered Google Search results. However, beware that these are not the real Google search results, and clicking on them can take you to Solo-Bar’s affiliate websites. Besides, sooner or later this potentially unwanted program (PUP) [1] can start bothering you by sending pesky pop-up or banner ads, and such activities should not be tolerated. No one wants to use a sluggish and lagging browser that opens new tabs or windows at random tabs and loads questionable third-party ads in them. On top of that, these ads and redirects can accidentally reroute you to suspicious and uncertain Internet pages that you have never stepped in before. Do not believe in information such sites present, and be very careful with them if they start showing you ads urging you to install new apps or updates. Unknown sites should not be trusted! 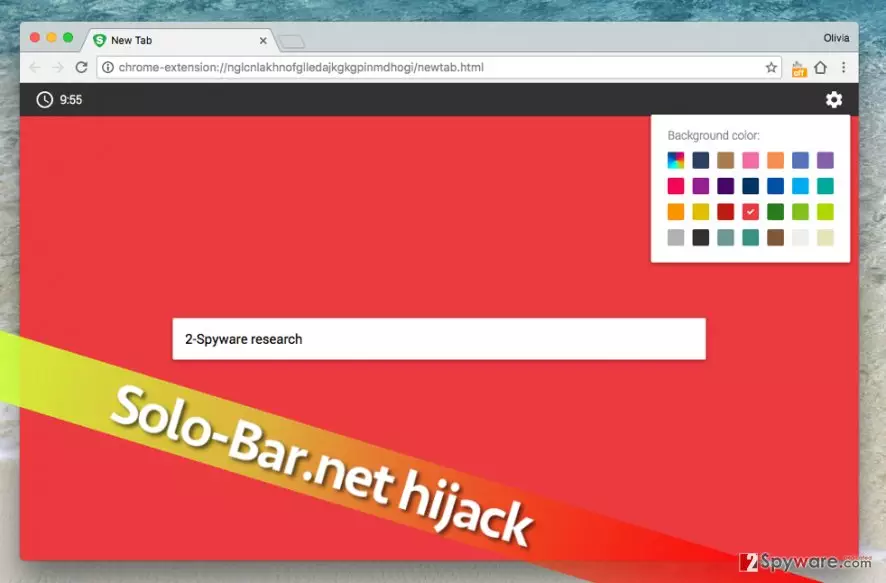
The aim of programs that change browser settings[2] and serve third-party ads is to generate revenue using pay-per-click advertising model[3]. Therefore, they research user’s interests and behavior online with a help of tracking cookies that gather information such as user’s search and browsing history, clicks, IP addresses, date/time stamp[4], and so on. Then they use collected data to find out what country the user lives in, what search terms does he/she enter in search engines, and then they select particular third-party ads to display. Bear in mind that some of these ads can be deceptive and cause redirects to sites that are not associated with offers they present. To block these ads, you need to carry out Solo-Bar.net removal, which can be completed either with anti-spyware software like FortectIntego or our help. We have prepared a detailed removal tutorial that explains how to uninstall this questionable program without anti-spyware program.
Stay clear of “recommended downloads” if you do not want to infect your PC!
If you have never heard how potentially unwanted programs spread, you should know that they proliferate via software bundles. Have you ever noticed how many free programs available on the Internet suggest installing additional software alongside them? If not, you should know that almost every free program offers installing toolbars, plug-ins, search tools, and other questionable applications alongside it. It is not that hard to get rid of them, but many people still do not know how to do it. It only takes a couple of minutes to adjust the installation settings and get rid of optional programs added to your download. Simply select Custom/Advanced settings instead of overrated Default/Standard ones and remove ticks next to statements saying that you agree to install optional programs[5].
Uninstalling Solo-Bar.net
If you know how to uninstall simple computer programs, you might still not be experienced enough to remove Solo-Bar.net virus from the system. However, we believe that instructions we present will make this task easy for you. We definitely recommend you to check them out. You can always choose automatic removal option in case you cannot delete spyware manually. In case you do not have an anti-spyware program, we highly recommend using FortectIntego for Solo-Bar.net removal and also for your computer’s maintenance.
Uninstall from Windows
Uninstall from Windows 10/8:
- Type Control Panel into the Windows search box and open the result.
- Under Programs, select Uninstall a program.


Uninstall from Windows 7/XP:
- Click on Windows Start > Control Panel (Windows XP users should click on Add/Remove Programs).
- In Control Panel, select Programs > Uninstall a program.


Remove the unwanted program:
- In the Programs and Features window, look for any recently installed suspicious entries, select them, and click Uninstall.
- If User Account Control appears, click Yes to confirm, then complete the removal.


Delete from macOS
Remove the unwanted application:
- From the menu bar, select Go > Applications.
- In the Applications folder, look for any suspicious entries, then drag them to Trash (or right-click and pick Move to Trash).


Delete leftover files and folders:
- Select Go > Go to Folder.
- Enter /Library/Application Support and remove any suspicious folders related to the unwanted program.
- Repeat the same check in the /Library/LaunchAgents and /Library/LaunchDaemons folders, deleting any suspicious entries.

- Finally, empty the Trash to permanently remove the leftovers.

Remove from Microsoft Edge
Delete unwanted extensions from MS Edge:
- Select Menu (three horizontal dots at the top-right of the browser window) and pick Extensions.
- From the list, pick the extension and click on the Gear icon.
- Click Remove.


Clear cookies and other browser data:
- Click on the Menu (three horizontal dots at the top-right of the browser window) and select Settings > Privacy, search, and services..
- Under Clear browsing data, pick Choose what to clear.
- Select Cookies and other site data and Cached images and files. (apart from passwords, although you might want to include Media licenses as well, if applicable) and click on Clear.


Restore new tab and homepage settings:
- Click the menu icon and choose Settings.
- Then find On startup section.
- Click Remove next to any suspicious startup page.
Reset MS Edge if the above steps did not work:
- Press on Ctrl + Shift + Esc to open Task Manager.
- Click on More details arrow at the bottom of the window.
- Select Details tab.
- Now scroll down and locate every entry with Microsoft Edge name in it. Right-click on each of them and select End Task to stop MS Edge from running.


Instructions for Chromium-based Edge
Delete extensions from MS Edge (Chromium):
- Open Edge and click select Settings > Extensions.
- Delete unwanted extensions by clicking Remove.


Clear cache and site data:
- Click on Menu and go to Settings.
- Select Privacy, search and services.
- Under Clear browsing data, pick Choose what to clear.
- Under Time range, pick All time.
- Select Clear now.


Reset Chromium-based MS Edge:
- Click on Menu and select Settings.
- On the left side, pick Reset settings.
- Select Restore settings to their default values.
- Confirm with Reset.
- This will disable extensions and reset startup pages but will not delete bookmarks, saved passwords, or browsing history.


Remove from Google Chrome
Delete malicious extensions from Google Chrome:
- Open Google Chrome, click on the Menu (three vertical dots at the top-right corner) and select More tools > Extensions.
- In the newly opened window, you will see all the installed extensions. Uninstall all suspicious extensions related to the unwanted program by clicking Remove.


Clear cache and web data from Chrome:
- Click on Menu and pick Settings.
- Under Privacy and security, select Clear browsing data.
- Select Browsing history, Cookies and other site data, as well as Cached images and files.
- Click Clear data.


Change your homepage:
- Click menu and choose Settings.
- Look for a suspicious site in the On startup section.
- Click on Open a specific or set of pages and click on three dots to find the Remove option.
Reset Google Chrome:
If the previous methods did not help you, reset Google Chrome to eliminate all the unwanted components:
- Click on Menu and select Settings.
- In the Settings, scroll down and click Advanced.
- Scroll down and locate Reset and clean up section.
- Now click Restore settings to their original defaults.
- Confirm with Reset settings.



Did this guide help?
3 comments
Phili[p_m
Thanks, It took me a while to get these instructions, but I have found Solo Bar and removed it. Thanks a million.
Jer_emy_xca
Useful. However, I am still concerned about my privacy. It seems that nowadays viruses can do a lot... like, really a lot!
RSA
Thanks God its not some ransomware... Uninstalled it. by the way, I have also found a virus called Pronto on my Mac... can they be related??