

Prevent Search.hometab.com from causing URL redirections by removing it from your browsers
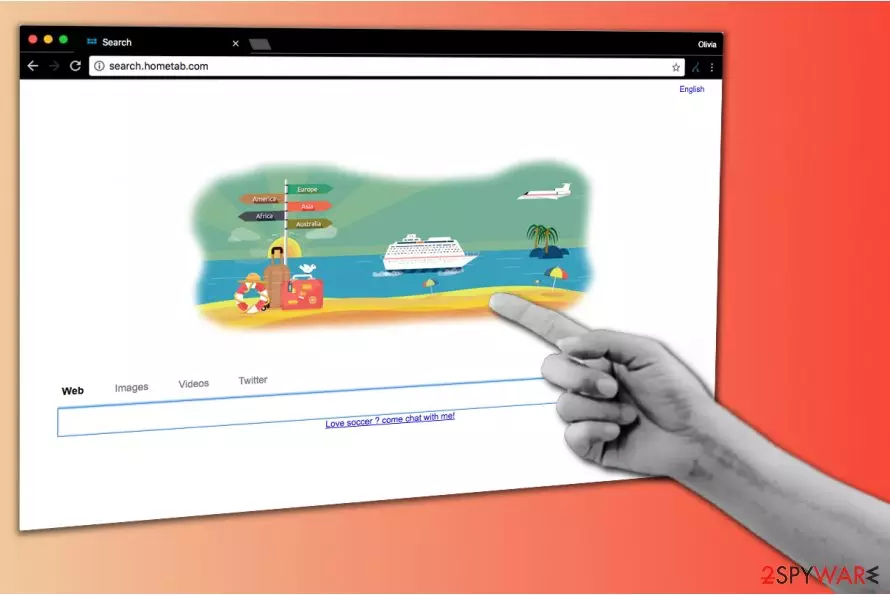
Search.hometab.com (by One Floor App Ltd.) is a deceptive search tool that is often called a browser redirect virus. Its developers promote the search tool by distributing potentially unwanted program (PUP) known as a browser hijacker.
Once on the target computer, the hijacker modifies user’s homepage settings by adding http://Search.hometab.com/ value to them. It is also believed that the hijacker changes default search settings as well.
Search.hometab.com virus can employ tracking cookies[1] to silently collect the search phrases and words you enter into the search box and also spy on your interests – it can collect domains you visit and ads you click. It does so on purpose to find out what products and services interest you so that it could deliver similar third-party offers later.
Be aware of Hometab’s ability to inject ads into search results. Although at first, these seem to be regular results that raise no suspicions, clicking on them can push you to external websites owned by unknown third-party companies. Such redirects help the developer of Search.hometab.com generate the pay-per-click type of revenue[2] and exposes the user to various cyber risks as well.
Surfing the Internet can be fun, but as long as you avoid visiting dangerous websites that serve spyware or malware to the visitors. Besides, if you continue to explore search results brought by a search engine that has just replaced your previous homepage, you risk entering sites that require personal details and other sensitive information.
On top of that, you might have to run into dozens of pop-up and banner ads. Considering that Home tab hijacker injects ads into search results, it is logical to expect their appearance in other forms as well. No matter what, try to refrain yourself from clicking on ads brought by Search.hometab.com.

Security experts from VirusActivity.com[3] suggest users to remove Search.hometab.com, stating that it functions as a typical browser-hijacking program. It certainly meets the characteristics of the potentially unwanted program, so we advise implementing Search.hometab.com removal as well.
You can successfully delete the unwanted app that is keeping the unwanted search tool in your browser using instructions below the article or anti-malware program like FortectIntego.
Browser hijackers attack computer users silently
Typical browser-hijacking programs sneak into victim’s computer system in unison with other free programs that user chooses to download and install. When installing new programs, users tend to rush, which leaves no choice but to rely on Standard or Default installation options that seem to be the “right” ones to choose.
Unfortunately, these settings contain statements granting various potentially unwanted programs a permission to infiltrate the system and hijack web browsers installed on it.
To ensure that potentially unwanted programs stay out of your computer system, always pick safe installation settings which are Custom and Advanced ones. After selecting one or another option, carefully inspect each program suggested to you.
We recommend you to opt-out all unknown applications presented as incredible search tools or extremely useful extensions. In reality, these vague applications hardly add any value to your computer.
Uninstall Search.hometab.com program today
Do not waste your time thinking whether it is right to remove Search.hometab.com virus or not. Simply think whether you want to experience never-ending browser redirections and meet pop-up ads on a daily basis for any longer. If the answer is no, prepare to eliminate the unwanted program from your computer right now.
To implement Search.hometab.com removal, you either need an anti-spyware software or reliable instructions to follow. In case you are more interested in manual removal options, consider reading the directions provided by our team. If you are looking for automatic removal option, try one of the programs listed below.
Uninstall from Windows
Uninstall from Windows 10/8:
- Type Control Panel into the Windows search box and open the result.
- Under Programs, select Uninstall a program.


Uninstall from Windows 7/XP:
- Click on Windows Start > Control Panel (Windows XP users should click on Add/Remove Programs).
- In Control Panel, select Programs > Uninstall a program.


Remove the unwanted program:
- In the Programs and Features window, look for any recently installed suspicious entries, select them, and click Uninstall.
- If User Account Control appears, click Yes to confirm, then complete the removal.


Delete from macOS
Remove the unwanted application:
- From the menu bar, select Go > Applications.
- In the Applications folder, look for any suspicious entries, then drag them to Trash (or right-click and pick Move to Trash).


Delete leftover files and folders:
- Select Go > Go to Folder.
- Enter /Library/Application Support and remove any suspicious folders related to the unwanted program.
- Repeat the same check in the /Library/LaunchAgents and /Library/LaunchDaemons folders, deleting any suspicious entries.

- Finally, empty the Trash to permanently remove the leftovers.

Reset Internet Explorer
Remove dangerous add-ons:
- Open Internet Explorer, click on the Gear icon (IE menu) on the top-right corner of the browser
- Pick Manage Add-ons.
- You will see a Manage Add-ons window. Here, look for suspicious plugins. Click on these entries and select Disable.


Change your homepage if it was altered:
- Open IE and click on the Gear icon.
- Select Internet Options.
- In the General tab, delete the Home page address and replace it by your preferred one (for example, Google.com).
- Click Apply and then select OK.


Delete temporary files:
- Press on the Gear icon and select Internet Options.
- Under Browsing history, click Delete...
- Select relevant fields and press Delete.


Reset Internet Explorer:
- Click on Gear icon > Internet options and select Advanced tab.
- Select Reset.
- In the new window, check Delete personal settings and select Reset.


Remove from Microsoft Edge
Delete unwanted extensions from MS Edge:
- Select Menu (three horizontal dots at the top-right of the browser window) and pick Extensions.
- From the list, pick the extension and click on the Gear icon.
- Click Remove.


Clear cookies and other browser data:
- Click on the Menu (three horizontal dots at the top-right of the browser window) and select Settings > Privacy, search, and services..
- Under Clear browsing data, pick Choose what to clear.
- Select Cookies and other site data and Cached images and files. (apart from passwords, although you might want to include Media licenses as well, if applicable) and click on Clear.


Restore new tab and homepage settings:
- Click the menu icon and choose Settings.
- Then find On startup section.
- Click Remove next to any suspicious startup page.
Reset MS Edge if the above steps did not work:
- Press on Ctrl + Shift + Esc to open Task Manager.
- Click on More details arrow at the bottom of the window.
- Select Details tab.
- Now scroll down and locate every entry with Microsoft Edge name in it. Right-click on each of them and select End Task to stop MS Edge from running.


Instructions for Chromium-based Edge
Delete extensions from MS Edge (Chromium):
- Open Edge and click select Settings > Extensions.
- Delete unwanted extensions by clicking Remove.


Clear cache and site data:
- Click on Menu and go to Settings.
- Select Privacy, search and services.
- Under Clear browsing data, pick Choose what to clear.
- Under Time range, pick All time.
- Select Clear now.


Reset Chromium-based MS Edge:
- Click on Menu and select Settings.
- On the left side, pick Reset settings.
- Select Restore settings to their default values.
- Confirm with Reset.
- This will disable extensions and reset startup pages but will not delete bookmarks, saved passwords, or browsing history.


Remove from Mozilla Firefox (FF)
Remove dangerous extensions:
- Open Mozilla Firefox browser and click on the Menu (three horizontal lines at the top-right of the window).
- Select Add-ons.
- In here, select the unwanted extension and click Remove.


Reset the homepage:
- Click three horizontal lines at the top right corner to open the menu.
- Choose Settings.
- Under Home, set your preferred homepage and new tab settings.
Clear cookies and site data:
- Click Menu and pick Settings.
- Go to Privacy & Security section.
- Scroll down to locate Cookies and Site Data.
- Click on Clear Data...
- Select Cookies and Site Data and Temporary cached files and pages, then click Clear.


Reset Mozilla Firefox
If clearing the browser as explained above did not help, reset Mozilla Firefox:
- Open Mozilla Firefox browser and click the Menu.
- Go to Help and then choose Troubleshooting Information.

- Under Give Firefox a tune up section, click on Refresh Firefox...
- Once the pop-up shows up, confirm the action by pressing on Refresh Firefox.



Remove from Google Chrome
Delete malicious extensions from Google Chrome:
- Open Google Chrome, click on the Menu (three vertical dots at the top-right corner) and select More tools > Extensions.
- In the newly opened window, you will see all the installed extensions. Uninstall all suspicious extensions related to the unwanted program by clicking Remove.


Clear cache and web data from Chrome:
- Click on Menu and pick Settings.
- Under Privacy and security, select Clear browsing data.
- Select Browsing history, Cookies and other site data, as well as Cached images and files.
- Click Clear data.


Change your homepage:
- Click menu and choose Settings.
- Look for a suspicious site in the On startup section.
- Click on Open a specific or set of pages and click on three dots to find the Remove option.
Reset Google Chrome:
If the previous methods did not help you, reset Google Chrome to eliminate all the unwanted components:
- Click on Menu and select Settings.
- In the Settings, scroll down and click Advanced.
- Scroll down and locate Reset and clean up section.
- Now click Restore settings to their original defaults.
- Confirm with Reset settings.


Delete from Safari
Remove dangerous extensions:
- Open Safari, click Safari in the menu at the top-left of the screen, and select Preferences.
- Go to the Extensions tab, look for any suspicious entries, and click Uninstall to remove them.


Clear history and website data:
- Click Safari in the menu and pick Clear History.
- Set Clear to all history and confirm with Clear History.


Reset Safari:
- Click Safari in the menu and select Preferences > Advanced.
- Enable Show Develop menu in menu bar.
- From the menu bar, click Develop and select Empty Caches.


Did this guide help?
Be the first to comment