

ActiveLink is a malicious application made for monetization purposes via malicious ads and data gathering
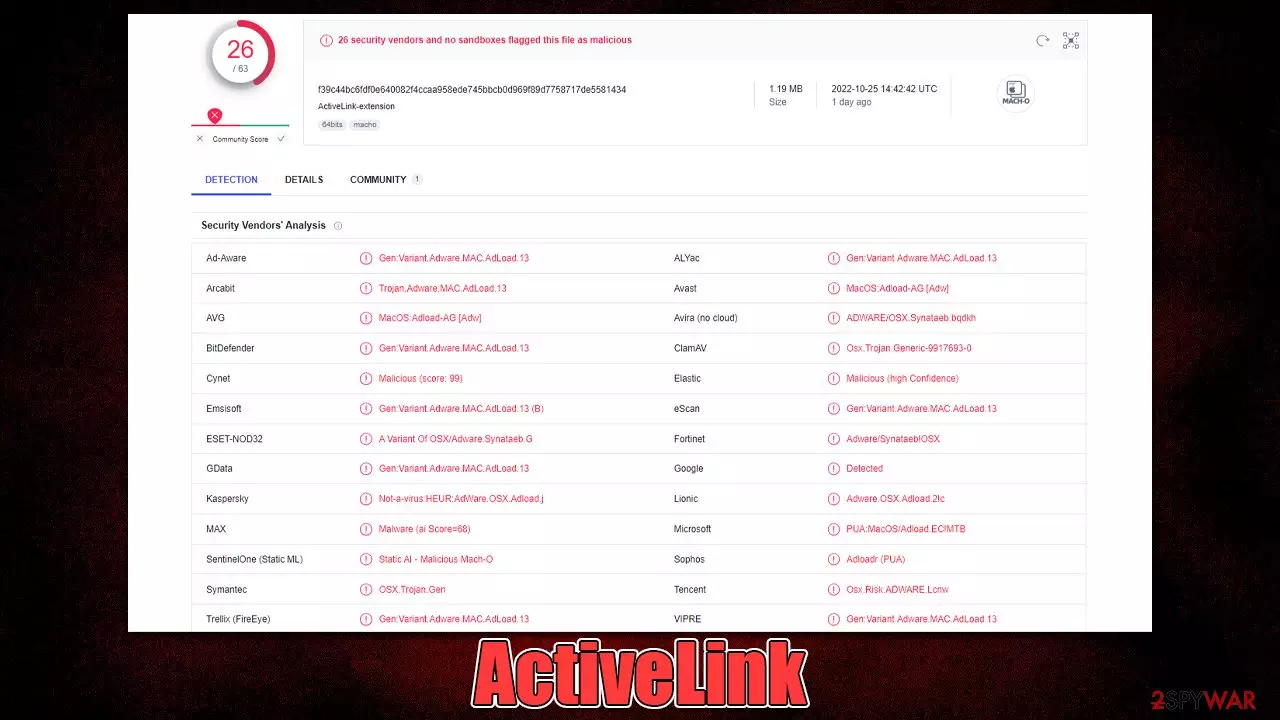
ActiveLink is a Mac virus that has been making rounds around the internet, infecting hundreds of users worldwide. It is a member of the rather large Adload malware family that has been extremely active since it was first spotted back in 2017. Although it does not propagate on its own, users are frequently duped into installing it as a result of different phishing strategies utilized by its developers.
Once installed, the ActiveLink virus adds a browser extension to Safari, Chrome, Firefox, or any online browser that enables it to carry out its nefarious tasks, including changing the homepage, new tab, search provider, and other settings (although this may vary from version to version). Due to the virus's ability to push sponsored links and ads, its creators generate income. Additionally, the extension is used to gather a variety of personal data, such as account and credit card information.
Malware can have a significant impact since it modifies the system and implements its own components. For instance, it may install extra payloads without first getting the user's consent. We strongly advise that you remove ActiveLink from your Mac as soon as you can because it poses a risk to both your personal safety and the security of your computer.
| Name | ActiveLink |
| Type | Mac virus, adware, browser hijacker |
| Malware family | Adload |
| Distribution | Software bundles of illegal apps, peer-to-peer networks, fake Flash Player updates |
| Symptoms | An extension installed on the browser with elevated permissions, along with an application of the same name; new profiles and login items set up on the account; malicious ads shown during web browsing activities; search and browsing settings altered to Safe Finder or another search provider |
| Removal | The easiest way to remove Mac malware is to perform a full system scan with SpyHunterCombo Cleaner security software. We also provide a manual guide below |
| Other tips | Potentially unwanted applications often leave traces within web browsers – cookies, for example, are used for tracking. You should get rid of these leftovers with FortectIntego or employ our manual guide |
Distribution methods and avoidance tips
Adload is a pretty well-known strain, and it was able to achieve this by employing efficient distribution strategies. The first and most popular one involves tricking users into downloading fake Flash Player updates by displaying them on numerous websites. Usually, people come across them by clicking a malicious link on a website that is already risky or because adware[1] is already installed on their computers.
The plan is pretty straightforward: Users are informed that in order to access a particular sort of multimedia material, they must upgrade or install Flash Player. Since the plugin has been used for multimedia for such a long period, it is now thought to be a need. The calls to install Flash are false because it stopped being developed a few years now.
Malicious installers from peer-to-peer[2] networks and other distributors of comparable unlicensed software are the other often used technique for the distribution of Adload. We advise against using these as they are one of the main ways that people become infected with malware.

ActiveLink elimination process
Everything you need to remove malware from your PC effectively is provided below. Since Adload is one of the more tenacious threats to Macs, we strongly advise against using the manual technique. In order to avoid being detected by local Mac defenses like XProtect[3] and to drop dozens of objects on the system, it uses the built-in AppleScript to grant itself elevated access after infiltrating the system.
We strongly advise regular users to use automatic removal solutions like SpyHunterCombo Cleaner or MalwarebytesMalwarebytes as a result, as doing otherwise may significantly complicate the removal procedure. You can prevent future infections with the aid of third-party security software by avoiding the malware's evasion techniques that damage Mac's protection measures. You could also pick the manual virus removal method, as explained below, although keep in mind that it may not be effective.
Delete the main application and the extension
Your first task is to find the malicious app and remove it – you should start by stopping its background processes via the Activity Monitor.
- Open Applications folder
- Select Utilities
- Double-click Activity Monitor
- Here, look for suspicious processes and use the Force Quit command to shut them down
- Go back to the Applications folder
- Find the malicious entry and place it in Trash.


Your next task is to remove all the virus-related Login items and new Profiles that could be used by it.
- Go to Preferences and select Accounts
- Click Login items and delete everything suspicious
- Next, pick System Preferences > Users & Groups
- Find Profiles and remove unwanted profiles from the list.
Finally, it would be best if you got rid of the extension that is used by crooks to harvest various personal data. Proceed with the following steps (note: if you can't perform this step, skip it for now):
Safari
- Click Safari > Preferences…
- In the new window, pick Extensions.
- Select the unwanted extension and select Uninstall.


Google Chrome
- Open Google Chrome, click on the Menu (three vertical dots at the top-right corner) and select More tools > Extensions.
- In the newly opened window, you will see all the installed extensions. Uninstall all the suspicious plugins that might be related to the unwanted program by clicking Remove.


Remove leftover files or reset your browsers
Small configuration files known as PLIST can hold various settings information. They might prevent the virus from being removed properly.
- Select Go > Go to Folder.
- Enter /Library/Application Support and click Go or press Enter.
- In the Application Support folder, look for any dubious entries and then delete them.
- Now enter /Library/LaunchAgents and /Library/LaunchDaemons folders the same way and delete all the related .plist files.


You should also clean your web browsers to remove various trackers and other caches to ensure proper NetDivision removal. You can employ FortectIntego for this job, or you can follow the manual steps below:
Safari
- Click Safari > Clear History…
- From the drop-down menu under Clear, pick all history.
- Confirm with Clear History.


Google Chrome
- Click on Menu and pick Settings.
- Under Privacy and security, select Clear browsing data.
- Select Browsing history, Cookies and other site data, as well as Cached images and files.
- Click Clear data.


If you were unable to remove malware components within your web browser, you could simply reset it, as we explain below. Your bookmarks and other preferences will not get lost as long as you remember your account details. Proceed with the following to reset your browser:
Safari
- Click Safari > Preferences…
- Go to the Advanced tab.
- Tick the Show Develop menu in the menu bar.
- From the menu bar, click Develop, and then select Empty Caches.


Google Chrome
- Click on Menu and select Settings.
- In the Settings, scroll down and click Advanced.
- Scroll down and locate Reset and clean up section.
- Now click Restore settings to their original defaults.
- Confirm with Reset settings.


You can find the instructions for MS Edge and Mozilla Firefox below.
Remove from Microsoft Edge
Delete unwanted extensions from MS Edge:
- Select Menu (three horizontal dots at the top-right of the browser window) and pick Extensions.
- From the list, pick the extension and click on the Gear icon.
- Click Remove.


Clear cookies and other browser data:
- Click on the Menu (three horizontal dots at the top-right of the browser window) and select Settings > Privacy, search, and services..
- Under Clear browsing data, pick Choose what to clear.
- Select Cookies and other site data and Cached images and files. (apart from passwords, although you might want to include Media licenses as well, if applicable) and click on Clear.


Restore new tab and homepage settings:
- Click the menu icon and choose Settings.
- Then find On startup section.
- Click Remove next to any suspicious startup page.
Reset MS Edge if the above steps did not work:
- Press on Ctrl + Shift + Esc to open Task Manager.
- Click on More details arrow at the bottom of the window.
- Select Details tab.
- Now scroll down and locate every entry with Microsoft Edge name in it. Right-click on each of them and select End Task to stop MS Edge from running.


Instructions for Chromium-based Edge
Delete extensions from MS Edge (Chromium):
- Open Edge and click select Settings > Extensions.
- Delete unwanted extensions by clicking Remove.


Clear cache and site data:
- Click on Menu and go to Settings.
- Select Privacy, search and services.
- Under Clear browsing data, pick Choose what to clear.
- Under Time range, pick All time.
- Select Clear now.


Reset Chromium-based MS Edge:
- Click on Menu and select Settings.
- On the left side, pick Reset settings.
- Select Restore settings to their default values.
- Confirm with Reset.
- This will disable extensions and reset startup pages but will not delete bookmarks, saved passwords, or browsing history.


Remove from Mozilla Firefox (FF)
Remove dangerous extensions:
- Open Mozilla Firefox browser and click on the Menu (three horizontal lines at the top-right of the window).
- Select Add-ons.
- In here, select the unwanted extension and click Remove.


Reset the homepage:
- Click three horizontal lines at the top right corner to open the menu.
- Choose Settings.
- Under Home, set your preferred homepage and new tab settings.
Clear cookies and site data:
- Click Menu and pick Settings.
- Go to Privacy & Security section.
- Scroll down to locate Cookies and Site Data.
- Click on Clear Data...
- Select Cookies and Site Data and Temporary cached files and pages, then click Clear.


Reset Mozilla Firefox
If clearing the browser as explained above did not help, reset Mozilla Firefox:
- Open Mozilla Firefox browser and click the Menu.
- Go to Help and then choose Troubleshooting Information.

- Under Give Firefox a tune up section, click on Refresh Firefox...
- Once the pop-up shows up, confirm the action by pressing on Refresh Firefox.



Did this guide help?
Be the first to comment