

2infoblog.net might be related to Yandex, researchers believe
2infoblog.net virus is a browser hijacker [1] which, as its title suggests, primarily targets web engines of the infected machines. In particular, this search engine acts by replacing the default search engine and the homepage of the browser, this way forcing victims to use its questionable search and news services. It is interesting that the information about this service creators or their contacts is nowhere to be found on this site. Only in the source code of the page, we’ve managed to find clues that might link 2infoblog to the famous Russian search provider Yandex [2]. What a adds to the suspicion is the fact that the designs of these two websites are alike in many respects. Nevertheless, when you type in your query and hit the search button, you will be redirected to the Ukrainian version of Google.com.ua rather than Yandex.com. Be careful — a familiar name does not guarantee that the site is really worth trusting [3]. In fact, most antivirus utilities indicate 2 Info Blog as a potentially dangerous website, so any content that branches from it may be harmful to your computer or your data. Unfortunately, this unwanted domain sticks to the browsers and uses browser helper [4] assistance to create an environment which simply won’t let users get rid of it that easily. Luckily, reputable antivirus tools, like FortectIntego or SpyHunterCombo Cleaner can be used to remove 2infoblog.net quite simply and effectively.
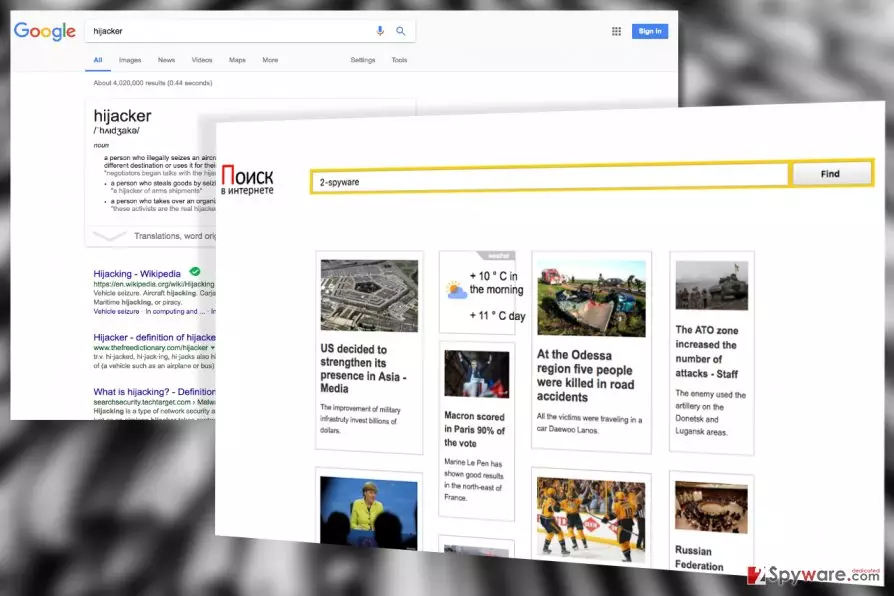
If immobilized in time, 2infoblog.net hijack should not inflict major problems to the system. However, the longer this hijacker stays on the computer, the more issues may emerge. For instance, you may notice that your web results are becoming increasingly more cluttered with ads, sponsored links and, on top of it all, you are being redirected to random domains against your will. All of this is a typical behavior of an ad-based cyber infection which primary aim is to generate as much advertising revenue [5] as possible. While some of the displayed offers may actually be legitimate and useful, they simply interrupt your regular browsing and may get really annoying if you are not planning any purchases whatsoever. If you have a different vision of what search providers should do, do not hesitate with 2infoblog.net removal and start looking for some different service instead.

Browser hijackers make use of freeware packages to infiltrate computers
2infoblog.net is a typical browser hijacker, so it uses tested infiltration techniques to deploy itself on the system. The most common of these methods is the infiltration via bundled software packages. This essentially means that the creators of the potentially unwanted program bundle it together with popular freely downloadable software. Then, such infectious packages are put up for download on software download websites which are not very reputable in the first place. You can imagine what happens next — the users download and install malware on their computers without suspecting it. To avoid such faith, always be careful when choosing the source of your downloads and carefully inspect the downloaded software for unwanted content.
Leave 2infoblog.net removal for the professionals
Though it may seem that it is quite easy to remove 2infoblog.net virus from the infected system, it is always best to trust any malware removal to the hands of the professionals. Nevertheless, this does not mean that you will have to take your infected device to some real-life technician. Sophisticated anti-malware or anti-spyware will do the job just as good and without wasting your precious time. Just make sure you obtain a legal software and update it to the latest version, to ensure a more precise 2infoblog.net removal.
Uninstall from Windows
Uninstall from Windows 10/8:
- Type Control Panel into the Windows search box and open the result.
- Under Programs, select Uninstall a program.


Uninstall from Windows 7/XP:
- Click on Windows Start > Control Panel (Windows XP users should click on Add/Remove Programs).
- In Control Panel, select Programs > Uninstall a program.


Remove the unwanted program:
- In the Programs and Features window, look for any recently installed suspicious entries, select them, and click Uninstall.
- If User Account Control appears, click Yes to confirm, then complete the removal.


Delete from macOS
Remove the unwanted application:
- From the menu bar, select Go > Applications.
- In the Applications folder, look for any suspicious entries, then drag them to Trash (or right-click and pick Move to Trash).


Delete leftover files and folders:
- Select Go > Go to Folder.
- Enter /Library/Application Support and remove any suspicious folders related to the unwanted program.
- Repeat the same check in the /Library/LaunchAgents and /Library/LaunchDaemons folders, deleting any suspicious entries.

- Finally, empty the Trash to permanently remove the leftovers.

Reset Internet Explorer
Remove dangerous add-ons:
- Open Internet Explorer, click on the Gear icon (IE menu) on the top-right corner of the browser
- Pick Manage Add-ons.
- You will see a Manage Add-ons window. Here, look for suspicious plugins. Click on these entries and select Disable.


Change your homepage if it was altered:
- Open IE and click on the Gear icon.
- Select Internet Options.
- In the General tab, delete the Home page address and replace it by your preferred one (for example, Google.com).
- Click Apply and then select OK.


Delete temporary files:
- Press on the Gear icon and select Internet Options.
- Under Browsing history, click Delete...
- Select relevant fields and press Delete.


Reset Internet Explorer:
- Click on Gear icon > Internet options and select Advanced tab.
- Select Reset.
- In the new window, check Delete personal settings and select Reset.


Remove from Microsoft Edge
Delete unwanted extensions from MS Edge:
- Select Menu (three horizontal dots at the top-right of the browser window) and pick Extensions.
- From the list, pick the extension and click on the Gear icon.
- Click Remove.


Clear cookies and other browser data:
- Click on the Menu (three horizontal dots at the top-right of the browser window) and select Settings > Privacy, search, and services..
- Under Clear browsing data, pick Choose what to clear.
- Select Cookies and other site data and Cached images and files. (apart from passwords, although you might want to include Media licenses as well, if applicable) and click on Clear.


Restore new tab and homepage settings:
- Click the menu icon and choose Settings.
- Then find On startup section.
- Click Remove next to any suspicious startup page.
Reset MS Edge if the above steps did not work:
- Press on Ctrl + Shift + Esc to open Task Manager.
- Click on More details arrow at the bottom of the window.
- Select Details tab.
- Now scroll down and locate every entry with Microsoft Edge name in it. Right-click on each of them and select End Task to stop MS Edge from running.


Instructions for Chromium-based Edge
Delete extensions from MS Edge (Chromium):
- Open Edge and click select Settings > Extensions.
- Delete unwanted extensions by clicking Remove.


Clear cache and site data:
- Click on Menu and go to Settings.
- Select Privacy, search and services.
- Under Clear browsing data, pick Choose what to clear.
- Under Time range, pick All time.
- Select Clear now.


Reset Chromium-based MS Edge:
- Click on Menu and select Settings.
- On the left side, pick Reset settings.
- Select Restore settings to their default values.
- Confirm with Reset.
- This will disable extensions and reset startup pages but will not delete bookmarks, saved passwords, or browsing history.


Remove from Mozilla Firefox (FF)
Remove dangerous extensions:
- Open Mozilla Firefox browser and click on the Menu (three horizontal lines at the top-right of the window).
- Select Add-ons.
- In here, select the unwanted extension and click Remove.


Reset the homepage:
- Click three horizontal lines at the top right corner to open the menu.
- Choose Settings.
- Under Home, set your preferred homepage and new tab settings.
Clear cookies and site data:
- Click Menu and pick Settings.
- Go to Privacy & Security section.
- Scroll down to locate Cookies and Site Data.
- Click on Clear Data...
- Select Cookies and Site Data and Temporary cached files and pages, then click Clear.


Reset Mozilla Firefox
If clearing the browser as explained above did not help, reset Mozilla Firefox:
- Open Mozilla Firefox browser and click the Menu.
- Go to Help and then choose Troubleshooting Information.

- Under Give Firefox a tune up section, click on Refresh Firefox...
- Once the pop-up shows up, confirm the action by pressing on Refresh Firefox.



Remove from Google Chrome
Delete malicious extensions from Google Chrome:
- Open Google Chrome, click on the Menu (three vertical dots at the top-right corner) and select More tools > Extensions.
- In the newly opened window, you will see all the installed extensions. Uninstall all suspicious extensions related to the unwanted program by clicking Remove.


Clear cache and web data from Chrome:
- Click on Menu and pick Settings.
- Under Privacy and security, select Clear browsing data.
- Select Browsing history, Cookies and other site data, as well as Cached images and files.
- Click Clear data.


Change your homepage:
- Click menu and choose Settings.
- Look for a suspicious site in the On startup section.
- Click on Open a specific or set of pages and click on three dots to find the Remove option.
Reset Google Chrome:
If the previous methods did not help you, reset Google Chrome to eliminate all the unwanted components:
- Click on Menu and select Settings.
- In the Settings, scroll down and click Advanced.
- Scroll down and locate Reset and clean up section.
- Now click Restore settings to their original defaults.
- Confirm with Reset settings.


Delete from Safari
Remove dangerous extensions:
- Open Safari, click Safari in the menu at the top-left of the screen, and select Preferences.
- Go to the Extensions tab, look for any suspicious entries, and click Uninstall to remove them.


Clear history and website data:
- Click Safari in the menu and pick Clear History.
- Set Clear to all history and confirm with Clear History.


Reset Safari:
- Click Safari in the menu and select Preferences > Advanced.
- Enable Show Develop menu in menu bar.
- From the menu bar, click Develop and select Empty Caches.


Did this guide help?
Be the first to comment