

What are Audio Ads and where do they come from?
There are many various computer problems that can be blamed for the appearance of repetitive Audio ads. If you have encountered speaking ads at least one time, you know how bothersome and annoying they can be. These ads pop-up out of nowhere, start playing bothersome audio messages, and cannot be stopped that easily. It is quite hard to solve the problem unless you know what causes these ads to appear, and we are going to help you to identify that. This article is dedicated to people who encounter such ads and want to remove the Audio Ads virus. First of all, we must say that there are several different types of malware that serve audio ads, so let’s discuss each of them.
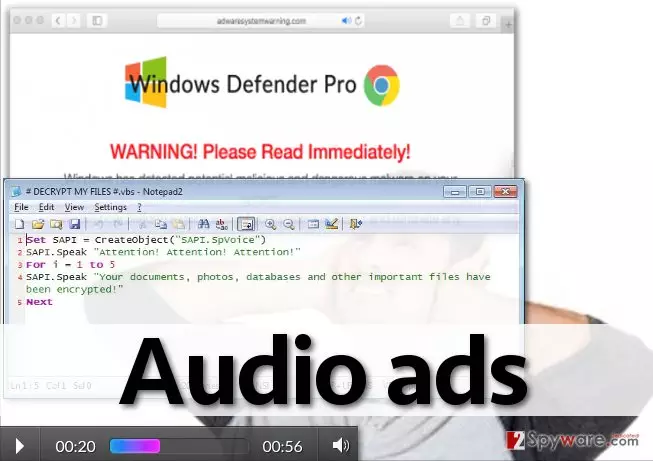
- Ransomware that plays audio messages: There are some malicious computer viruses that can play an audio message to you. As an example, we would like to introduce you to Cerber ransomware. This one is an incredibly malicious computer software, which aims to infiltrate into victim’s computer system masked its malicious executive as a safe file and enter the system as a Trojan horse, encrypt all victim’s data, and demand a ransom afterward. Once files are encrypted, the virus executes .vbs file, which loudly reads an annoying message, stating that all documents, photos, databases and the rest of records have been encrypted. The point of this ad is to scare the computer user and make him understand what happened to the computer faster.
- Audio ads by tech support scam malware: Technical assistance scammers create programs that act very similarly like adware-type programs do. These programs can randomly launch the Internet browser and open a fraud website, which shows error messages, triggers pop-up alerts and similar warnings, claiming that victim’s computer is at risk and that the computer must be checked by “certified Microsoft technicians” or just some suspicious “IT experts” immediately. Such computer viruses seek to intimidate the PC user and make him/her call technical support scammers, which ask to purchase some rogue computer security software, provide credit card details, or just provide remote access to the computer. Such threats also play audio ads immediately after launching the aforementioned deceptive website. These ads commonly just read the same text written on such sites loudly. An example of such malware: Adwaresystemwarning.com virus.
- Speaking ads that come from adware programs. Audio ads can also start playing without your permission in case your PC is infected with adware. Ad-supported applications typically open web advertisements in new tabs, browser windows, and advertise various third-party sites, their products and their services. Some of these ads play a record related to the content of the ad. Such ads are very annoying, and usually, victims immediately start looking for Audio ads removal instructions on the Internet.
If you encounter these ads, first of all, you have to identify what makes them appear on your screen. If it is a non-malicious program, you might be able to remove it manually. In order to identify the virus, you have to run a system scan with a spyware removal tool. If you just want to remove Audio Ads as soon as possible, then we recommend deleting it automatically with a help of FortectIntego program. Download, install it and then let it check your computer system for you.
How do such programs spread?
There are many ways how spyware and malware programs can enter your PC. You can download them by yourself and install them thinking that they are safe, or, you can be tricked into installing them after downloading a software bundle. We would like to share some tips on how you can avoid installing bundled programs. When you launch a software installer, do not rush and read Privacy Policy and Terms of Use documents thoroughly. Then, proceed with the installation and once you reach “Settings” step, configure settings. Select Advanced or Custom installation method and then opt-out all unwanted programs manually. Then you can finish the installation procedure in the usual manner.
However, speaking of malicious viruses, this prevention method is not the only one that you should practice. Viruses can be installed on the computer system by opening hideous email attachments, clicking on corrupted links or ads, or just by visiting deceptive websites. The most efficient way to prevent Audio Ads hijack is to keep your PC protected by a proper security software. Hence, if you do not have one, install it.
How to remove Audio ads?
Audio ads virus can be non-malicious, but it can also be an incredibly dangerous one. In case you are dealing with adware variant, you can use Audio ads removal instructions provided below this article and get rid of these ads manually. However, if you are dealing with a more severe virus, then manual removal method might not be that effective. In such case, you should employ an automatic malware removal tool and remove Audio Ads automatically.
Uninstall from Windows
Uninstall from Windows 10/8:
- Type Control Panel into the Windows search box and open the result.
- Under Programs, select Uninstall a program.


Uninstall from Windows 7/XP:
- Click on Windows Start > Control Panel (Windows XP users should click on Add/Remove Programs).
- In Control Panel, select Programs > Uninstall a program.


Remove the unwanted program:
- In the Programs and Features window, look for any recently installed suspicious entries, select them, and click Uninstall.
- If User Account Control appears, click Yes to confirm, then complete the removal.


Delete from macOS
Remove the unwanted application:
- From the menu bar, select Go > Applications.
- In the Applications folder, look for any suspicious entries, then drag them to Trash (or right-click and pick Move to Trash).


Delete leftover files and folders:
- Select Go > Go to Folder.
- Enter /Library/Application Support and remove any suspicious folders related to the unwanted program.
- Repeat the same check in the /Library/LaunchAgents and /Library/LaunchDaemons folders, deleting any suspicious entries.

- Finally, empty the Trash to permanently remove the leftovers.

Remove from Microsoft Edge
Delete unwanted extensions from MS Edge:
- Select Menu (three horizontal dots at the top-right of the browser window) and pick Extensions.
- From the list, pick the extension and click on the Gear icon.
- Click Remove.


Clear cookies and other browser data:
- Click on the Menu (three horizontal dots at the top-right of the browser window) and select Settings > Privacy, search, and services..
- Under Clear browsing data, pick Choose what to clear.
- Select Cookies and other site data and Cached images and files. (apart from passwords, although you might want to include Media licenses as well, if applicable) and click on Clear.


Restore new tab and homepage settings:
- Click the menu icon and choose Settings.
- Then find On startup section.
- Click Remove next to any suspicious startup page.
Reset MS Edge if the above steps did not work:
- Press on Ctrl + Shift + Esc to open Task Manager.
- Click on More details arrow at the bottom of the window.
- Select Details tab.
- Now scroll down and locate every entry with Microsoft Edge name in it. Right-click on each of them and select End Task to stop MS Edge from running.


Instructions for Chromium-based Edge
Delete extensions from MS Edge (Chromium):
- Open Edge and click select Settings > Extensions.
- Delete unwanted extensions by clicking Remove.


Clear cache and site data:
- Click on Menu and go to Settings.
- Select Privacy, search and services.
- Under Clear browsing data, pick Choose what to clear.
- Under Time range, pick All time.
- Select Clear now.


Reset Chromium-based MS Edge:
- Click on Menu and select Settings.
- On the left side, pick Reset settings.
- Select Restore settings to their default values.
- Confirm with Reset.
- This will disable extensions and reset startup pages but will not delete bookmarks, saved passwords, or browsing history.


Remove from Mozilla Firefox (FF)
Remove dangerous extensions:
- Open Mozilla Firefox browser and click on the Menu (three horizontal lines at the top-right of the window).
- Select Add-ons.
- In here, select the unwanted extension and click Remove.


Reset the homepage:
- Click three horizontal lines at the top right corner to open the menu.
- Choose Settings.
- Under Home, set your preferred homepage and new tab settings.
Clear cookies and site data:
- Click Menu and pick Settings.
- Go to Privacy & Security section.
- Scroll down to locate Cookies and Site Data.
- Click on Clear Data...
- Select Cookies and Site Data and Temporary cached files and pages, then click Clear.


Reset Mozilla Firefox
If clearing the browser as explained above did not help, reset Mozilla Firefox:
- Open Mozilla Firefox browser and click the Menu.
- Go to Help and then choose Troubleshooting Information.

- Under Give Firefox a tune up section, click on Refresh Firefox...
- Once the pop-up shows up, confirm the action by pressing on Refresh Firefox.



Remove from Google Chrome
Delete malicious extensions from Google Chrome:
- Open Google Chrome, click on the Menu (three vertical dots at the top-right corner) and select More tools > Extensions.
- In the newly opened window, you will see all the installed extensions. Uninstall all suspicious extensions related to the unwanted program by clicking Remove.


Clear cache and web data from Chrome:
- Click on Menu and pick Settings.
- Under Privacy and security, select Clear browsing data.
- Select Browsing history, Cookies and other site data, as well as Cached images and files.
- Click Clear data.


Change your homepage:
- Click menu and choose Settings.
- Look for a suspicious site in the On startup section.
- Click on Open a specific or set of pages and click on three dots to find the Remove option.
Reset Google Chrome:
If the previous methods did not help you, reset Google Chrome to eliminate all the unwanted components:
- Click on Menu and select Settings.
- In the Settings, scroll down and click Advanced.
- Scroll down and locate Reset and clean up section.
- Now click Restore settings to their original defaults.
- Confirm with Reset settings.


Delete from Safari
Remove dangerous extensions:
- Open Safari, click Safari in the menu at the top-left of the screen, and select Preferences.
- Go to the Extensions tab, look for any suspicious entries, and click Uninstall to remove them.


Clear history and website data:
- Click Safari in the menu and pick Clear History.
- Set Clear to all history and confirm with Clear History.


Reset Safari:
- Click Safari in the menu and select Preferences > Advanced.
- Enable Show Develop menu in menu bar.
- From the menu bar, click Develop and select Empty Caches.


Was this guide helpful?
4 comments