

Beware of raunchy Copypast.ru browser hijacker!
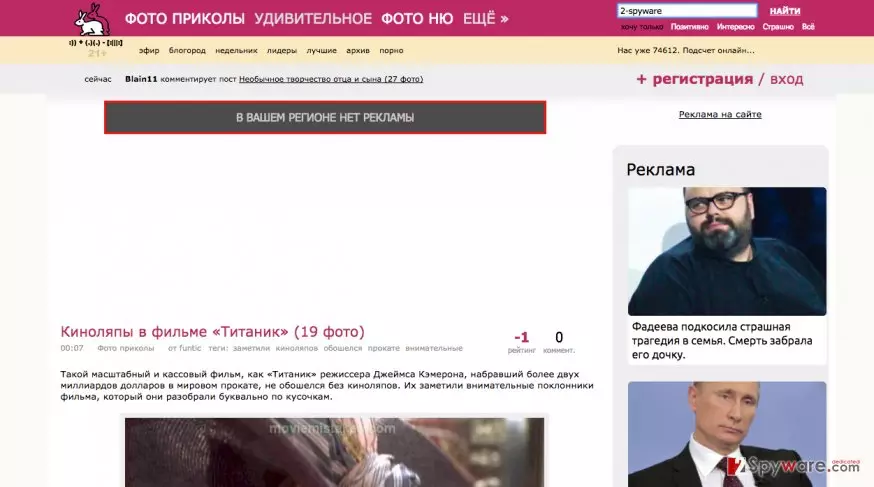
Copypast.ru virus is a potentially unwanted program (PUP), and its functionality is simply beyond the pale. It is that kind of a program that you do not want to infect your PC with, especially if you have little ones in your family. This program belongs to browser hijackers category due to its ability to affect browsers’ performance. Once installed, it sets copypast.ru/p/main.html as a default page in all web browsers and causes unwanted redirects to the main page that is situated on Copypast.ru domain. This browser hijacker can flood your screen with a large amount of pop-up and banner ads, and you might not be very satisfied with content that it presents. On the official website, Copypast.ru redirect virus provides adult-oriented content, such as pictures of nude girls, links to sites filled with pornographic content, and so on. Typically, such material serves as a bait to make users access dangerous domains, download and install malware on their computer, so our team recommends you to stay away from links placed on this site and also not use the search engine available on Copypast.ru/p/main.html site, because you can easily be redirected to shady portals that can contain malicious content. Creators of such viruses are usually greedy, so they can redirect you even to some malicious websites if only that generates them more advertising revenue. Your computer’s security is the least of their concerns. Luckily, you can fight them back by simply closing your browser and carrying out Copypast.ru removal when you notice this website on your browser.
We should also mention that this site seems to be primarily targeting Russian-speaking countries since the content of the page is all in Russian. Nevertheless, that does not mean you are safe living far from these regions. Copypast.ru malware is capable of infecting any Google Chrome, Internet Explorer, Edge or Mozilla Firefox browser, so under the right circumstances, it does not make much difference in which country the infection eventually takes place. What matters is that you remove Copypast.ru from your computer as soon as possible. Be sure to use reputable antivirus software, for instance, FortectIntego to ensure a smooth and effective removal.
Tricky distribution techniques
Copypast.ru is potentially unwanted program, so it is natural that some people might use it and not consider it especially dangerous. Nevertheless, methods of its distribution are highly worrying. The virus enters computers without asking direct permission from the user. To be more precise, it swindles this permission by deception. Malware developers add Copypast.ru as an optional install that comes along with other freeware or shareware applications that are popular and frequently downloaded. So, when installing the desired program, you may not even notice that Copypast.ru or any other components come in the same package. To diminish the possibility of accidentally installing unwanted software, you should always pay attention to the mode you choose for the software installation. We recommended “Advanced” or “Custom” settings which decompose the whole process into separate steps and disclose any additional software that might be included in the package.
Uninstall Copypast.ru hijacker without a delay
Whether the Copypast.ru virus is difficult or easy to get rid highly depends on your level of expertise with the virus removal in general. If it is your first time dealing with a browser hijacker virus, we recommend sticking to the automatic removal options. Anti-malware, antivirus or anti-spyware software will remove Copypast.ru without leaving residue on your PC, taking into account other programs that might potentially be hiding on your PC as well. Manual removal approach is much more isolated. Following the guidelines provided below will sort out Copypast.ru removal, however, the rest of the computer will remain unexamined. If there is no other way to eliminate the virus, you can do it manually, but we recommend running the scan with a reputable antivirus utility as soon as you have the opportunity.
Uninstall from Windows
Uninstall from Windows 10/8:
- Type Control Panel into the Windows search box and open the result.
- Under Programs, select Uninstall a program.


Uninstall from Windows 7/XP:
- Click on Windows Start > Control Panel (Windows XP users should click on Add/Remove Programs).
- In Control Panel, select Programs > Uninstall a program.


Remove the unwanted program:
- In the Programs and Features window, look for any recently installed suspicious entries, select them, and click Uninstall.
- If User Account Control appears, click Yes to confirm, then complete the removal.


Reset Internet Explorer
Remove dangerous add-ons:
- Open Internet Explorer, click on the Gear icon (IE menu) on the top-right corner of the browser
- Pick Manage Add-ons.
- You will see a Manage Add-ons window. Here, look for suspicious plugins. Click on these entries and select Disable.


Change your homepage if it was altered:
- Open IE and click on the Gear icon.
- Select Internet Options.
- In the General tab, delete the Home page address and replace it by your preferred one (for example, Google.com).
- Click Apply and then select OK.


Delete temporary files:
- Press on the Gear icon and select Internet Options.
- Under Browsing history, click Delete...
- Select relevant fields and press Delete.


Reset Internet Explorer:
- Click on Gear icon > Internet options and select Advanced tab.
- Select Reset.
- In the new window, check Delete personal settings and select Reset.


Remove from Microsoft Edge
Delete unwanted extensions from MS Edge:
- Select Menu (three horizontal dots at the top-right of the browser window) and pick Extensions.
- From the list, pick the extension and click on the Gear icon.
- Click Remove.


Clear cookies and other browser data:
- Click on the Menu (three horizontal dots at the top-right of the browser window) and select Settings > Privacy, search, and services..
- Under Clear browsing data, pick Choose what to clear.
- Select Cookies and other site data and Cached images and files. (apart from passwords, although you might want to include Media licenses as well, if applicable) and click on Clear.


Restore new tab and homepage settings:
- Click the menu icon and choose Settings.
- Then find On startup section.
- Click Remove next to any suspicious startup page.
Reset MS Edge if the above steps did not work:
- Press on Ctrl + Shift + Esc to open Task Manager.
- Click on More details arrow at the bottom of the window.
- Select Details tab.
- Now scroll down and locate every entry with Microsoft Edge name in it. Right-click on each of them and select End Task to stop MS Edge from running.


Instructions for Chromium-based Edge
Delete extensions from MS Edge (Chromium):
- Open Edge and click select Settings > Extensions.
- Delete unwanted extensions by clicking Remove.


Clear cache and site data:
- Click on Menu and go to Settings.
- Select Privacy, search and services.
- Under Clear browsing data, pick Choose what to clear.
- Under Time range, pick All time.
- Select Clear now.


Reset Chromium-based MS Edge:
- Click on Menu and select Settings.
- On the left side, pick Reset settings.
- Select Restore settings to their default values.
- Confirm with Reset.
- This will disable extensions and reset startup pages but will not delete bookmarks, saved passwords, or browsing history.


Remove from Mozilla Firefox (FF)
Remove dangerous extensions:
- Open Mozilla Firefox browser and click on the Menu (three horizontal lines at the top-right of the window).
- Select Add-ons.
- In here, select the unwanted extension and click Remove.


Reset the homepage:
- Click three horizontal lines at the top right corner to open the menu.
- Choose Settings.
- Under Home, set your preferred homepage and new tab settings.
Clear cookies and site data:
- Click Menu and pick Settings.
- Go to Privacy & Security section.
- Scroll down to locate Cookies and Site Data.
- Click on Clear Data...
- Select Cookies and Site Data and Temporary cached files and pages, then click Clear.


Reset Mozilla Firefox
If clearing the browser as explained above did not help, reset Mozilla Firefox:
- Open Mozilla Firefox browser and click the Menu.
- Go to Help and then choose Troubleshooting Information.

- Under Give Firefox a tune up section, click on Refresh Firefox...
- Once the pop-up shows up, confirm the action by pressing on Refresh Firefox.



Remove from Google Chrome
Delete malicious extensions from Google Chrome:
- Open Google Chrome, click on the Menu (three vertical dots at the top-right corner) and select More tools > Extensions.
- In the newly opened window, you will see all the installed extensions. Uninstall all suspicious extensions related to the unwanted program by clicking Remove.


Clear cache and web data from Chrome:
- Click on Menu and pick Settings.
- Under Privacy and security, select Clear browsing data.
- Select Browsing history, Cookies and other site data, as well as Cached images and files.
- Click Clear data.


Change your homepage:
- Click menu and choose Settings.
- Look for a suspicious site in the On startup section.
- Click on Open a specific or set of pages and click on three dots to find the Remove option.
Reset Google Chrome:
If the previous methods did not help you, reset Google Chrome to eliminate all the unwanted components:
- Click on Menu and select Settings.
- In the Settings, scroll down and click Advanced.
- Scroll down and locate Reset and clean up section.
- Now click Restore settings to their original defaults.
- Confirm with Reset settings.


Delete from Safari
Remove dangerous extensions:
- Open Safari, click Safari in the menu at the top-left of the screen, and select Preferences.
- Go to the Extensions tab, look for any suspicious entries, and click Uninstall to remove them.


Clear history and website data:
- Click Safari in the menu and pick Clear History.
- Set Clear to all history and confirm with Clear History.


Reset Safari:
- Click Safari in the menu and select Preferences > Advanced.
- Enable Show Develop menu in menu bar.
- From the menu bar, click Develop and select Empty Caches.


Did this guide help?
Be the first to comment