

Pros and cons of funtabstvsearch.com search engine
If you are looking for a new search engine, be careful not to choose funtabstvsearch.com virus. This browsing tool is categorized as a browser hijacker. Thus, it will not meet up your expectations of a reliable search engine. We suggest you not to delay funtabstvsearch.com removal despite its several supposed advantages. Its tendency to redirect to sponsored websites might hinder your browsing sessions. What is more, the PUP may install additional but highly unpractical programs and tools without direct consent. In general, the drawbacks outweigh the possible advantages. Before you remove funtabstvsearch.com with the help of FortectIntego, find out about its functions and distribution techniques.
Imali Ltd is back with another browser hijacker up their sleeves. This company specializes in creating diverse search engines. However, all of them happen to be barely practical browsing tools. There are two most common features of the hijackers create by this corporate entity. They name their search engines, which almost in all cases include “Fun Tab,” “My Tab” or “New tab.” Furthermore, all of their products deliver quick-access links to sponsored sports, movie streaming, and shopping domains. The ability to reach the preferred web page is appreciated by the majority of search engines. However, this seemingly practical characteristic has its price. The owners of Fun Tabs TV Search are obliged to promote the web pages of their partners. Sometimes such advertising comes in a highly irritating form. The problem is that you might find yourself in their affiliate domains unwillingly.
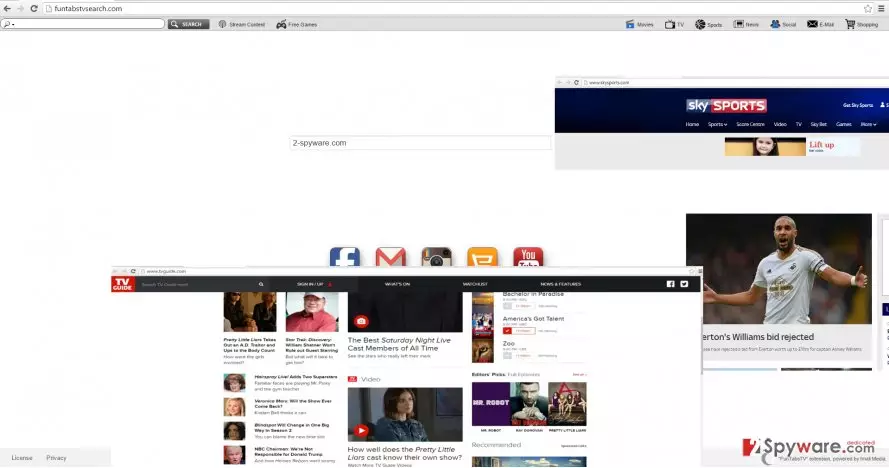
In other words, funtabstvsearch.com redirect issue appears when you either click on the popped-up advertisements. Alternatively, you might be redirected to their web pages after you unsuccessfully attempt to enter the wanted website. The redirect windows might also emerge alongside to your the web page of your interest. Be careful not to click on fake download buttons or any other insecure hyperlinks while canceling the windows. Keep in mind that such redirect websites often happen to be potentially fraudulent.
The transmission techniques of the hijacker
Its distribution does not differ much from other browser hijackers. The most successful strategy proves to be “bundling.” When it is applied, users rarely spot additional software. Thus, leaving it pre-marked enable the PUP to sneak into the computer. As a result, alongside the primary installation, funtabstvsearch.com hijack occurs. If you are interested in how you can avoid such mistake in the future, bear in mind these tips. First of all, before downloading a new application, check its official publisher. Download it only from its official website. Afterward, uncheck all optional and unnecessary add-ons.
Does the removal of funtabstvsearch.com take long?
The fastest solution to eliminate the hijacker is to employ the services of malware removal application. Update it and run the system scan. It will remove funtabstvsearch.com within few minutes. Additionally, it checks your operating system for other potentially malignant files on the computer. There is another method to delete funtabstvsearch.com virus. Follow the manual guidelines provided below. Ensure that no important detail misses your attention. Otherwise, the hijacker might attempt to invade your computer again. On the final note, these instructions will help you complete permanent funtabstvsearch.com removal. They are applicable for the elimination of similar PUPs as well.
Uninstall from Windows
Uninstall from Windows 10/8:
- Type Control Panel into the Windows search box and open the result.
- Under Programs, select Uninstall a program.


Uninstall from Windows 7/XP:
- Click on Windows Start > Control Panel (Windows XP users should click on Add/Remove Programs).
- In Control Panel, select Programs > Uninstall a program.


Remove the unwanted program:
- In the Programs and Features window, look for any recently installed suspicious entries, select them, and click Uninstall.
- If User Account Control appears, click Yes to confirm, then complete the removal.


Delete from macOS
Remove the unwanted application:
- From the menu bar, select Go > Applications.
- In the Applications folder, look for any suspicious entries, then drag them to Trash (or right-click and pick Move to Trash).


Delete leftover files and folders:
- Select Go > Go to Folder.
- Enter /Library/Application Support and remove any suspicious folders related to the unwanted program.
- Repeat the same check in the /Library/LaunchAgents and /Library/LaunchDaemons folders, deleting any suspicious entries.

- Finally, empty the Trash to permanently remove the leftovers.

Remove from Microsoft Edge
Delete unwanted extensions from MS Edge:
- Select Menu (three horizontal dots at the top-right of the browser window) and pick Extensions.
- From the list, pick the extension and click on the Gear icon.
- Click Remove.


Clear cookies and other browser data:
- Click on the Menu (three horizontal dots at the top-right of the browser window) and select Settings > Privacy, search, and services..
- Under Clear browsing data, pick Choose what to clear.
- Select Cookies and other site data and Cached images and files. (apart from passwords, although you might want to include Media licenses as well, if applicable) and click on Clear.


Restore new tab and homepage settings:
- Click the menu icon and choose Settings.
- Then find On startup section.
- Click Remove next to any suspicious startup page.
Reset MS Edge if the above steps did not work:
- Press on Ctrl + Shift + Esc to open Task Manager.
- Click on More details arrow at the bottom of the window.
- Select Details tab.
- Now scroll down and locate every entry with Microsoft Edge name in it. Right-click on each of them and select End Task to stop MS Edge from running.


Instructions for Chromium-based Edge
Delete extensions from MS Edge (Chromium):
- Open Edge and click select Settings > Extensions.
- Delete unwanted extensions by clicking Remove.


Clear cache and site data:
- Click on Menu and go to Settings.
- Select Privacy, search and services.
- Under Clear browsing data, pick Choose what to clear.
- Under Time range, pick All time.
- Select Clear now.


Reset Chromium-based MS Edge:
- Click on Menu and select Settings.
- On the left side, pick Reset settings.
- Select Restore settings to their default values.
- Confirm with Reset.
- This will disable extensions and reset startup pages but will not delete bookmarks, saved passwords, or browsing history.


Remove from Mozilla Firefox (FF)
Remove dangerous extensions:
- Open Mozilla Firefox browser and click on the Menu (three horizontal lines at the top-right of the window).
- Select Add-ons.
- In here, select the unwanted extension and click Remove.


Reset the homepage:
- Click three horizontal lines at the top right corner to open the menu.
- Choose Settings.
- Under Home, set your preferred homepage and new tab settings.
Clear cookies and site data:
- Click Menu and pick Settings.
- Go to Privacy & Security section.
- Scroll down to locate Cookies and Site Data.
- Click on Clear Data...
- Select Cookies and Site Data and Temporary cached files and pages, then click Clear.


Reset Mozilla Firefox
If clearing the browser as explained above did not help, reset Mozilla Firefox:
- Open Mozilla Firefox browser and click the Menu.
- Go to Help and then choose Troubleshooting Information.

- Under Give Firefox a tune up section, click on Refresh Firefox...
- Once the pop-up shows up, confirm the action by pressing on Refresh Firefox.



Remove from Google Chrome
Delete malicious extensions from Google Chrome:
- Open Google Chrome, click on the Menu (three vertical dots at the top-right corner) and select More tools > Extensions.
- In the newly opened window, you will see all the installed extensions. Uninstall all suspicious extensions related to the unwanted program by clicking Remove.


Clear cache and web data from Chrome:
- Click on Menu and pick Settings.
- Under Privacy and security, select Clear browsing data.
- Select Browsing history, Cookies and other site data, as well as Cached images and files.
- Click Clear data.


Change your homepage:
- Click menu and choose Settings.
- Look for a suspicious site in the On startup section.
- Click on Open a specific or set of pages and click on three dots to find the Remove option.
Reset Google Chrome:
If the previous methods did not help you, reset Google Chrome to eliminate all the unwanted components:
- Click on Menu and select Settings.
- In the Settings, scroll down and click Advanced.
- Scroll down and locate Reset and clean up section.
- Now click Restore settings to their original defaults.
- Confirm with Reset settings.


Delete from Safari
Remove dangerous extensions:
- Open Safari, click Safari in the menu at the top-left of the screen, and select Preferences.
- Go to the Extensions tab, look for any suspicious entries, and click Uninstall to remove them.


Clear history and website data:
- Click Safari in the menu and pick Clear History.
- Set Clear to all history and confirm with Clear History.


Reset Safari:
- Click Safari in the menu and select Preferences > Advanced.
- Enable Show Develop menu in menu bar.
- From the menu bar, click Develop and select Empty Caches.


Did this guide help?
3 comments
JackP.0.P
The developers stopped to surprise me with those "tab" browser hijackers already...
sarah
I didnt have any problems removing it.
Sandra
Those pop-ups offering to update my software are too irritating!