

Should you install Newtaba.com?
Newtaba.com virus works as a search engine targeting Russian-speaking users. It offers you links to entertaining domains and web pages where you can sell your car or other goods. If you have been using this search engine for a while already, we recommend you to remove Newtaba.com. Why? Simply because this search engine falls into the category of browser hijackers. The longer this hijacker stays on the computer, the more bothersome consequences will start nagging you. Most annoying of them is the redirects to questionable web pages. Such tendency might significantly increase the level of vulnerability of your computer. More information about newtaba.com removal can be found below. Speed up the process with FortectIntego.
If you have encountered a browser hijacker for the first time, you may not be aware of all capabilities. There are several features which distinguish browser hijackers from reliable browsing tools. Initially, it presents altered search results. It means that there are more chances you see ad-based website links among the search results. If you are used to finding relevant information quickly, this hijacker should not stay on the device. These ad-based links are delivered due to hidden script files injected by the PUP. Along with them, the hijacker may install cookies, beacons, and other tracking tools to collect information about your browsing preferences. Such activity highly limits personal privacy. Likewise, it might play as the decisive factor to remove Newtaba.com from the computer. Almost all programs or websites track their visitors. However, you may limit the amount of collected information yourself [1].
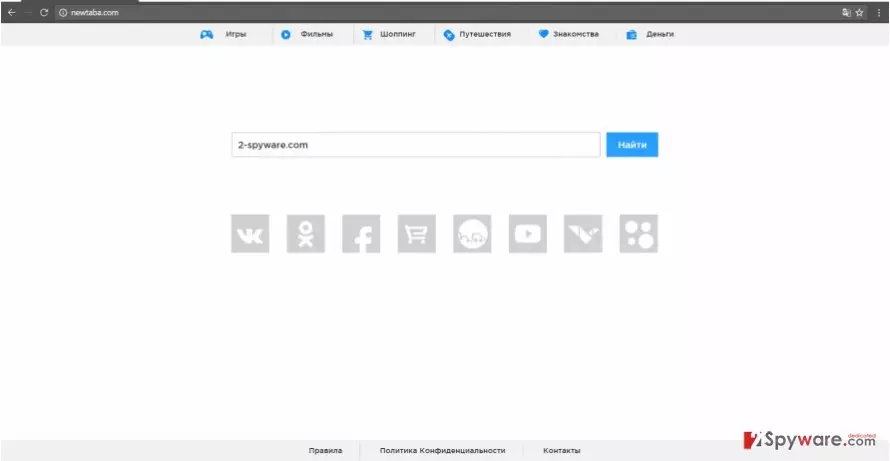
Your computer safety should be of concern to you. Within a while, Newtaba.com redirect will become a frustrating phenomenon as you will often be redirected to the websites different from your prior expectation. Likewise, you might also get misguided to porn sites or gambling domains. Usually, they harbor bothersome malware which slows down the overall performance of the computer. Since the latter web pages have been a popular domain for distributing various cyber infections, such tendency urged the law enforcement in South Carolina to take some action [2]. However, not everywhere such domains are prohibited. You may even encounter a devastating crypto-malware if you visit seemingly legitimate domains [3]. Therefore, there is no need to take a risk and let newtaba.com managing your browsing traffic.
How does the PUP infiltrate the computer?
It is likely that this hijacker sneaked into your computer together with a recently installed application. Such tendency to spread questionable applications is called “bundling.” Due to this, rarely users spot additional applications. As a result, they unwillingly facilitate Newtaba.com hijack or another PUP. In order to prevent such unwanted infiltration, before installing any new applications, choose “Custom” mode. It then discloses optional tools, and you will be able to spot them on time. Carefully unpin them before and then continue with the installation. Note that such applications may also travel along with legitimate and well-known applications, Adobe Flash Player, for instance. Arrows of criticism have been piercing the latter program as it has been exploited by crooks of various ilk. Though the company issued patches for the vulnerabilities [4], be vigilant upon installing any programs.
How should I get rid of the hijacker?
You can easily get rid of this application when you install an anti-spyware application. Newtaba.com removal does not take long as the application complete initial preparations and then roots out the hijacker completely. It also looks for all elements and hidden scripts. If you are used to eliminating unwanted tools the usual way, you can remove newtaba.com virus manually. Feel free to use our instructions. On the final note, check user reviews before attempting to download any program. Other users’ experience might serve as useful tips evading unwanted applications. Taking a glance at privacy policy and terms of use might be crucial as well [5].
Uninstall from Windows
Uninstall from Windows 10/8:
- Type Control Panel into the Windows search box and open the result.
- Under Programs, select Uninstall a program.


Uninstall from Windows 7/XP:
- Click on Windows Start > Control Panel (Windows XP users should click on Add/Remove Programs).
- In Control Panel, select Programs > Uninstall a program.


Remove the unwanted program:
- In the Programs and Features window, look for any recently installed suspicious entries, select them, and click Uninstall.
- If User Account Control appears, click Yes to confirm, then complete the removal.


Delete from macOS
Remove the unwanted application:
- From the menu bar, select Go > Applications.
- In the Applications folder, look for any suspicious entries, then drag them to Trash (or right-click and pick Move to Trash).


Delete leftover files and folders:
- Select Go > Go to Folder.
- Enter /Library/Application Support and remove any suspicious folders related to the unwanted program.
- Repeat the same check in the /Library/LaunchAgents and /Library/LaunchDaemons folders, deleting any suspicious entries.

- Finally, empty the Trash to permanently remove the leftovers.

Reset Internet Explorer
Remove dangerous add-ons:
- Open Internet Explorer, click on the Gear icon (IE menu) on the top-right corner of the browser
- Pick Manage Add-ons.
- You will see a Manage Add-ons window. Here, look for suspicious plugins. Click on these entries and select Disable.


Change your homepage if it was altered:
- Open IE and click on the Gear icon.
- Select Internet Options.
- In the General tab, delete the Home page address and replace it by your preferred one (for example, Google.com).
- Click Apply and then select OK.


Delete temporary files:
- Press on the Gear icon and select Internet Options.
- Under Browsing history, click Delete...
- Select relevant fields and press Delete.


Reset Internet Explorer:
- Click on Gear icon > Internet options and select Advanced tab.
- Select Reset.
- In the new window, check Delete personal settings and select Reset.


Remove from Microsoft Edge
Delete unwanted extensions from MS Edge:
- Select Menu (three horizontal dots at the top-right of the browser window) and pick Extensions.
- From the list, pick the extension and click on the Gear icon.
- Click Remove.


Clear cookies and other browser data:
- Click on the Menu (three horizontal dots at the top-right of the browser window) and select Settings > Privacy, search, and services..
- Under Clear browsing data, pick Choose what to clear.
- Select Cookies and other site data and Cached images and files. (apart from passwords, although you might want to include Media licenses as well, if applicable) and click on Clear.


Restore new tab and homepage settings:
- Click the menu icon and choose Settings.
- Then find On startup section.
- Click Remove next to any suspicious startup page.
Reset MS Edge if the above steps did not work:
- Press on Ctrl + Shift + Esc to open Task Manager.
- Click on More details arrow at the bottom of the window.
- Select Details tab.
- Now scroll down and locate every entry with Microsoft Edge name in it. Right-click on each of them and select End Task to stop MS Edge from running.


Instructions for Chromium-based Edge
Delete extensions from MS Edge (Chromium):
- Open Edge and click select Settings > Extensions.
- Delete unwanted extensions by clicking Remove.


Clear cache and site data:
- Click on Menu and go to Settings.
- Select Privacy, search and services.
- Under Clear browsing data, pick Choose what to clear.
- Under Time range, pick All time.
- Select Clear now.


Reset Chromium-based MS Edge:
- Click on Menu and select Settings.
- On the left side, pick Reset settings.
- Select Restore settings to their default values.
- Confirm with Reset.
- This will disable extensions and reset startup pages but will not delete bookmarks, saved passwords, or browsing history.


Remove from Mozilla Firefox (FF)
Remove dangerous extensions:
- Open Mozilla Firefox browser and click on the Menu (three horizontal lines at the top-right of the window).
- Select Add-ons.
- In here, select the unwanted extension and click Remove.


Reset the homepage:
- Click three horizontal lines at the top right corner to open the menu.
- Choose Settings.
- Under Home, set your preferred homepage and new tab settings.
Clear cookies and site data:
- Click Menu and pick Settings.
- Go to Privacy & Security section.
- Scroll down to locate Cookies and Site Data.
- Click on Clear Data...
- Select Cookies and Site Data and Temporary cached files and pages, then click Clear.


Reset Mozilla Firefox
If clearing the browser as explained above did not help, reset Mozilla Firefox:
- Open Mozilla Firefox browser and click the Menu.
- Go to Help and then choose Troubleshooting Information.

- Under Give Firefox a tune up section, click on Refresh Firefox...
- Once the pop-up shows up, confirm the action by pressing on Refresh Firefox.



Remove from Google Chrome
Delete malicious extensions from Google Chrome:
- Open Google Chrome, click on the Menu (three vertical dots at the top-right corner) and select More tools > Extensions.
- In the newly opened window, you will see all the installed extensions. Uninstall all suspicious extensions related to the unwanted program by clicking Remove.


Clear cache and web data from Chrome:
- Click on Menu and pick Settings.
- Under Privacy and security, select Clear browsing data.
- Select Browsing history, Cookies and other site data, as well as Cached images and files.
- Click Clear data.


Change your homepage:
- Click menu and choose Settings.
- Look for a suspicious site in the On startup section.
- Click on Open a specific or set of pages and click on three dots to find the Remove option.
Reset Google Chrome:
If the previous methods did not help you, reset Google Chrome to eliminate all the unwanted components:
- Click on Menu and select Settings.
- In the Settings, scroll down and click Advanced.
- Scroll down and locate Reset and clean up section.
- Now click Restore settings to their original defaults.
- Confirm with Reset settings.


Delete from Safari
Remove dangerous extensions:
- Open Safari, click Safari in the menu at the top-left of the screen, and select Preferences.
- Go to the Extensions tab, look for any suspicious entries, and click Uninstall to remove them.


Clear history and website data:
- Click Safari in the menu and pick Clear History.
- Set Clear to all history and confirm with Clear History.


Reset Safari:
- Click Safari in the menu and select Preferences > Advanced.
- Enable Show Develop menu in menu bar.
- From the menu bar, click Develop and select Empty Caches.


Did this guide help?
2 comments
rokossse
I cant believe, someone would install it...
flip3side
Didnt have any problems removing it.