

Can search.searchlwr.com virus cause trouble for the PC?
Safer Browser series is back with another browser hijacker – search.searchlwr.com. Do not fall into its deception despite how alluring it looks. It offers users a very practical feature – incorporated websites which inform you of local weathers. It is a common strategy among Safer Browser hijackers. They either tempt by quick-access platforms to popular domains. In any case, we recommend you to opt for search.searchlwr.com removal instead. You can do it quickly with the assistance of FortectIntego.
If you haven’t encountered browser hijackers, you might not understand why they are considered to be potentially malicious or unwanted. You see, the majority of hijackers are supported by third parties. This results in the hijacker advertising their services. Thus, it comes either in direct or indirect form. Specifically, search.searchlwr.com redirect to partner web pages occurs when you enter one of the search results or when you click on a popped-up window. However, a redirect window might prevent you from quickly reaching your primary destination. This peculiarity might surely enrage some users.
Furthermore, the owners of the browser hijacker and their partners are only interested in making a profit online. Thus, they promote each other services or questionable products despite your need for fast browsing. Do not get tempted to install any new applications while search.searchlwr.com occupies the device. You might download a completely futile program or an application which is enhanced with malevolent elements.
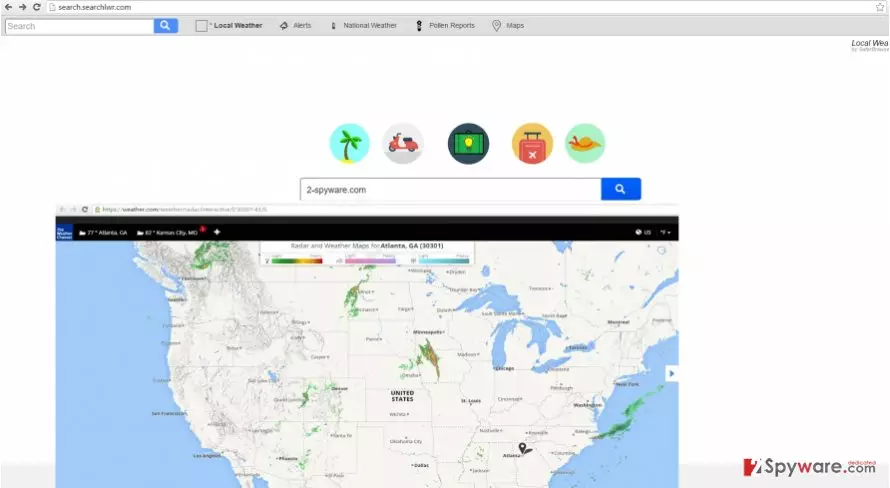
To sum up, your computer might be stuffed with low-profile malware which highly slows down PC performance. In addition, a more serious virus might also take a liking of your computer. Since this hijacker belongs to Safer Browser group, it also tends to track your online activity. Few users enjoy being watched over by some fishy search engine. Such activity might only result in your computer screen flooded with personalized advertisements. Do not hesitate to remove search.searchlwr.com from the computer.
The distribution methods of the hijacker
This PUP attacks computer while users install new applications. Specifically, it is pinned down to a free movie watching manager or driver updater. Since the majority of users skip installation instructions, they fail to spot Searchlwr.com. The hijacker is already automatically pre-checked. Likewise, it easily paves the way into a computer. Luckily, there are universal precautions which help you escape this malware. Before initiating the installation of a new program, opt for “Advanced” settings. Only when you make sure no irrelevant applications will be installed, start installing the primary software.
Search.searchlwr.com removal steps
As you can see, there are more cons than pros. There should be no doubt to eliminate this browser hijacker. Luckily, its termination is not complex. The fastest and most efficient way to put an end to this PUP – automatic elimination. The anti-spyware application will take care of the hijacker within few minutes. In addition, this program should be a necessary component in every operating system because it ensures real-time protection. It is able to detect minor PUPs which might be overlooked by some anti-virus applications. Maintaining both, anti-virus and anti-spyware applications, guarantees the proper protection of the computer. Alternatively, you can remove search.searchlwr.com manually. You can also contribute to it by evading the domains overcrowded with ads and watching for suspicious add-ons before hitting the “Install” button.
Uninstall from Windows
Uninstall from Windows 10/8:
- Type Control Panel into the Windows search box and open the result.
- Under Programs, select Uninstall a program.


Uninstall from Windows 7/XP:
- Click on Windows Start > Control Panel (Windows XP users should click on Add/Remove Programs).
- In Control Panel, select Programs > Uninstall a program.


Remove the unwanted program:
- In the Programs and Features window, look for any recently installed suspicious entries, select them, and click Uninstall.
- If User Account Control appears, click Yes to confirm, then complete the removal.


Delete from macOS
Remove the unwanted application:
- From the menu bar, select Go > Applications.
- In the Applications folder, look for any suspicious entries, then drag them to Trash (or right-click and pick Move to Trash).


Delete leftover files and folders:
- Select Go > Go to Folder.
- Enter /Library/Application Support and remove any suspicious folders related to the unwanted program.
- Repeat the same check in the /Library/LaunchAgents and /Library/LaunchDaemons folders, deleting any suspicious entries.

- Finally, empty the Trash to permanently remove the leftovers.

Remove from Microsoft Edge
Delete unwanted extensions from MS Edge:
- Select Menu (three horizontal dots at the top-right of the browser window) and pick Extensions.
- From the list, pick the extension and click on the Gear icon.
- Click Remove.


Clear cookies and other browser data:
- Click on the Menu (three horizontal dots at the top-right of the browser window) and select Settings > Privacy, search, and services..
- Under Clear browsing data, pick Choose what to clear.
- Select Cookies and other site data and Cached images and files. (apart from passwords, although you might want to include Media licenses as well, if applicable) and click on Clear.


Restore new tab and homepage settings:
- Click the menu icon and choose Settings.
- Then find On startup section.
- Click Remove next to any suspicious startup page.
Reset MS Edge if the above steps did not work:
- Press on Ctrl + Shift + Esc to open Task Manager.
- Click on More details arrow at the bottom of the window.
- Select Details tab.
- Now scroll down and locate every entry with Microsoft Edge name in it. Right-click on each of them and select End Task to stop MS Edge from running.


Instructions for Chromium-based Edge
Delete extensions from MS Edge (Chromium):
- Open Edge and click select Settings > Extensions.
- Delete unwanted extensions by clicking Remove.


Clear cache and site data:
- Click on Menu and go to Settings.
- Select Privacy, search and services.
- Under Clear browsing data, pick Choose what to clear.
- Under Time range, pick All time.
- Select Clear now.


Reset Chromium-based MS Edge:
- Click on Menu and select Settings.
- On the left side, pick Reset settings.
- Select Restore settings to their default values.
- Confirm with Reset.
- This will disable extensions and reset startup pages but will not delete bookmarks, saved passwords, or browsing history.


Remove from Mozilla Firefox (FF)
Remove dangerous extensions:
- Open Mozilla Firefox browser and click on the Menu (three horizontal lines at the top-right of the window).
- Select Add-ons.
- In here, select the unwanted extension and click Remove.


Reset the homepage:
- Click three horizontal lines at the top right corner to open the menu.
- Choose Settings.
- Under Home, set your preferred homepage and new tab settings.
Clear cookies and site data:
- Click Menu and pick Settings.
- Go to Privacy & Security section.
- Scroll down to locate Cookies and Site Data.
- Click on Clear Data...
- Select Cookies and Site Data and Temporary cached files and pages, then click Clear.


Reset Mozilla Firefox
If clearing the browser as explained above did not help, reset Mozilla Firefox:
- Open Mozilla Firefox browser and click the Menu.
- Go to Help and then choose Troubleshooting Information.

- Under Give Firefox a tune up section, click on Refresh Firefox...
- Once the pop-up shows up, confirm the action by pressing on Refresh Firefox.



Remove from Google Chrome
Delete malicious extensions from Google Chrome:
- Open Google Chrome, click on the Menu (three vertical dots at the top-right corner) and select More tools > Extensions.
- In the newly opened window, you will see all the installed extensions. Uninstall all suspicious extensions related to the unwanted program by clicking Remove.


Clear cache and web data from Chrome:
- Click on Menu and pick Settings.
- Under Privacy and security, select Clear browsing data.
- Select Browsing history, Cookies and other site data, as well as Cached images and files.
- Click Clear data.


Change your homepage:
- Click menu and choose Settings.
- Look for a suspicious site in the On startup section.
- Click on Open a specific or set of pages and click on three dots to find the Remove option.
Reset Google Chrome:
If the previous methods did not help you, reset Google Chrome to eliminate all the unwanted components:
- Click on Menu and select Settings.
- In the Settings, scroll down and click Advanced.
- Scroll down and locate Reset and clean up section.
- Now click Restore settings to their original defaults.
- Confirm with Reset settings.


Delete from Safari
Remove dangerous extensions:
- Open Safari, click Safari in the menu at the top-left of the screen, and select Preferences.
- Go to the Extensions tab, look for any suspicious entries, and click Uninstall to remove them.


Clear history and website data:
- Click Safari in the menu and pick Clear History.
- Set Clear to all history and confirm with Clear History.


Reset Safari:
- Click Safari in the menu and select Preferences > Advanced.
- Enable Show Develop menu in menu bar.
- From the menu bar, click Develop and select Empty Caches.


Did this guide help?
3 comments
Henry
This hijacker is more or less bearable...
Steve
Luckily, its not some kind of ransomware or computer worm.
Anna
Uninstalled it successfully.