

Facts worth knowing about Search.searchyea.com:
Visually, Search.searchyea.com virus does not stand out from the usual search engines that you normally use for information research online. The website is quite pleasing to the eye, with its orderly design and a comprehensible structure which is easily recognizable from such popular search providers as Google, Yahoo or Bing. Unfortunately, searchyea.com cannot compare with these Internet search giants looking from the functionality perspective. This is primarily because this program was not designed to provide accurate and useful search results in the first place. As the research has proven, what the creators of this program are really interested in is profit from the affiliate advertising. So, the search engine itself was designed as one major billboard. Of course, this type of advertising is more effective and gives quicker results compared to the ads you see on the side of the highway or pinned to your city walls. This type of marketing allows Search.searchyea.com redirect the users to the particular websites or promote certain products every step of the way. It is all being executed without asking proper permission either. This shady website may simply appear on your browser completely unexpectedly. What is more, it also does not provide proper instructions how to switch back to your regular search provider. Luckily, you can remove Search.searchyea.com quite easily with the help of anti-malware utilities, for instance FortectIntego.
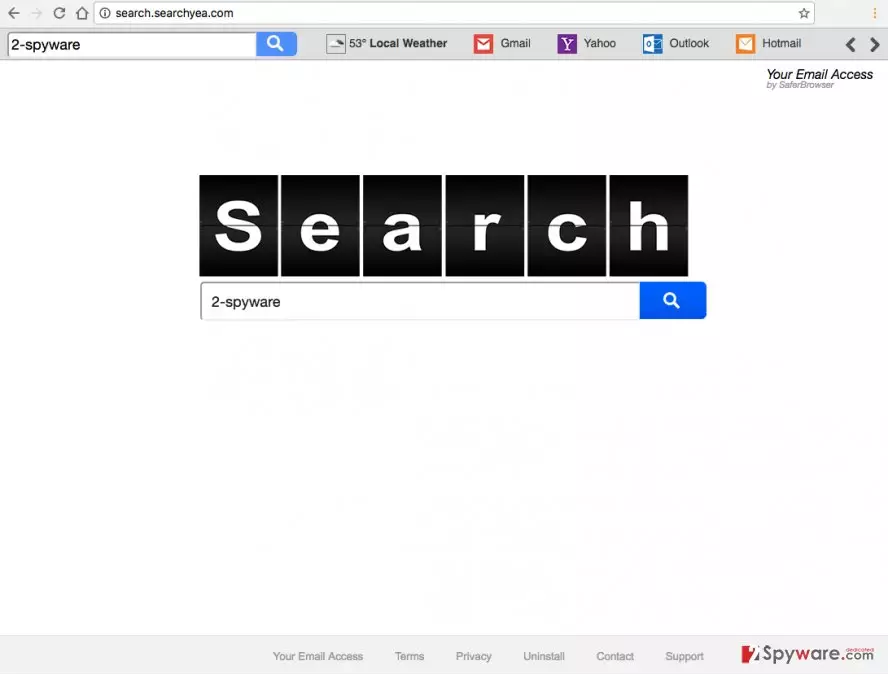
Do not think all the troubles with this virus end there. There is much more you can expect from the Search.searchyea.com hijack. You may be surprised by the extent of information it collects about its users. Though not personally identifiable, your IP address, frequently visited websites and similar information may provide the advertisers with some invaluable insight into your interests and allow them to create specifically targeted content. You may just won’t be able to resist the temptation of finding out more about the proposed online offers and end up on some unfamiliar domains, some of which may potentially be dangerous. Search.searchyea.com removal is the only way to avoid that. Do not hesitate and run the system scan ASAP.
How can you be sure this virus won’t infect your computer?
You can’t. That’s the tricky aspect of the potentially unwanted programs. They may be hiding anywhere: behind a deceptive ad or link, software download button or in packages together with completely legitimate applications. There is also no 100% working antidote for such infections either. Antivirus may not detect them, not to mention noticing them yourself. Nevertheless, you should do the best of your abilities to avoid visiting suspicious websites or downloading content promoted via questionable ads. Also, always make sure what you are installing on your computer is safe. Check the software for additional components and cancel the ones you do not recognize or simply do not desire to see on your computer.
Search.searchyea.com removal and browser reset:
Usually, when users encounter browser hijackers like Search.searchyea.com virus on their computers they reset the browser and hope for the best. Unfortunately, such technique is useless, since it does not tackle the virus itself. To remove Search.searchyea.com properly, you have to delete all of the virus counterparts from your computer, including the potential “helper objects” it may have self-willingly installed while running on your system. Sounds overwhelming? Well, it might be, if you choose to take up Search.searchyea.com removal manually. Luckily, you still have the option of the automatic virus elimination which requires the minimum of your effort. It takes a full system scan with the antivirus scanner to locate the virus and eliminate it from your device.
Uninstall from Windows
Uninstall from Windows 10/8:
- Type Control Panel into the Windows search box and open the result.
- Under Programs, select Uninstall a program.


Uninstall from Windows 7/XP:
- Click on Windows Start > Control Panel (Windows XP users should click on Add/Remove Programs).
- In Control Panel, select Programs > Uninstall a program.


Remove the unwanted program:
- In the Programs and Features window, look for any recently installed suspicious entries, select them, and click Uninstall.
- If User Account Control appears, click Yes to confirm, then complete the removal.


Delete from macOS
Remove the unwanted application:
- From the menu bar, select Go > Applications.
- In the Applications folder, look for any suspicious entries, then drag them to Trash (or right-click and pick Move to Trash).


Delete leftover files and folders:
- Select Go > Go to Folder.
- Enter /Library/Application Support and remove any suspicious folders related to the unwanted program.
- Repeat the same check in the /Library/LaunchAgents and /Library/LaunchDaemons folders, deleting any suspicious entries.

- Finally, empty the Trash to permanently remove the leftovers.

Remove from Microsoft Edge
Delete unwanted extensions from MS Edge:
- Select Menu (three horizontal dots at the top-right of the browser window) and pick Extensions.
- From the list, pick the extension and click on the Gear icon.
- Click Remove.


Clear cookies and other browser data:
- Click on the Menu (three horizontal dots at the top-right of the browser window) and select Settings > Privacy, search, and services..
- Under Clear browsing data, pick Choose what to clear.
- Select Cookies and other site data and Cached images and files. (apart from passwords, although you might want to include Media licenses as well, if applicable) and click on Clear.


Restore new tab and homepage settings:
- Click the menu icon and choose Settings.
- Then find On startup section.
- Click Remove next to any suspicious startup page.
Reset MS Edge if the above steps did not work:
- Press on Ctrl + Shift + Esc to open Task Manager.
- Click on More details arrow at the bottom of the window.
- Select Details tab.
- Now scroll down and locate every entry with Microsoft Edge name in it. Right-click on each of them and select End Task to stop MS Edge from running.


Instructions for Chromium-based Edge
Delete extensions from MS Edge (Chromium):
- Open Edge and click select Settings > Extensions.
- Delete unwanted extensions by clicking Remove.


Clear cache and site data:
- Click on Menu and go to Settings.
- Select Privacy, search and services.
- Under Clear browsing data, pick Choose what to clear.
- Under Time range, pick All time.
- Select Clear now.


Reset Chromium-based MS Edge:
- Click on Menu and select Settings.
- On the left side, pick Reset settings.
- Select Restore settings to their default values.
- Confirm with Reset.
- This will disable extensions and reset startup pages but will not delete bookmarks, saved passwords, or browsing history.


Remove from Mozilla Firefox (FF)
Remove dangerous extensions:
- Open Mozilla Firefox browser and click on the Menu (three horizontal lines at the top-right of the window).
- Select Add-ons.
- In here, select the unwanted extension and click Remove.


Reset the homepage:
- Click three horizontal lines at the top right corner to open the menu.
- Choose Settings.
- Under Home, set your preferred homepage and new tab settings.
Clear cookies and site data:
- Click Menu and pick Settings.
- Go to Privacy & Security section.
- Scroll down to locate Cookies and Site Data.
- Click on Clear Data...
- Select Cookies and Site Data and Temporary cached files and pages, then click Clear.


Reset Mozilla Firefox
If clearing the browser as explained above did not help, reset Mozilla Firefox:
- Open Mozilla Firefox browser and click the Menu.
- Go to Help and then choose Troubleshooting Information.

- Under Give Firefox a tune up section, click on Refresh Firefox...
- Once the pop-up shows up, confirm the action by pressing on Refresh Firefox.



Remove from Google Chrome
Delete malicious extensions from Google Chrome:
- Open Google Chrome, click on the Menu (three vertical dots at the top-right corner) and select More tools > Extensions.
- In the newly opened window, you will see all the installed extensions. Uninstall all suspicious extensions related to the unwanted program by clicking Remove.


Clear cache and web data from Chrome:
- Click on Menu and pick Settings.
- Under Privacy and security, select Clear browsing data.
- Select Browsing history, Cookies and other site data, as well as Cached images and files.
- Click Clear data.


Change your homepage:
- Click menu and choose Settings.
- Look for a suspicious site in the On startup section.
- Click on Open a specific or set of pages and click on three dots to find the Remove option.
Reset Google Chrome:
If the previous methods did not help you, reset Google Chrome to eliminate all the unwanted components:
- Click on Menu and select Settings.
- In the Settings, scroll down and click Advanced.
- Scroll down and locate Reset and clean up section.
- Now click Restore settings to their original defaults.
- Confirm with Reset settings.


Delete from Safari
Remove dangerous extensions:
- Open Safari, click Safari in the menu at the top-left of the screen, and select Preferences.
- Go to the Extensions tab, look for any suspicious entries, and click Uninstall to remove them.


Clear history and website data:
- Click Safari in the menu and pick Clear History.
- Set Clear to all history and confirm with Clear History.


Reset Safari:
- Click Safari in the menu and select Preferences > Advanced.
- Enable Show Develop menu in menu bar.
- From the menu bar, click Develop and select Empty Caches.


Did this guide help?
2 comments
Catherine
Another hijacker from Safer Browser?? Will it ever stop with these bogus search engines??
Asmont
Thanks for the elimination guide!