

Details about Tsarlima.ru virus
Tsarlima.ru virus might start bothering you and keep redirecting you to Workno.ru site in case you install a software package containing a browser hijacker. This browser hijacker is also known as Tsarlima.ru redirect virus, and we have added it to our spyware database. This suspicious program advertises an ordinary-looking search engine that is situated on Workno.ru site, sadly, this search tool cannot be trusted. According to spyware researchers, this search engine might inject paid third-party links into its search findings, seeking to convince the user to click on them and visit pre-determined websites. This advertising scheme is known as the pay-per-click model, and it is used to drive users to particular Internet sites so that their web traffic rates would increase. However, these sites might be dangerous to visit, feature malicious downloads, or attempt to collect personal data from visitors. It is highly recommended to stay away from unknown and untrustworthy-looking web pages if you do not want to be exposed to insecure material online. Remember – providing personal information to unknown third-party sources can result in data leakage, and installing unknown software can result in even more sorrowful consequences. You should not trust websites that suddenly appear in your browser instead of your previous homepage without your permission, and ideally, remove what causes them to appear. In this case, you need to remove Tsarlima.ru hijacker, which might have left its files on your computer system and also in your web browsers. To quickly fetch all of them and carry out a full Tsarlima.ru removal, you can use the FortectIntego software.
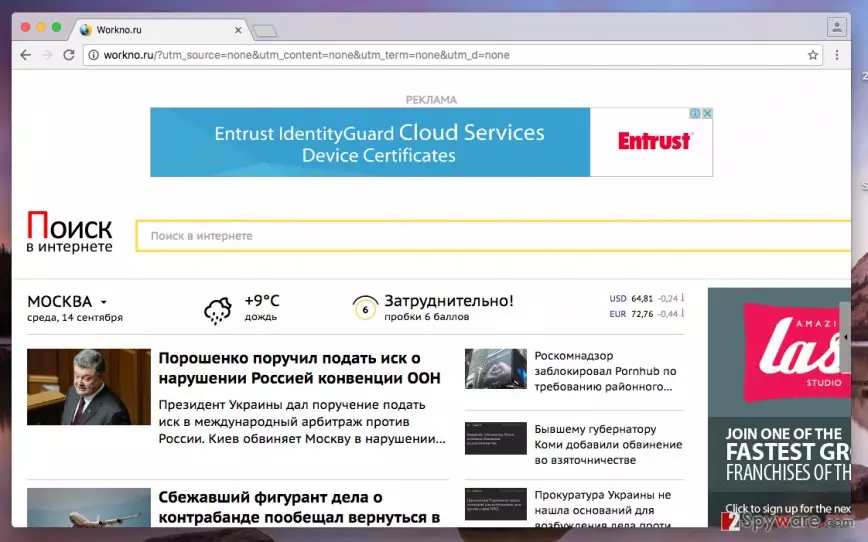
The reason why third-party search engines are untrustworthy is that typically they do not endorse the content of third-party links they advertise. In other words, they do not apply strict filters to links they advertise; therefore, the user can easily wander into insecure websites without even knowing it. Furthermore, you can bump into malware-laden ads and quickly infect the computer. Therefore, such innocent-looking search tools can be a great danger to your computer system, because even they are not malicious themselves, they can open a path for inexperienced PC users to insecure sites on the Internet.
Tips on how to avoid browser hijacks
Tsarlima.ru hijack is something you do not want to happen; therefore, you should do something about it to prevent it from happening in the future. You should be very careful at all times when you download or install something on your PC because some stuff that can be quickly grabbed from the Internet for free might be dangerous and pose a threat to the computer system. Besides, some free programs that seem to be individual can actually contain several additional free apps that might be infectious or simply really bothersome. To avoid installing extra components, you have to adjust software installation settings and choose Advanced or Custom option. These options will reveal all additional software added to your download and allow to reject it in case you do not want to install them. Bear in mind that typically pre-selected options, such as Default or Standard ones, will not permit any adjustments of software composition.
Easiest way to uninstall Tsarlima.ru hijacker
If Tsarlima.ru virus has visited your browser, there is no need to panic. You just need to stop using the search engine placed on the homepage and think about how you want to uninstall this browser hijacker. There are two different methods of how you can do it, the manual and the automatic one. The manual Tsarlima.ru removal method is explained in the instructions provided below. In case you cannot remove this hijacker, send us a question or use the automatic spyware removal tool (you can use one of the ones listed below – we have tested these programs and can recommend them as one of the best spyware and malware removal tools).
Uninstall from Windows
Uninstall from Windows 10/8:
- Type Control Panel into the Windows search box and open the result.
- Under Programs, select Uninstall a program.


Uninstall from Windows 7/XP:
- Click on Windows Start > Control Panel (Windows XP users should click on Add/Remove Programs).
- In Control Panel, select Programs > Uninstall a program.


Remove the unwanted program:
- In the Programs and Features window, look for any recently installed suspicious entries, select them, and click Uninstall.
- If User Account Control appears, click Yes to confirm, then complete the removal.


Delete from macOS
Remove the unwanted application:
- From the menu bar, select Go > Applications.
- In the Applications folder, look for any suspicious entries, then drag them to Trash (or right-click and pick Move to Trash).


Delete leftover files and folders:
- Select Go > Go to Folder.
- Enter /Library/Application Support and remove any suspicious folders related to the unwanted program.
- Repeat the same check in the /Library/LaunchAgents and /Library/LaunchDaemons folders, deleting any suspicious entries.

- Finally, empty the Trash to permanently remove the leftovers.

Remove from Microsoft Edge
Delete unwanted extensions from MS Edge:
- Select Menu (three horizontal dots at the top-right of the browser window) and pick Extensions.
- From the list, pick the extension and click on the Gear icon.
- Click Remove.


Clear cookies and other browser data:
- Click on the Menu (three horizontal dots at the top-right of the browser window) and select Settings > Privacy, search, and services..
- Under Clear browsing data, pick Choose what to clear.
- Select Cookies and other site data and Cached images and files. (apart from passwords, although you might want to include Media licenses as well, if applicable) and click on Clear.


Restore new tab and homepage settings:
- Click the menu icon and choose Settings.
- Then find On startup section.
- Click Remove next to any suspicious startup page.
Reset MS Edge if the above steps did not work:
- Press on Ctrl + Shift + Esc to open Task Manager.
- Click on More details arrow at the bottom of the window.
- Select Details tab.
- Now scroll down and locate every entry with Microsoft Edge name in it. Right-click on each of them and select End Task to stop MS Edge from running.


Instructions for Chromium-based Edge
Delete extensions from MS Edge (Chromium):
- Open Edge and click select Settings > Extensions.
- Delete unwanted extensions by clicking Remove.


Clear cache and site data:
- Click on Menu and go to Settings.
- Select Privacy, search and services.
- Under Clear browsing data, pick Choose what to clear.
- Under Time range, pick All time.
- Select Clear now.


Reset Chromium-based MS Edge:
- Click on Menu and select Settings.
- On the left side, pick Reset settings.
- Select Restore settings to their default values.
- Confirm with Reset.
- This will disable extensions and reset startup pages but will not delete bookmarks, saved passwords, or browsing history.


Remove from Mozilla Firefox (FF)
Remove dangerous extensions:
- Open Mozilla Firefox browser and click on the Menu (three horizontal lines at the top-right of the window).
- Select Add-ons.
- In here, select the unwanted extension and click Remove.


Reset the homepage:
- Click three horizontal lines at the top right corner to open the menu.
- Choose Settings.
- Under Home, set your preferred homepage and new tab settings.
Clear cookies and site data:
- Click Menu and pick Settings.
- Go to Privacy & Security section.
- Scroll down to locate Cookies and Site Data.
- Click on Clear Data...
- Select Cookies and Site Data and Temporary cached files and pages, then click Clear.


Reset Mozilla Firefox
If clearing the browser as explained above did not help, reset Mozilla Firefox:
- Open Mozilla Firefox browser and click the Menu.
- Go to Help and then choose Troubleshooting Information.

- Under Give Firefox a tune up section, click on Refresh Firefox...
- Once the pop-up shows up, confirm the action by pressing on Refresh Firefox.



Remove from Google Chrome
Delete malicious extensions from Google Chrome:
- Open Google Chrome, click on the Menu (three vertical dots at the top-right corner) and select More tools > Extensions.
- In the newly opened window, you will see all the installed extensions. Uninstall all suspicious extensions related to the unwanted program by clicking Remove.


Clear cache and web data from Chrome:
- Click on Menu and pick Settings.
- Under Privacy and security, select Clear browsing data.
- Select Browsing history, Cookies and other site data, as well as Cached images and files.
- Click Clear data.


Change your homepage:
- Click menu and choose Settings.
- Look for a suspicious site in the On startup section.
- Click on Open a specific or set of pages and click on three dots to find the Remove option.
Reset Google Chrome:
If the previous methods did not help you, reset Google Chrome to eliminate all the unwanted components:
- Click on Menu and select Settings.
- In the Settings, scroll down and click Advanced.
- Scroll down and locate Reset and clean up section.
- Now click Restore settings to their original defaults.
- Confirm with Reset settings.


Delete from Safari
Remove dangerous extensions:
- Open Safari, click Safari in the menu at the top-left of the screen, and select Preferences.
- Go to the Extensions tab, look for any suspicious entries, and click Uninstall to remove them.


Clear history and website data:
- Click Safari in the menu and pick Clear History.
- Set Clear to all history and confirm with Clear History.


Reset Safari:
- Click Safari in the menu and select Preferences > Advanced.
- Enable Show Develop menu in menu bar.
- From the menu bar, click Develop and select Empty Caches.


Did this guide help?
Be the first to comment