

Goo.glesafe.com search can take control over the web browser to promote sponsored websites and track browsing history
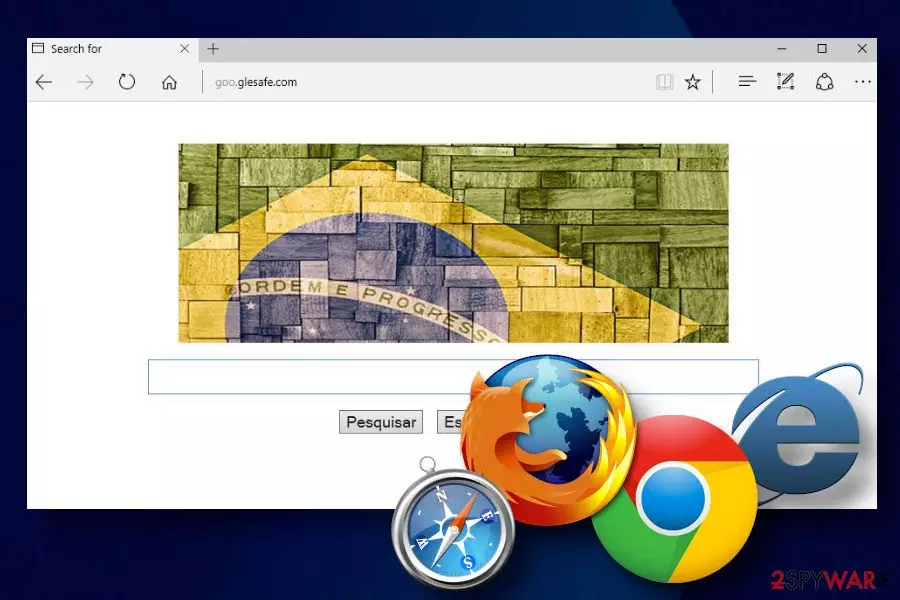
Goo.glesafe.com is a misleading Portuguese search engine that has been around since 2015. It's classified as a browser hijacker and potentially unwanted application (PUA) as it tends to replace the web browser's start page, search provider, and other settings right after the user installs a freeware bundle.
Usually, users agree upon goo.glesafe.com installation inadvertently by selecting the Express installation option of free application. Upon that, Google Chrome, Mozilla Firefox, Internet Explorer or another web browser is aggressively altered in terms of settings, i.e. start page, search provider, new tab window, bookmarks, toolbars, and other settings get changed without user's permission. The biggest problem with this search is not the intrusive changes in the settings, but rather the content that it attempts to promote.
According to cybersecurity experts[1], goo.glesafe.com virus is basically used to promote third-party sites, boost traffic to suspicious download sites, rogue services, or other doubtful domains. Therefore, using this search engine poses a risk of downloading unwanted programs, malware, or virus.
| Name | Goo.glesafe.com |
| Classification | Browser hijacker / Potentially Unwanted Application (PUA) |
| Is it dangerous? | The search itself is non-malicious. However, it can promote misleading content and lead to the infiltration of malware. |
| Symptoms | The browser hijacker alters the following web browser's settings: -start page -search provider -new tab window -bookmarks bar -adds extensions |
| Performance | Upon infiltration, this hijacker starts initiating Goo.glesafe.com redirects to doubtful third-party websites. As an addition, it generates popups, banners, hyperlinks, and other commercial content on random websites to collect clicks |
| Elimination process | Manual and automatic removal of this browser hijacker is possible. To get rid of it completely, one must delete the unwanted apps from the system and then reset web browser's settings |
| Fix the damage | Every time you deal with a PUP, make sure to fix the damage caused to the system by running a scan with FortectIntego repair tool |
Do not ignore the presence of thegoo.glesafe.com hijacker because it may cost you your PC's security and stability. Although initially, it seems like a regular Yahoo-based search provider, our research team has noticed an outstanding similarity between Goo.glesafe.com virus, bogots.com, and pesquisa.ninja search engines. Each of them falls for the class of hijackers [2]and is not recommended using.
In fact, these three search engines are identical, which is an immediate signal that this search is certainly not the one that can be trusted. In fact, the Goo.glesafe.com virus belongs to browser hijacker and PUP (potentially unwanted program) category. It has been developed with the intention to generate money from advertising. It's programmed to display links to the websites of its affiliates. Thus, although the search results that it delivers are powered by Yahoo, which is a trustworthy search engine, they are always filled with sponsored search results in the priority.
Keep in mind that each link is governed by a different privacy policy and terms, so you can never know what kind of content is disguised under them. According to our malware research team, Goo.glesafe.com redirects pose a risk to the PC's security since some of the sponsored links and advertisements may be involved in the distribution of cyber threats.
Also, another reason you may be forced to use the Goo.glesafe.com search engine is data. Third-party advertisers seek to collect as much information about user's browsing habits as possible because it's vital for the development of personalized advertisements.

However, you may not be happy to hear that Goo.glesafe.com redirect virus may cause leakage of your PC's IP address, its location, email address, and other quite sensitive information. Last, but not least, this search engine may jeopardize CPU memory, corrupt some of the vital browser's settings, and make it run as slowly as you probably cannot imagine now.
Therefore, if you seek to protect your computer from the issues we've just mentioned, always make sure that your computer is appropriately protected. For this purpose, use SpyHunterCombo Cleaner, MalwarebytesMalwarebytes, and similar anti-malware applications. A professional security tool will help to quarantine malware and protect the system from new threats.
Goo.glesafe.com removal, in general, is not a difficult procedure. For that, you have to delete freeware that came bundled with this hijacker. Yontoo 2.052 is one of the programs that this unwanted search may spread. Thus, you should eliminate it in the first place and then reset the web browser's setting to default.
Reckless installation of freeware ends up with browser-based malware on the system
The majority of the users don't know how PUPs spread. Although there are thousands of applications dubbed potentially unwanted that have direct download websites, the vast majority of cases when people experience browser's hijack happen due to the reckless installation of freeware.
- Bundling. This is by far the most commonly applied distribution method. This distribution method is inseparable from freeware and shareware. In other words, unwanted programs are usually spread as a component of various download managers, PDF creators, media players, and so on. Thus, each time you install free programs, make sure that you select either Advanced or Custom installation mode and opt-out of all attachments that it bears.
- Misleading pop-ups. Hijackers and adware may be disguised under propositions to install Java[3], Flash Player, Media Player, and other popular software.
- Misleading official pages. This browser hijacker may be offered for you while visiting the official page of another freeware.
In conclusion, when you browse the web, you must be very careful. Do not visit unfamiliar pages and never accept to download programs that seem to be suspicious.

Options for an easy Goo.glesafe.com removal
Goo.glesafe.com removal can be performed using a professional anti-malware. An automatic removal option is highly recommended because it will ensure the elimination of all cyber threats that may be lurking on your computer. If you cannot get rid of the hijacker easily because it blocks antivirus tools, try restarting your machine into Safe Mode.
Nevertheless, manual removal is also possible, so if you wish to remove Goo.glesafe.com by yourself, you can follow the guide given down below. As we have pointed out before, open the Apps folder, and carefully analyze what programs have been installed simultaneously with the hijacker. At best, eliminate all suspicious entries.
Finally, take care of your web browser. If Chrome has been hijacked, delete Goo.glesafe.com extension and remove it from the default search engine settings. At best, you should reset settings to default. After that, scan the machine with FortectIntego utility to recover it to the state prior to the hijack.
Uninstall from Windows
Uninstall from Windows 10/8:
- Type Control Panel into the Windows search box and open the result.
- Under Programs, select Uninstall a program.


Uninstall from Windows 7/XP:
- Click on Windows Start > Control Panel (Windows XP users should click on Add/Remove Programs).
- In Control Panel, select Programs > Uninstall a program.


Remove the unwanted program:
- In the Programs and Features window, look for any recently installed suspicious entries, select them, and click Uninstall.
- If User Account Control appears, click Yes to confirm, then complete the removal.


Delete from macOS
Remove the unwanted application:
- From the menu bar, select Go > Applications.
- In the Applications folder, look for any suspicious entries, then drag them to Trash (or right-click and pick Move to Trash).


Delete leftover files and folders:
- Select Go > Go to Folder.
- Enter /Library/Application Support and remove any suspicious folders related to the unwanted program.
- Repeat the same check in the /Library/LaunchAgents and /Library/LaunchDaemons folders, deleting any suspicious entries.

- Finally, empty the Trash to permanently remove the leftovers.

Reset Internet Explorer
Remove dangerous add-ons:
- Open Internet Explorer, click on the Gear icon (IE menu) on the top-right corner of the browser
- Pick Manage Add-ons.
- You will see a Manage Add-ons window. Here, look for suspicious plugins. Click on these entries and select Disable.


Change your homepage if it was altered:
- Open IE and click on the Gear icon.
- Select Internet Options.
- In the General tab, delete the Home page address and replace it by your preferred one (for example, Google.com).
- Click Apply and then select OK.


Delete temporary files:
- Press on the Gear icon and select Internet Options.
- Under Browsing history, click Delete...
- Select relevant fields and press Delete.


Reset Internet Explorer:
- Click on Gear icon > Internet options and select Advanced tab.
- Select Reset.
- In the new window, check Delete personal settings and select Reset.


Remove from Microsoft Edge
Delete unwanted extensions from MS Edge:
- Select Menu (three horizontal dots at the top-right of the browser window) and pick Extensions.
- From the list, pick the extension and click on the Gear icon.
- Click Remove.


Clear cookies and other browser data:
- Click on the Menu (three horizontal dots at the top-right of the browser window) and select Settings > Privacy, search, and services..
- Under Clear browsing data, pick Choose what to clear.
- Select Cookies and other site data and Cached images and files. (apart from passwords, although you might want to include Media licenses as well, if applicable) and click on Clear.


Restore new tab and homepage settings:
- Click the menu icon and choose Settings.
- Then find On startup section.
- Click Remove next to any suspicious startup page.
Reset MS Edge if the above steps did not work:
- Press on Ctrl + Shift + Esc to open Task Manager.
- Click on More details arrow at the bottom of the window.
- Select Details tab.
- Now scroll down and locate every entry with Microsoft Edge name in it. Right-click on each of them and select End Task to stop MS Edge from running.


Instructions for Chromium-based Edge
Delete extensions from MS Edge (Chromium):
- Open Edge and click select Settings > Extensions.
- Delete unwanted extensions by clicking Remove.


Clear cache and site data:
- Click on Menu and go to Settings.
- Select Privacy, search and services.
- Under Clear browsing data, pick Choose what to clear.
- Under Time range, pick All time.
- Select Clear now.


Reset Chromium-based MS Edge:
- Click on Menu and select Settings.
- On the left side, pick Reset settings.
- Select Restore settings to their default values.
- Confirm with Reset.
- This will disable extensions and reset startup pages but will not delete bookmarks, saved passwords, or browsing history.


Remove from Mozilla Firefox (FF)
Remove dangerous extensions:
- Open Mozilla Firefox browser and click on the Menu (three horizontal lines at the top-right of the window).
- Select Add-ons.
- In here, select the unwanted extension and click Remove.


Reset the homepage:
- Click three horizontal lines at the top right corner to open the menu.
- Choose Settings.
- Under Home, set your preferred homepage and new tab settings.
Clear cookies and site data:
- Click Menu and pick Settings.
- Go to Privacy & Security section.
- Scroll down to locate Cookies and Site Data.
- Click on Clear Data...
- Select Cookies and Site Data and Temporary cached files and pages, then click Clear.


Reset Mozilla Firefox
If clearing the browser as explained above did not help, reset Mozilla Firefox:
- Open Mozilla Firefox browser and click the Menu.
- Go to Help and then choose Troubleshooting Information.

- Under Give Firefox a tune up section, click on Refresh Firefox...
- Once the pop-up shows up, confirm the action by pressing on Refresh Firefox.



Remove from Google Chrome
Delete malicious extensions from Google Chrome:
- Open Google Chrome, click on the Menu (three vertical dots at the top-right corner) and select More tools > Extensions.
- In the newly opened window, you will see all the installed extensions. Uninstall all suspicious extensions related to the unwanted program by clicking Remove.


Clear cache and web data from Chrome:
- Click on Menu and pick Settings.
- Under Privacy and security, select Clear browsing data.
- Select Browsing history, Cookies and other site data, as well as Cached images and files.
- Click Clear data.


Change your homepage:
- Click menu and choose Settings.
- Look for a suspicious site in the On startup section.
- Click on Open a specific or set of pages and click on three dots to find the Remove option.
Reset Google Chrome:
If the previous methods did not help you, reset Google Chrome to eliminate all the unwanted components:
- Click on Menu and select Settings.
- In the Settings, scroll down and click Advanced.
- Scroll down and locate Reset and clean up section.
- Now click Restore settings to their original defaults.
- Confirm with Reset settings.


Delete from Safari
Remove dangerous extensions:
- Open Safari, click Safari in the menu at the top-left of the screen, and select Preferences.
- Go to the Extensions tab, look for any suspicious entries, and click Uninstall to remove them.


Clear history and website data:
- Click Safari in the menu and pick Clear History.
- Set Clear to all history and confirm with Clear History.


Reset Safari:
- Click Safari in the menu and select Preferences > Advanced.
- Enable Show Develop menu in menu bar.
- From the menu bar, click Develop and select Empty Caches.


Did this guide help?
Be the first to comment