

Mac Heal Pro – a fake optimization program which offers its licensed version for € 14,95
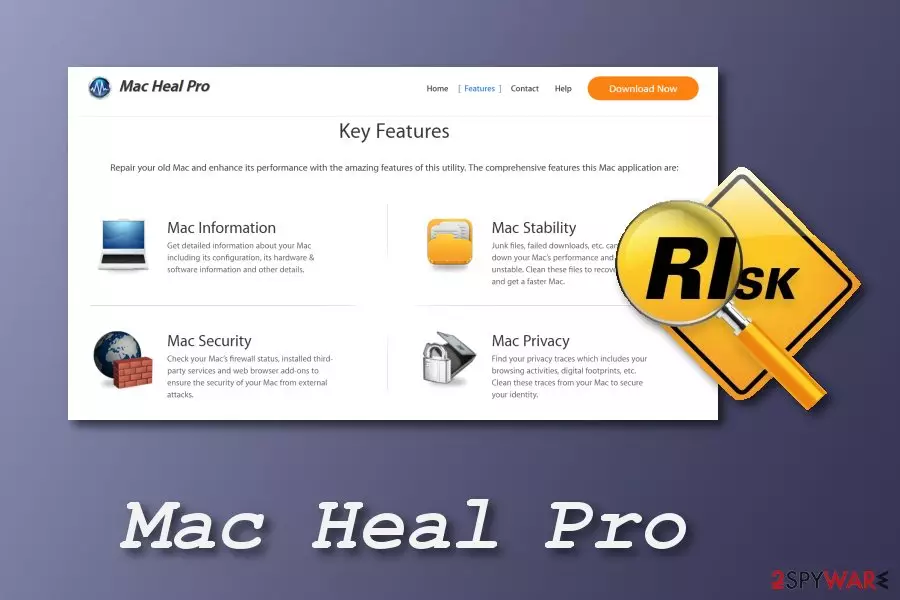
Mac Heal Pro is a fake system tool[1] for Mac users. It has been actively promoted by its developers as an easy way to improve Mas' security. However, their real aim is trying to gain income from this app which functionality is highly questionable. This fake optimization tool can be downloaded from its original site or it can come together with the fake Adobe Flash Player software or its updates. Once installed, the optimization program initiates a full system scan and starts detecting various system errors that are related to computer infections, temperature level, etc. However, warnings that are spread by Mac Heal Pro virus are false. Developers use such cruel technique to convince users into paying for the licensed version of the program which costs € 14,95. We do NOT think that it is worth such an amount of money.
| Name | Mac Heal Pro |
|---|---|
| Type | Fake system tool |
| Purpose | To convince users to buy the licensed version of the program |
| Cost | € 14,95 for the full version |
| Symptoms | Numerous system scanners, fake scan reports, pop-ups |
| Prevention | Avoid suspicious sites, do not download it from its original page, install antivirus protection |
| Removal | Use FortectIntego to get rid of the PUP |
Once Mac Heal Pro PUP infiltrates your machine, you can recognize such signs on your Mac computer:
- The app starts running numerous system scanners;
- It also reports about hundreds of different problems detected. Typically, they are presented as severe;
- The program also interrupts its users with false warnings announcing about computer infections detected;
- Your searches are interrupted by different pop-ups.
If you ever encounter this PUP on your computer, do not worry as this system tool does not provide any true information. It just collects various outdated registry entries and produces them as system errors. You can install another trustworthy system tool and perform a scan with it. After that, measure the results with the ones that are provided by Mac Heal Pro. You should see that there are no system errors that were discovered by the fake fixing tool.
DO NOT spend your money on a useless tool. DO NOT pay for the licensed version of this fake system optimization program as it will just fake to fix all errors that were found. You should perform the Mac Heal Pro removal from your computer system as this optimization tool is fake and cannot improve your system's work. The only ones who benefit from it are its developers.
You need to remove Mac Heal Pro virus as it will get more and more annoying. If you keep this PUP on your computer, you will not be able to get rid of false errors and pop-ups that it produces. Use FortectIntego or any other similar anti-malware tool to deal with the fake optimization program safe and fast. If you are willing to get rid of this program manually, make sure you put these entries to the Trash as well: helpermhp, hlprmhp, hlprmachealpro.

Prevent PUP's infiltration by spending more time on the installation of the freeware
Various potentially unwanted programs (PUPs)[2] spread by using different techniques. Fake system tools can be downloaded from their original websites. They are promoted as reliable and helpful programs. However, this is only a way used to convince gullible users to use the fake optimization program.
Moreover, you can get infected by PUPs when browsing the Internet. There are many questionable pages which include dubious content. Once you click on a suspicious link, you might accidentally download a rogue application straight into your computer. If you encounter strange-looking pages, eliminate them immediately.
According to researchers[3], PUPs such as false system tools can spread through a deceptive marketing method called “bundling.” That means unwanted content can come together with regular software. Be careful while downloading various programs from the internet, select the Custom or Advanced option and opt-out all suspicious-looking downloads.
Eliminate Mac Heal Pro as it cannot improve your PC's performance
There are two ways which allow you to perform the Mac Heal Pro removal. We have provided manual and automatical methods. You can read the manual elimination instructions below this article. Make sure you carefully remove all PUP-added components from your computer system while following the elimination guide.
If you want to remove Mac Heal Pro in a faster and more effective way, you should choose an anti-malware tool. You can pick from our suggested ones, or any other similar program that you know is useful. This method will allow you to get rid of the cyberthreat in a small period. Do not rush the deletion process and make sure it is completed fully.
Delete from macOS
Remove the unwanted application:
- From the menu bar, select Go > Applications.
- In the Applications folder, look for any suspicious entries, then drag them to Trash (or right-click and pick Move to Trash).


Delete leftover files and folders:
- Select Go > Go to Folder.
- Enter /Library/Application Support and remove any suspicious folders related to the unwanted program.
- Repeat the same check in the /Library/LaunchAgents and /Library/LaunchDaemons folders, deleting any suspicious entries.

- Finally, empty the Trash to permanently remove the leftovers.

Reset Internet Explorer
Remove dangerous add-ons:
- Open Internet Explorer, click on the Gear icon (IE menu) on the top-right corner of the browser
- Pick Manage Add-ons.
- You will see a Manage Add-ons window. Here, look for suspicious plugins. Click on these entries and select Disable.


Change your homepage if it was altered:
- Open IE and click on the Gear icon.
- Select Internet Options.
- In the General tab, delete the Home page address and replace it by your preferred one (for example, Google.com).
- Click Apply and then select OK.


Delete temporary files:
- Press on the Gear icon and select Internet Options.
- Under Browsing history, click Delete...
- Select relevant fields and press Delete.


Reset Internet Explorer:
- Click on Gear icon > Internet options and select Advanced tab.
- Select Reset.
- In the new window, check Delete personal settings and select Reset.


Remove from Microsoft Edge
Delete unwanted extensions from MS Edge:
- Select Menu (three horizontal dots at the top-right of the browser window) and pick Extensions.
- From the list, pick the extension and click on the Gear icon.
- Click Remove.


Clear cookies and other browser data:
- Click on the Menu (three horizontal dots at the top-right of the browser window) and select Settings > Privacy, search, and services..
- Under Clear browsing data, pick Choose what to clear.
- Select Cookies and other site data and Cached images and files. (apart from passwords, although you might want to include Media licenses as well, if applicable) and click on Clear.


Restore new tab and homepage settings:
- Click the menu icon and choose Settings.
- Then find On startup section.
- Click Remove next to any suspicious startup page.
Reset MS Edge if the above steps did not work:
- Press on Ctrl + Shift + Esc to open Task Manager.
- Click on More details arrow at the bottom of the window.
- Select Details tab.
- Now scroll down and locate every entry with Microsoft Edge name in it. Right-click on each of them and select End Task to stop MS Edge from running.


Instructions for Chromium-based Edge
Delete extensions from MS Edge (Chromium):
- Open Edge and click select Settings > Extensions.
- Delete unwanted extensions by clicking Remove.


Clear cache and site data:
- Click on Menu and go to Settings.
- Select Privacy, search and services.
- Under Clear browsing data, pick Choose what to clear.
- Under Time range, pick All time.
- Select Clear now.


Reset Chromium-based MS Edge:
- Click on Menu and select Settings.
- On the left side, pick Reset settings.
- Select Restore settings to their default values.
- Confirm with Reset.
- This will disable extensions and reset startup pages but will not delete bookmarks, saved passwords, or browsing history.


Remove from Mozilla Firefox (FF)
Remove dangerous extensions:
- Open Mozilla Firefox browser and click on the Menu (three horizontal lines at the top-right of the window).
- Select Add-ons.
- In here, select the unwanted extension and click Remove.


Reset the homepage:
- Click three horizontal lines at the top right corner to open the menu.
- Choose Settings.
- Under Home, set your preferred homepage and new tab settings.
Clear cookies and site data:
- Click Menu and pick Settings.
- Go to Privacy & Security section.
- Scroll down to locate Cookies and Site Data.
- Click on Clear Data...
- Select Cookies and Site Data and Temporary cached files and pages, then click Clear.


Reset Mozilla Firefox
If clearing the browser as explained above did not help, reset Mozilla Firefox:
- Open Mozilla Firefox browser and click the Menu.
- Go to Help and then choose Troubleshooting Information.

- Under Give Firefox a tune up section, click on Refresh Firefox...
- Once the pop-up shows up, confirm the action by pressing on Refresh Firefox.



Remove from Google Chrome
Delete malicious extensions from Google Chrome:
- Open Google Chrome, click on the Menu (three vertical dots at the top-right corner) and select More tools > Extensions.
- In the newly opened window, you will see all the installed extensions. Uninstall all suspicious extensions related to the unwanted program by clicking Remove.


Clear cache and web data from Chrome:
- Click on Menu and pick Settings.
- Under Privacy and security, select Clear browsing data.
- Select Browsing history, Cookies and other site data, as well as Cached images and files.
- Click Clear data.


Change your homepage:
- Click menu and choose Settings.
- Look for a suspicious site in the On startup section.
- Click on Open a specific or set of pages and click on three dots to find the Remove option.
Reset Google Chrome:
If the previous methods did not help you, reset Google Chrome to eliminate all the unwanted components:
- Click on Menu and select Settings.
- In the Settings, scroll down and click Advanced.
- Scroll down and locate Reset and clean up section.
- Now click Restore settings to their original defaults.
- Confirm with Reset settings.


Delete from Safari
Remove dangerous extensions:
- Open Safari, click Safari in the menu at the top-left of the screen, and select Preferences.
- Go to the Extensions tab, look for any suspicious entries, and click Uninstall to remove them.


Clear history and website data:
- Click Safari in the menu and pick Clear History.
- Set Clear to all history and confirm with Clear History.


Reset Safari:
- Click Safari in the menu and select Preferences > Advanced.
- Enable Show Develop menu in menu bar.
- From the menu bar, click Develop and select Empty Caches.


Did this guide help?
Be the first to comment