

Moatads – adware that disrupts your searches by redirecting you to unsafe websites
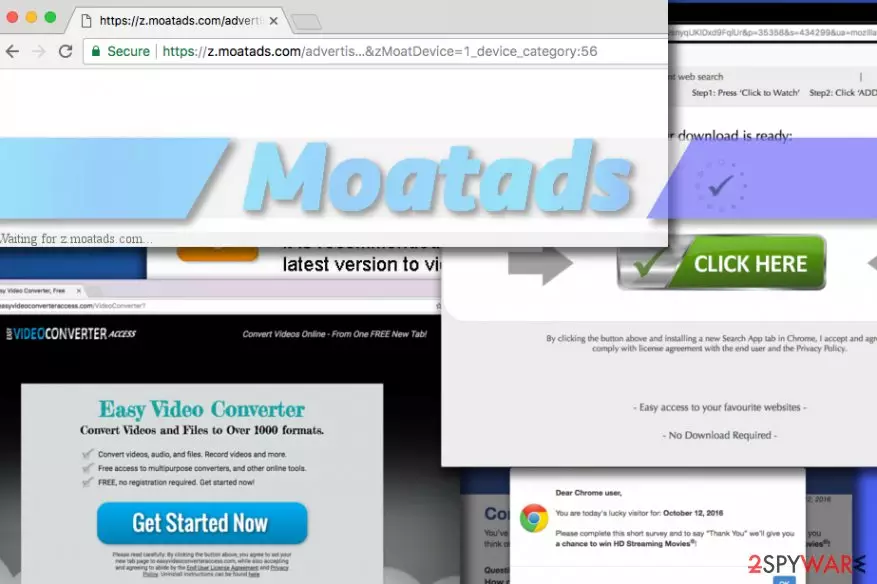
Moatads is a highly annoying application that belongs to the adware category. Just like any other program of this type, it delivers continuous advertisements by opening them in a new window or in a new tab. Additionally, it causes redirects to subdomains such as Z.moatads.com,[1] px.moatads.com, v4.moatads.com, js.moatads.com, and mb.moatads.com virus. The described domains can be filled with different ads that are seeking the only thing – to trick you into visiting specific websites, installing questionable programs or even revealing your personal information while trying to win invented prizes. Moatads malware can serve tons of annoying ads without stopping, and the only way to get rid of them is to delete the adware virus from your computer.
| Name | Moatads |
|---|---|
| Type | Adware |
| Affected web browsers | Chrome, Safari, Firefox, IE, Opera, etc. |
| Versions |
|
| Main issues | Displays continuous ads on the user's browser |
| Main dangers | Being redirected to an infected website |
| Prevention tips | Using safe configuration such as Custom/Advanced |
| Elimination | To get rid of this malware, download and run FortectIntego. |
According to 2-Spyware experts, this potentially unwanted program is associated with the branch of clingy computer viruses called browser hijackers[2] and potentially unwanted programs[3]. These viruses infiltrate computers stealthily and start changing the browser’s settings without users' knowledge or permission. Therefore, you should probably not take long to notice the infiltration of this PUP because moatads.com domain quickly starts emerging in your browser's URL bar.
Internet Explorer is considered to be the most affected web browser[4], but this hijacker has also been spotted on Mozilla, Chrome, and Safari as well. What is also surprising that the suspicious program targets not only Windows users – people are already complaining about Moatads Mac version as well. The majority of complaints reach virusler.info.tr experts as the problem mainly bothers Turkish-speaking computer users.[5]
When having this adware program on board, you can start suffering from Z.moatads.com redirect issue constantly. It reappears once you open your browser and enter the URL you prefer. However, they are just the beginning of problems if the computer is infected. To prevent unpleasant activities on your computer, security experts advise users to get rid of the adware from the system.
Moatads can also include some features of an adware-type program and inject intrusive sponsored ads and links to your visited websites. We don't recommend clicking these ads and links because they can end up on highly suspicious websites used to promote malicious programs. Often, malware developers inject spyware, trojans, or ransomware virus straight into secondary downloading links and similar locations.

On top of that, it can track your browsing with the help of cookies or Javascript. Once it collects the right amount of data, it sends it to its developers who are working on filling your searches with eye-catching ads and links. To avoid all these shady activities from taking place on your device, we recommend you to remove Moatads virus as soon as possible. A quick removal can be achieved with reputable antivirus tools, such as FortectIntego.
Moatads can infiltrate any of the popular browsers, so Internet Explorer, Mozilla Firefox, and Chrome users have to think twice about their computer protection. However, if you are already infected with this virus, there are a few things you should also keep in mind if you do not want to inflict additional damage to your computer.
- First of all, you should not click on any ads you see that are labeled “[virus name] Ads,” “Brought to you by [virus name]” or “Ads by [virus name].” These advertisements are usually linked to unreliable sites, so, regardless of how legitimate they might look, interacting with them is not safe.
- Stay away from ads provided to you by px.moatads or other subdomains associated with the described ad-supported program. In addition, some users have shared their experience in online forums, stating that js.moatads.com virus started bothering them lately. Do not forget that unwanted browser redirects and ads appearing on the screen are warning signs asking for an immediate computer scan.
- It is not uncommon for this virus to generate fake support service ads, software update ads and similar pop-up notifications[6] which use social engineering techniques, such as scare tactics, to trick people into downloading or purchasing unnecessary or infectious programs.
- Needless to say, Moatads removal is essential to keep your computer’s system stable and protected.

Find out how the adware reaches your computer system
Before introducing you to the methods which you can apply for fixing redirects to such domains as https://z.moatads.com/advertis…&zMoatDevice=1_device_category:56, we want to inform you about the steps you can take to protect your computer from such viruses. Maybe you have already read about them in some tech-related website[7] but we must repeat them to save your computer.
- First and foremost, you should obtain a reputable antivirus system to shield your computer from the potential cyber attacks. Do not forget to update your antivirus to its latest version and run frequent system scans.
- Secondly, if you have taken the software installation process merely as an obligatory procedure before being able to enjoy your new programs, you should start changing your attitude. You should know that the hijack can be initiated with the help of the software packages.
- Typically, unreliable developers distribute their PUPs in a bundle with other popular applications. The majority of such software packages are not adequately disclosed to the user.
- The only way to manage these optional installs is through advanced installation settings, which list all the included programs and gives you an option to cancel their installation individually.
- This way, you can decide for yourself, what applications should be installed and which ones are better to be kept at bay.
Block Moatads ads with ease
You can remove Moatads virus from your computer manually, by following a detailed removal guide provided below this article. Potentially unwanted programs come in very distinct forms – some of them are less dangerous while infection with others can result in a completely ruined PC.
Therefore, it is important to remove them from the computer without a delay. The guidelines provided by our team will guide you through the removal process and help you to kill the unwanted ad-supported program with ease. Furthermore, you can get rid of Moatads notifications from web browsers by performing these guidelines:
- Launch your browser and locate the menu (it will be the three dots in the upper right corner of your browser window).
- Enter Settings and opt for the Advanced feature.
- Locate Site Settings which is placed under Privacy & Security.
- In the Notifications section, remove Moatads from the list to block all incoming notifications.
However, if manually deleting viruses sounds intimidating to you, we recommend using automatic tools, such as anti-malware or antivirus software to help you with the process. The major benefit of such programs is that they will not only take care of the Moatads removal quickly and safely but will also protect you from similar attacks in the future.
Uninstall from Windows
Uninstall from Windows 10/8:
- Type Control Panel into the Windows search box and open the result.
- Under Programs, select Uninstall a program.


Uninstall from Windows 7/XP:
- Click on Windows Start > Control Panel (Windows XP users should click on Add/Remove Programs).
- In Control Panel, select Programs > Uninstall a program.


Remove the unwanted program:
- In the Programs and Features window, look for any recently installed suspicious entries, select them, and click Uninstall.
- If User Account Control appears, click Yes to confirm, then complete the removal.


Delete from macOS
Remove the unwanted application:
- From the menu bar, select Go > Applications.
- In the Applications folder, look for any suspicious entries, then drag them to Trash (or right-click and pick Move to Trash).


Delete leftover files and folders:
- Select Go > Go to Folder.
- Enter /Library/Application Support and remove any suspicious folders related to the unwanted program.
- Repeat the same check in the /Library/LaunchAgents and /Library/LaunchDaemons folders, deleting any suspicious entries.

- Finally, empty the Trash to permanently remove the leftovers.

Reset Internet Explorer
Remove dangerous add-ons:
- Open Internet Explorer, click on the Gear icon (IE menu) on the top-right corner of the browser
- Pick Manage Add-ons.
- You will see a Manage Add-ons window. Here, look for suspicious plugins. Click on these entries and select Disable.


Change your homepage if it was altered:
- Open IE and click on the Gear icon.
- Select Internet Options.
- In the General tab, delete the Home page address and replace it by your preferred one (for example, Google.com).
- Click Apply and then select OK.


Delete temporary files:
- Press on the Gear icon and select Internet Options.
- Under Browsing history, click Delete...
- Select relevant fields and press Delete.


Reset Internet Explorer:
- Click on Gear icon > Internet options and select Advanced tab.
- Select Reset.
- In the new window, check Delete personal settings and select Reset.


Remove from Microsoft Edge
Delete unwanted extensions from MS Edge:
- Select Menu (three horizontal dots at the top-right of the browser window) and pick Extensions.
- From the list, pick the extension and click on the Gear icon.
- Click Remove.


Clear cookies and other browser data:
- Click on the Menu (three horizontal dots at the top-right of the browser window) and select Settings > Privacy, search, and services..
- Under Clear browsing data, pick Choose what to clear.
- Select Cookies and other site data and Cached images and files. (apart from passwords, although you might want to include Media licenses as well, if applicable) and click on Clear.


Restore new tab and homepage settings:
- Click the menu icon and choose Settings.
- Then find On startup section.
- Click Remove next to any suspicious startup page.
Reset MS Edge if the above steps did not work:
- Press on Ctrl + Shift + Esc to open Task Manager.
- Click on More details arrow at the bottom of the window.
- Select Details tab.
- Now scroll down and locate every entry with Microsoft Edge name in it. Right-click on each of them and select End Task to stop MS Edge from running.


Instructions for Chromium-based Edge
Delete extensions from MS Edge (Chromium):
- Open Edge and click select Settings > Extensions.
- Delete unwanted extensions by clicking Remove.


Clear cache and site data:
- Click on Menu and go to Settings.
- Select Privacy, search and services.
- Under Clear browsing data, pick Choose what to clear.
- Under Time range, pick All time.
- Select Clear now.


Reset Chromium-based MS Edge:
- Click on Menu and select Settings.
- On the left side, pick Reset settings.
- Select Restore settings to their default values.
- Confirm with Reset.
- This will disable extensions and reset startup pages but will not delete bookmarks, saved passwords, or browsing history.


Remove from Mozilla Firefox (FF)
Remove dangerous extensions:
- Open Mozilla Firefox browser and click on the Menu (three horizontal lines at the top-right of the window).
- Select Add-ons.
- In here, select the unwanted extension and click Remove.


Reset the homepage:
- Click three horizontal lines at the top right corner to open the menu.
- Choose Settings.
- Under Home, set your preferred homepage and new tab settings.
Clear cookies and site data:
- Click Menu and pick Settings.
- Go to Privacy & Security section.
- Scroll down to locate Cookies and Site Data.
- Click on Clear Data...
- Select Cookies and Site Data and Temporary cached files and pages, then click Clear.


Reset Mozilla Firefox
If clearing the browser as explained above did not help, reset Mozilla Firefox:
- Open Mozilla Firefox browser and click the Menu.
- Go to Help and then choose Troubleshooting Information.

- Under Give Firefox a tune up section, click on Refresh Firefox...
- Once the pop-up shows up, confirm the action by pressing on Refresh Firefox.



Remove from Google Chrome
Delete malicious extensions from Google Chrome:
- Open Google Chrome, click on the Menu (three vertical dots at the top-right corner) and select More tools > Extensions.
- In the newly opened window, you will see all the installed extensions. Uninstall all suspicious extensions related to the unwanted program by clicking Remove.


Clear cache and web data from Chrome:
- Click on Menu and pick Settings.
- Under Privacy and security, select Clear browsing data.
- Select Browsing history, Cookies and other site data, as well as Cached images and files.
- Click Clear data.


Change your homepage:
- Click menu and choose Settings.
- Look for a suspicious site in the On startup section.
- Click on Open a specific or set of pages and click on three dots to find the Remove option.
Reset Google Chrome:
If the previous methods did not help you, reset Google Chrome to eliminate all the unwanted components:
- Click on Menu and select Settings.
- In the Settings, scroll down and click Advanced.
- Scroll down and locate Reset and clean up section.
- Now click Restore settings to their original defaults.
- Confirm with Reset settings.


Delete from Safari
Remove dangerous extensions:
- Open Safari, click Safari in the menu at the top-left of the screen, and select Preferences.
- Go to the Extensions tab, look for any suspicious entries, and click Uninstall to remove them.


Clear history and website data:
- Click Safari in the menu and pick Clear History.
- Set Clear to all history and confirm with Clear History.


Reset Safari:
- Click Safari in the menu and select Preferences > Advanced.
- Enable Show Develop menu in menu bar.
- From the menu bar, click Develop and select Empty Caches.


Did this guide help?
5 comments
Matrix WInnee
Moatads are dangerous!! Delete it at one if you see it on your computer!!
MoatadsReply
Already did :) Spyhunter did the job :)
Raul145
The manual removal works just fine too. If you have time, of course
JksOnme
Nice article ! Thanks for the information
anuja
Hey, I was reading your article and I just wanted to say thank you for putting out such excellent content.
There’s so much nonsense on the internet these days its hard to find anything worthwhile. I showed this to my husband since this is the kind of thing he tends to read online.
Thanks for the article and great ideas