

All you need to know about Smartsputnik.ru
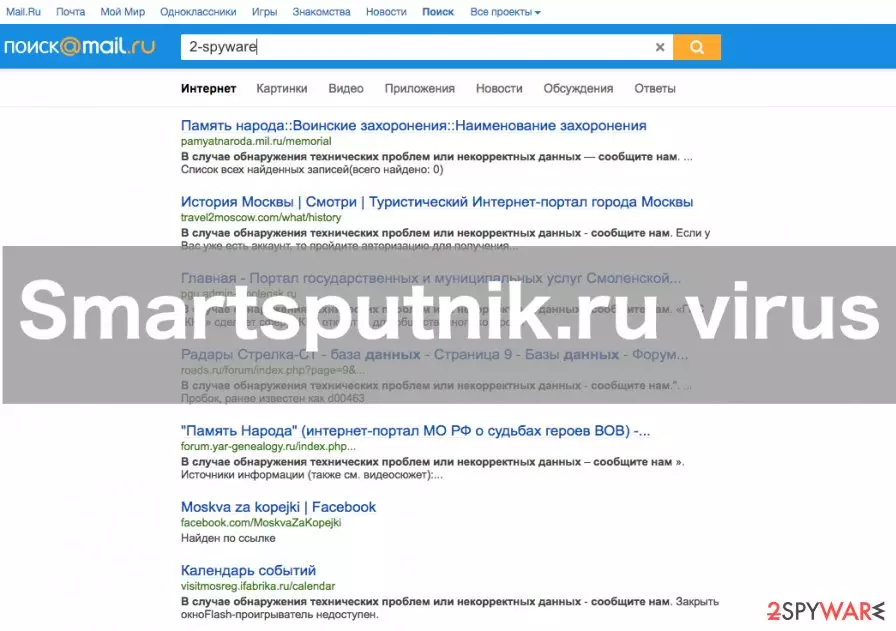
Smartsputnik.ru virus is a browser hijacker-type program which can infect all the popular browsers such as Google, Chrome, Mozilla Firefox, and Internet Explorer. Immediately after being installed, this virus may set its own search engine (which redirects to http://go.mail.ru/search?q=,&gp=789110&frc=789110) as your default search provider without your permission. This rogue software causes issues for the user with each browsing session, thus, if your computer got infected, please remove Smartsputnik.ru as soon as possible. You can do that by using reputable anti-malware tools, for instance, FortectIntego.
The users who have been struggling with the hijack, report that this virus takes over the control of the browsers settings stealthily and proceeds with making changes without asking permission. This software sets smartsputnik.ru as a default search engine and homepage and each time the user attempts to connect to the Internet using some regular browsers, they are redirected to smartsputnik.ru. Even if the settings are restored, the virus can easily change the settings back again. What is more, it is not uncommon to hear about the redirect problem as well. The users complain about being sent to unknown and potentially dangerous websites after clicking on the search results generated by this suspicious search engine. Unfortunately, our experts have found that these sites often contain a variety of spyware or malware viruses. Besides redirecting the user to unsafe websites, this virus may also flood the browser with unwanted ads or download unnecessary toolbars without your knowledge or permission.
In addition to this, Smartsputnik.ru also can be used to gather the NPII (non-personally identifiable information), such as search queries, most visited websites, hardware and software data on the computer. This data, later on, can be shared with unreliable third parties and used to create even more attractive user-focused ads. Also, the information may be used to carry out scams or any other illegal activities. Thus, if you notice suspicious occurrences while opening the browser, such as the unusual default page, unknown toolbars, highlighted hyperlinks instead of text or numbers, constant advertisements or any similar issues, this might be the warning signs that your computer is infected with an adware virus. In this case, you should either scan your system with an antivirus utility or take care of the virus manually, by following Smartsputnik.ru removal instructions provided at the end of this article. Please note that it is not advisable to use the suspicious toolbars or to interact with the occurring ads because you may easily be redirected to potentially harmful websites and, as a result of malware infection, damage your computer irreversibly.
How did Smartsputnik.ru get into my computer?
Usually Smartsputnik.ru is installed silently bundled with other free software, which is downloaded from unsafe file sharing websites. Most of the freeware is usually filled with potentially unwanted programs and other suspicious software, as it allows the supposedly free programs to be monetised. To avoid infiltrating your computer, you should always be very attentive with the new software installation. We strongly advise you to choose “Custom” or “Advanced” installation settings, because most of the PUP’s (potentially unwanted programs) are embedded within these settings. If you see any suspicious optional software, you should never install it to your computer. Instead, you should uncheck the suggested optional installs and additional options before installing the chosen software.
Easy Smartsputnik.ru removal from your computer guide
You can remove this virus manually or automatically, using the anti-malware software. The first, manual virus removal option is recommended to the users already accustomed to manual virus elimination since the less experienced users may find removal rather difficult. Besides, there is a risk that some of the infected files will remain on your computer by simply accident. Thus, we advise you choose using the anti-malware software. Anti-malware software not only will ensure that Smartsputnik.ru and all the affected data is removed from the computer, but it will also protect your computer from further hijacks and other threats. All you need to do is to update this software regularly, as the threats evolve every day and the anti-malware software has to be up to date to be effective.
Uninstall from Windows
Uninstall from Windows 10/8:
- Type Control Panel into the Windows search box and open the result.
- Under Programs, select Uninstall a program.


Uninstall from Windows 7/XP:
- Click on Windows Start > Control Panel (Windows XP users should click on Add/Remove Programs).
- In Control Panel, select Programs > Uninstall a program.


Remove the unwanted program:
- In the Programs and Features window, look for any recently installed suspicious entries, select them, and click Uninstall.
- If User Account Control appears, click Yes to confirm, then complete the removal.


Delete from macOS
Remove the unwanted application:
- From the menu bar, select Go > Applications.
- In the Applications folder, look for any suspicious entries, then drag them to Trash (or right-click and pick Move to Trash).


Delete leftover files and folders:
- Select Go > Go to Folder.
- Enter /Library/Application Support and remove any suspicious folders related to the unwanted program.
- Repeat the same check in the /Library/LaunchAgents and /Library/LaunchDaemons folders, deleting any suspicious entries.

- Finally, empty the Trash to permanently remove the leftovers.

Remove from Microsoft Edge
Delete unwanted extensions from MS Edge:
- Select Menu (three horizontal dots at the top-right of the browser window) and pick Extensions.
- From the list, pick the extension and click on the Gear icon.
- Click Remove.


Clear cookies and other browser data:
- Click on the Menu (three horizontal dots at the top-right of the browser window) and select Settings > Privacy, search, and services..
- Under Clear browsing data, pick Choose what to clear.
- Select Cookies and other site data and Cached images and files. (apart from passwords, although you might want to include Media licenses as well, if applicable) and click on Clear.


Restore new tab and homepage settings:
- Click the menu icon and choose Settings.
- Then find On startup section.
- Click Remove next to any suspicious startup page.
Reset MS Edge if the above steps did not work:
- Press on Ctrl + Shift + Esc to open Task Manager.
- Click on More details arrow at the bottom of the window.
- Select Details tab.
- Now scroll down and locate every entry with Microsoft Edge name in it. Right-click on each of them and select End Task to stop MS Edge from running.


Instructions for Chromium-based Edge
Delete extensions from MS Edge (Chromium):
- Open Edge and click select Settings > Extensions.
- Delete unwanted extensions by clicking Remove.


Clear cache and site data:
- Click on Menu and go to Settings.
- Select Privacy, search and services.
- Under Clear browsing data, pick Choose what to clear.
- Under Time range, pick All time.
- Select Clear now.


Reset Chromium-based MS Edge:
- Click on Menu and select Settings.
- On the left side, pick Reset settings.
- Select Restore settings to their default values.
- Confirm with Reset.
- This will disable extensions and reset startup pages but will not delete bookmarks, saved passwords, or browsing history.


Remove from Mozilla Firefox (FF)
Remove dangerous extensions:
- Open Mozilla Firefox browser and click on the Menu (three horizontal lines at the top-right of the window).
- Select Add-ons.
- In here, select the unwanted extension and click Remove.


Reset the homepage:
- Click three horizontal lines at the top right corner to open the menu.
- Choose Settings.
- Under Home, set your preferred homepage and new tab settings.
Clear cookies and site data:
- Click Menu and pick Settings.
- Go to Privacy & Security section.
- Scroll down to locate Cookies and Site Data.
- Click on Clear Data...
- Select Cookies and Site Data and Temporary cached files and pages, then click Clear.


Reset Mozilla Firefox
If clearing the browser as explained above did not help, reset Mozilla Firefox:
- Open Mozilla Firefox browser and click the Menu.
- Go to Help and then choose Troubleshooting Information.

- Under Give Firefox a tune up section, click on Refresh Firefox...
- Once the pop-up shows up, confirm the action by pressing on Refresh Firefox.



Remove from Google Chrome
Delete malicious extensions from Google Chrome:
- Open Google Chrome, click on the Menu (three vertical dots at the top-right corner) and select More tools > Extensions.
- In the newly opened window, you will see all the installed extensions. Uninstall all suspicious extensions related to the unwanted program by clicking Remove.


Clear cache and web data from Chrome:
- Click on Menu and pick Settings.
- Under Privacy and security, select Clear browsing data.
- Select Browsing history, Cookies and other site data, as well as Cached images and files.
- Click Clear data.


Change your homepage:
- Click menu and choose Settings.
- Look for a suspicious site in the On startup section.
- Click on Open a specific or set of pages and click on three dots to find the Remove option.
Reset Google Chrome:
If the previous methods did not help you, reset Google Chrome to eliminate all the unwanted components:
- Click on Menu and select Settings.
- In the Settings, scroll down and click Advanced.
- Scroll down and locate Reset and clean up section.
- Now click Restore settings to their original defaults.
- Confirm with Reset settings.


Delete from Safari
Remove dangerous extensions:
- Open Safari, click Safari in the menu at the top-left of the screen, and select Preferences.
- Go to the Extensions tab, look for any suspicious entries, and click Uninstall to remove them.


Clear history and website data:
- Click Safari in the menu and pick Clear History.
- Set Clear to all history and confirm with Clear History.


Reset Safari:
- Click Safari in the menu and select Preferences > Advanced.
- Enable Show Develop menu in menu bar.
- From the menu bar, click Develop and select Empty Caches.


Did this guide help?
3 comments
Brianne
Funny thing is that I found this site as my homepage too. I have no idea what does it say
Varrris122
FINALLY, DELETED!!! Thank you for the tutorial!!!!
KobbY9
Same here! I hate browser hijackers cause u never know when one is gonna strike