

Auto Purge extension for Chrome may expose users to potentially dangerous third-party sites
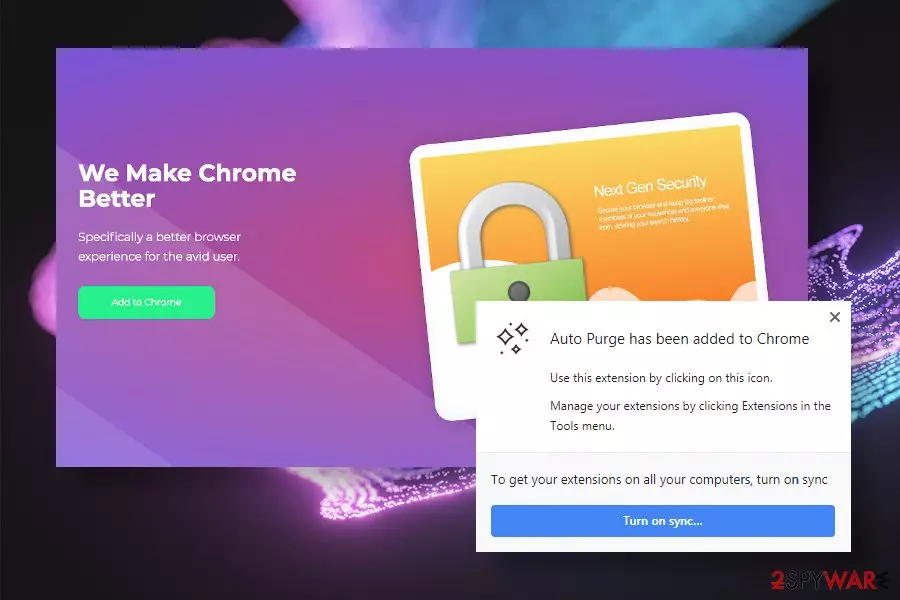
Auto Purge extension for Chrome is a tricky third-party tool that promises potential users many useful features, while in reality, it can hardly fulfill any of them. Prevent tracking of search history, stop advertisements from chasing you, and cleaning Chrome's history automatically are the three things that this tool promises to do. However, do not fall for believing it blindly because this extension has recently been classified as a browser hijacker and potentially unwanted application (PUA) due to intolerable activities.
Based on the NoVirus.uk[1] researchers, Auto Purge has been spreading in disguise with freeware as a pre-selected component (hidden under Quick installation setup). Consequently, it reached thousands of computers without users' authorization. Its primary goal – to set sponsored Bing search instead of a default search engine, replace start page, new tab window, and other Chrome settings to make people see the content of its sponsors and take control over users' web traffic.
Thus, even though this dubious extension promises its users to disable ads and improve their online privacy, it disables original ads and replaces them with the content of its sponsors, promotes questionable third-party websites, and injects its own cookies to monitor users' web browsing activities. Therefore, it's advisable to remove Auto Purge extension from Chrome without a delay.
| Name | Auto Purge |
| Developer | Responsible LLC, registered by GoDaddy.com LLC |
| Classification | Browser hijacker, Potentially Unwanted Program (PUP) |
| Compatibility | The extension has been developed for Chrome. Can settle down on Windows and Macs |
| Distribution | Direct download from the official website. Direct download from Chrome Web Store. Indirect download via freeware bundles |
| Symptoms | If the user downloads the extension, all he or she notices – abnormal web browser's behavior: – search.bing.com is set instead of a default search engine; – start page and new tab windows altered without permission; – web browser regularly reroutes to suspicious third-party websites; – intrusive ads and pop-ups cover the original content on most of the visited websites; – tracking cookies are installed for ongoing monitoring of browsing activities; |
| Danger level | Relatively low. The extension is not capable of causing direct harm to the system. The only risk that it causes – exposure to dangerous malware-infected sites |
| Removal options | Browser hijackers target to attack web browsers. Thus, it's a must to restore the web browser's settings in the first place. After that, eliminate PUPs from the machine. Manual removal is possible, however, you can kill two birds with one stone by running a scan with a robust anti-malware tool |
| Recovery | Each unwanted application leaves its footprint on the system. Thus, experts recommend taking care of the system and regularly optimize it with FortectIntego software. |
The Auto Purge extension for Chrome promises to disable third-party content, including intrusive advertising and cookies that disrupt web browsing activities and interfere the privacy. The problem is that the extension is sponsored by third parties, meaning that it is programmed to show the content of its sponsored for an agreed commission fee. Here's an excerpt from the EULA[2] of the extension:
The Services may contain links to other Internet websites and services owned by third parties. Your use of each of those websites and services is subject to the conditions, if any, that each of those websites has posted. You acknowledge and agree that we have no control over websites that are not ours, and we are not responsible for any changes to and/or content on them. Our inclusion of any third-party Content or a link to a third-party website or service is not an endorsement of such third-party content or third-party site. […] Any questions, complaints, or claims related to any product or service should be directed to the appropriate third party.
The Auto Purge redirects should not be tolerated because no one knows what parties initiate them and what content is positioned behind. In the worst-case scenario, you may get exposed to phishing sites where you may be offered to participate in prize giveaways in exchange for your personal details (first name, last name, telephone number, e-mail address, home address, etc.). In addition to that, you can also be tricked into visiting malware-infected websites that spread malware like Auto Refresh, Dirty Tinder, CookieMiner, and others.

Apart from rather aggressive advertising, Auto Purge removal is recommended to improve privacy security. The extension is represented as a tool that protects privacy. On the one hand, it blocks third-party cookies. On the other hand, it enables its own cookies and web beacons to record personally non-identifiable information (PII) and then shares it with the sponsors for marketing improvements.
- User IP Address;
- Search Term;
- Ad clicked, Organic/Web results clicked & Search Engine Overridden;
- User-Agent.
Therefore, we strongly recommend you to remove Auto Purge virus from your machine. It does not have a real value, except ambiguous activities. Luckily, it's removal is not too difficult – a manageable task for less experienced PC users. You can select either manual or automatic removal option.

Manual Auto Purge removal should be initiated in stages, i.e. PUP removal, extension removal, and full system optimization. Users can find manual elimination guidance and recommended anti-malware tools at the end of this article. Additionally, we recommend not leaving the system caches with outdated registry entries. This task can be initiated by FortectIntego optimizer.
Make a research on any freeware before installing it
This Chrome extension has the official download website where it is promoted in a rather appealing manner. The download costs nothing and, we believe, that people who accidentally land on this site may decide to tithe this browser-based a try. However, direct downloads are very rare.
Usually, PUPs like this are downloaded in bundled[3], which is why users often don't even realize that they have installed unwanted applications. The so-called “bundling” is a method known for ages, though for the last ten years it has been misused for distributing PUPs and other malware.

That's why it's so important to download freeware purposely and deliberately. Choose official websites if possible, download freeware by picking up the Advanced/Custom installation technique, reject the installation of additional components (add-ons, toolbars, plug-ins, etc.).
Ways of getting rid of Auto Purge malware
Remember that Auto Purge virus is capable of displaying third-party content, initiated ongoing web browser's redirects, and collecting browsing-related information behind your back. Even though it cannot be called a virus, the content it returns can be misleading or even dangerous.

Therefore, we recommend people to initiate a full Auto Purge removal as soon as it starts showing signs of presence. The easiest way to do that is to run a full scan with a robust anti-malware tool. Nevertheless, the web browser's settings will have to be restored manually.
When you remove Auto Purge-related malware from the system, you should open the web browser and delete the extension manually. First of all, disable the extension and then delete the search engine. At best, restore the default Chrome's settings.
Uninstall from Windows
Uninstall from Windows 10/8:
- Type Control Panel into the Windows search box and open the result.
- Under Programs, select Uninstall a program.


Uninstall from Windows 7/XP:
- Click on Windows Start > Control Panel (Windows XP users should click on Add/Remove Programs).
- In Control Panel, select Programs > Uninstall a program.


Remove the unwanted program:
- In the Programs and Features window, look for any recently installed suspicious entries, select them, and click Uninstall.
- If User Account Control appears, click Yes to confirm, then complete the removal.


Delete from macOS
Remove the unwanted application:
- From the menu bar, select Go > Applications.
- In the Applications folder, look for any suspicious entries, then drag them to Trash (or right-click and pick Move to Trash).


Delete leftover files and folders:
- Select Go > Go to Folder.
- Enter /Library/Application Support and remove any suspicious folders related to the unwanted program.
- Repeat the same check in the /Library/LaunchAgents and /Library/LaunchDaemons folders, deleting any suspicious entries.

- Finally, empty the Trash to permanently remove the leftovers.

Reset Internet Explorer
Remove dangerous add-ons:
- Open Internet Explorer, click on the Gear icon (IE menu) on the top-right corner of the browser
- Pick Manage Add-ons.
- You will see a Manage Add-ons window. Here, look for suspicious plugins. Click on these entries and select Disable.


Change your homepage if it was altered:
- Open IE and click on the Gear icon.
- Select Internet Options.
- In the General tab, delete the Home page address and replace it by your preferred one (for example, Google.com).
- Click Apply and then select OK.


Delete temporary files:
- Press on the Gear icon and select Internet Options.
- Under Browsing history, click Delete...
- Select relevant fields and press Delete.


Reset Internet Explorer:
- Click on Gear icon > Internet options and select Advanced tab.
- Select Reset.
- In the new window, check Delete personal settings and select Reset.


Remove from Microsoft Edge
Delete unwanted extensions from MS Edge:
- Select Menu (three horizontal dots at the top-right of the browser window) and pick Extensions.
- From the list, pick the extension and click on the Gear icon.
- Click Remove.


Clear cookies and other browser data:
- Click on the Menu (three horizontal dots at the top-right of the browser window) and select Settings > Privacy, search, and services..
- Under Clear browsing data, pick Choose what to clear.
- Select Cookies and other site data and Cached images and files. (apart from passwords, although you might want to include Media licenses as well, if applicable) and click on Clear.


Restore new tab and homepage settings:
- Click the menu icon and choose Settings.
- Then find On startup section.
- Click Remove next to any suspicious startup page.
Reset MS Edge if the above steps did not work:
- Press on Ctrl + Shift + Esc to open Task Manager.
- Click on More details arrow at the bottom of the window.
- Select Details tab.
- Now scroll down and locate every entry with Microsoft Edge name in it. Right-click on each of them and select End Task to stop MS Edge from running.


Instructions for Chromium-based Edge
Delete extensions from MS Edge (Chromium):
- Open Edge and click select Settings > Extensions.
- Delete unwanted extensions by clicking Remove.


Clear cache and site data:
- Click on Menu and go to Settings.
- Select Privacy, search and services.
- Under Clear browsing data, pick Choose what to clear.
- Under Time range, pick All time.
- Select Clear now.


Reset Chromium-based MS Edge:
- Click on Menu and select Settings.
- On the left side, pick Reset settings.
- Select Restore settings to their default values.
- Confirm with Reset.
- This will disable extensions and reset startup pages but will not delete bookmarks, saved passwords, or browsing history.


Remove from Mozilla Firefox (FF)
Remove dangerous extensions:
- Open Mozilla Firefox browser and click on the Menu (three horizontal lines at the top-right of the window).
- Select Add-ons.
- In here, select the unwanted extension and click Remove.


Reset the homepage:
- Click three horizontal lines at the top right corner to open the menu.
- Choose Settings.
- Under Home, set your preferred homepage and new tab settings.
Clear cookies and site data:
- Click Menu and pick Settings.
- Go to Privacy & Security section.
- Scroll down to locate Cookies and Site Data.
- Click on Clear Data...
- Select Cookies and Site Data and Temporary cached files and pages, then click Clear.


Reset Mozilla Firefox
If clearing the browser as explained above did not help, reset Mozilla Firefox:
- Open Mozilla Firefox browser and click the Menu.
- Go to Help and then choose Troubleshooting Information.

- Under Give Firefox a tune up section, click on Refresh Firefox...
- Once the pop-up shows up, confirm the action by pressing on Refresh Firefox.



Remove from Google Chrome
Delete malicious extensions from Google Chrome:
- Open Google Chrome, click on the Menu (three vertical dots at the top-right corner) and select More tools > Extensions.
- In the newly opened window, you will see all the installed extensions. Uninstall all suspicious extensions related to the unwanted program by clicking Remove.


Clear cache and web data from Chrome:
- Click on Menu and pick Settings.
- Under Privacy and security, select Clear browsing data.
- Select Browsing history, Cookies and other site data, as well as Cached images and files.
- Click Clear data.


Change your homepage:
- Click menu and choose Settings.
- Look for a suspicious site in the On startup section.
- Click on Open a specific or set of pages and click on three dots to find the Remove option.
Reset Google Chrome:
If the previous methods did not help you, reset Google Chrome to eliminate all the unwanted components:
- Click on Menu and select Settings.
- In the Settings, scroll down and click Advanced.
- Scroll down and locate Reset and clean up section.
- Now click Restore settings to their original defaults.
- Confirm with Reset settings.


Delete from Safari
Remove dangerous extensions:
- Open Safari, click Safari in the menu at the top-left of the screen, and select Preferences.
- Go to the Extensions tab, look for any suspicious entries, and click Uninstall to remove them.


Clear history and website data:
- Click Safari in the menu and pick Clear History.
- Set Clear to all history and confirm with Clear History.


Reset Safari:
- Click Safari in the menu and select Preferences > Advanced.
- Enable Show Develop menu in menu bar.
- From the menu bar, click Develop and select Empty Caches.


Did this guide help?
Be the first to comment