

TzarMedia – doubtful project used for getting victims’ credit card information
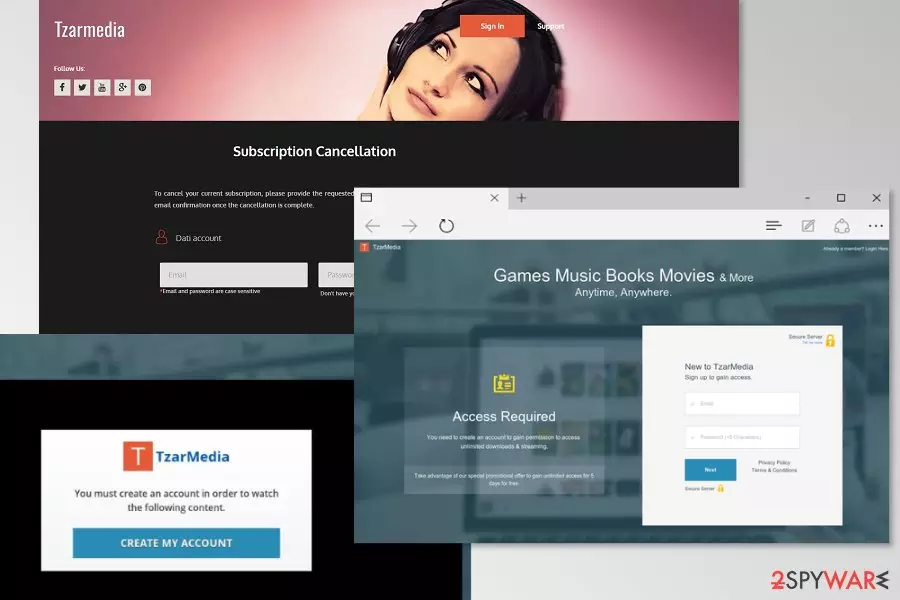
TzarMedia is a fraudulent video streaming site offering videos, movies, music, e-books, and games. Users can either use this content online or download it to their device. However, no matter how safe it looks, users and security experts have reported[1] that this service is scam used for tricking user’s into getting a subscription.
Currently, TzarMedia.com website is not available. However, it is assumed that, due to all negative reviews and feedback, its developers just changed the name of their fake site. They seem to be related or changed the name to geeker.com.
TzarMedia scam offers users subscribing for a free trial to test the service and make sure that it meets their expectations. In order to do that, they are asked to add their credit card information. However, you should be very careful with websites and services asking you to do so because your information can be used to initiate illegal money transfers from your account and similar crimes!
Once a certain amount of time passes, users are asked to obtain one of the subscription plans or cancel the membership of TzarMedia. Some users claim that they signed up for $1.95 membership. However, checking credit card’s balance was shocking – the subscription cost around $30.
Cancellation of TzarMedia services is not simple too. Scammers ask to pay $1 for “Express Online Cancellation service.” Indeed, this scheme doesn’t feel right. The purpose of a free trial is to try services for free and stop using them if not needed. Thus, it's a clear identification of scam.
Additionally, victims of TzarMedia scam report that even after paying the unfair cancellation fee, they were still charged for the subscription. However, this service cost differently for people. While ones were charged for a few dollars, other had to pay $10, $15 or even more for a service they do not use.
Therefore, people who signed in to this bogus streaming website should check their bank statements immediately. If you see transactions to TzarMedia or Geeker, you should contact your bank and report about this issue. Only the bank can block this activity.
People report that contacting TzarMedia support did not help. Either no one picked up the phone or responded to emails, or the promise to stop membership or/and to refund the money was not kept.
Therefore, in order to remove TzarMedia subscription, you have to contact your bank directly. Nevertheless, you won’t be able to get back stolen money; your bank will protect you from further money loss. We also recommend running a full system scan with updated anti-spyware, like FortectIntego to make sure that you system is free of tracking software and similar potentially malicious programs.
Adware programs might promote non-existent TzarMedia or Geeker services
This fraudulent website was also actively promoted with the help of potentially unwanted programs (PUPs). Scammers took advantage of adware in order to display pop-ups, banners and other types of ads promoting movies or games that were said to be available on TzarMedia.com.
However, none of the TzarMedia ads said the truth. This site does not allow watching any promised movies or access other content. The purpose of this phishing website is to get user’s credit card information and silently steal their money.
Therefore, if you are frequently being redirected to a scam website or see ads offering to try its services, you should scan the device with anti-malware/anti-spyware. Software like FortectIntego can quickly perform automatic TzarMedia removal.

Tips to spot and avoid scam
Cyber security specialists from the zondervirus.nl[2] report that there are many scams similar to TzarMedia. Thus, you have to be vigilant in order to protect your credit card information and identity.
- Always read user reviews before signing into a new video streaming website. If you see negative reviews, you should not use this service.
- If you want to watch videos online, you should use Netflix or other well-known video streaming websites. Indeed, their membership might be a little bit higher. However, these sites offer legitimate and safe services.
- Read Terms and Agreements and Privacy Policy attentively. Of course, these documents are long and might be complicated. However, you have to make sure that your personal information will be used adequately.
- Do not visit shady or potentially dangerous websites. Users report being redirected to TzarMedia.com from websites like filedrive.com. Keep in mind that various file-sharing, video streaming or other questionable reputation websites might trigger redirects to phishing or infected sites. Thus, you should not visit them.
- Install freeware or shareware correctly. Potentially unwanted programs (PUP) that promote TzarMedia can spread bundled with free programs that you can download from the Internet. To avoid their installation, you have to use Advanced/Custom settings instead of Quick/Recommended and opt out all “optional programs” like UrBookDownload.
How to get rid of TzarMedia virus
If you have subscribed to TzarMedia services, you have to cancel your subscription immediately. However, their support might not be helpful. Thus, it’s better to contact your bank and inform about the issue. Your bank should block scammers’ transactions. Next time you should be more careful when typing your credit card details.[3]
In order to remove TzarMedia ads or redirects to this phishing site, you should check the system for the adware infection. Usually, this cyber threat arrives in the form of the browser extension or add-on. However, you should not only uninstall questionable plugins but look up for suspicious components in the system too.
Manual TzarMedia removal guide is given at the end of the article. However, we recommend using reputable anti-malware to clean your PC quicker. PUPs rarely come alone, so security software will clean up all entries that were installed on the computer without your knowledge.
Uninstall from Windows
Uninstall from Windows 10/8:
- Type Control Panel into the Windows search box and open the result.
- Under Programs, select Uninstall a program.


Uninstall from Windows 7/XP:
- Click on Windows Start > Control Panel (Windows XP users should click on Add/Remove Programs).
- In Control Panel, select Programs > Uninstall a program.


Remove the unwanted program:
- In the Programs and Features window, look for any recently installed suspicious entries, select them, and click Uninstall.
- If User Account Control appears, click Yes to confirm, then complete the removal.


Delete from macOS
Remove the unwanted application:
- From the menu bar, select Go > Applications.
- In the Applications folder, look for any suspicious entries, then drag them to Trash (or right-click and pick Move to Trash).


Delete leftover files and folders:
- Select Go > Go to Folder.
- Enter /Library/Application Support and remove any suspicious folders related to the unwanted program.
- Repeat the same check in the /Library/LaunchAgents and /Library/LaunchDaemons folders, deleting any suspicious entries.

- Finally, empty the Trash to permanently remove the leftovers.

Reset Internet Explorer
Remove dangerous add-ons:
- Open Internet Explorer, click on the Gear icon (IE menu) on the top-right corner of the browser
- Pick Manage Add-ons.
- You will see a Manage Add-ons window. Here, look for suspicious plugins. Click on these entries and select Disable.


Change your homepage if it was altered:
- Open IE and click on the Gear icon.
- Select Internet Options.
- In the General tab, delete the Home page address and replace it by your preferred one (for example, Google.com).
- Click Apply and then select OK.


Delete temporary files:
- Press on the Gear icon and select Internet Options.
- Under Browsing history, click Delete...
- Select relevant fields and press Delete.


Reset Internet Explorer:
- Click on Gear icon > Internet options and select Advanced tab.
- Select Reset.
- In the new window, check Delete personal settings and select Reset.


Remove from Microsoft Edge
Delete unwanted extensions from MS Edge:
- Select Menu (three horizontal dots at the top-right of the browser window) and pick Extensions.
- From the list, pick the extension and click on the Gear icon.
- Click Remove.


Clear cookies and other browser data:
- Click on the Menu (three horizontal dots at the top-right of the browser window) and select Settings > Privacy, search, and services..
- Under Clear browsing data, pick Choose what to clear.
- Select Cookies and other site data and Cached images and files. (apart from passwords, although you might want to include Media licenses as well, if applicable) and click on Clear.


Restore new tab and homepage settings:
- Click the menu icon and choose Settings.
- Then find On startup section.
- Click Remove next to any suspicious startup page.
Reset MS Edge if the above steps did not work:
- Press on Ctrl + Shift + Esc to open Task Manager.
- Click on More details arrow at the bottom of the window.
- Select Details tab.
- Now scroll down and locate every entry with Microsoft Edge name in it. Right-click on each of them and select End Task to stop MS Edge from running.


Instructions for Chromium-based Edge
Delete extensions from MS Edge (Chromium):
- Open Edge and click select Settings > Extensions.
- Delete unwanted extensions by clicking Remove.


Clear cache and site data:
- Click on Menu and go to Settings.
- Select Privacy, search and services.
- Under Clear browsing data, pick Choose what to clear.
- Under Time range, pick All time.
- Select Clear now.


Reset Chromium-based MS Edge:
- Click on Menu and select Settings.
- On the left side, pick Reset settings.
- Select Restore settings to their default values.
- Confirm with Reset.
- This will disable extensions and reset startup pages but will not delete bookmarks, saved passwords, or browsing history.


Remove from Mozilla Firefox (FF)
Remove dangerous extensions:
- Open Mozilla Firefox browser and click on the Menu (three horizontal lines at the top-right of the window).
- Select Add-ons.
- In here, select the unwanted extension and click Remove.


Reset the homepage:
- Click three horizontal lines at the top right corner to open the menu.
- Choose Settings.
- Under Home, set your preferred homepage and new tab settings.
Clear cookies and site data:
- Click Menu and pick Settings.
- Go to Privacy & Security section.
- Scroll down to locate Cookies and Site Data.
- Click on Clear Data...
- Select Cookies and Site Data and Temporary cached files and pages, then click Clear.


Reset Mozilla Firefox
If clearing the browser as explained above did not help, reset Mozilla Firefox:
- Open Mozilla Firefox browser and click the Menu.
- Go to Help and then choose Troubleshooting Information.

- Under Give Firefox a tune up section, click on Refresh Firefox...
- Once the pop-up shows up, confirm the action by pressing on Refresh Firefox.



Remove from Google Chrome
Delete malicious extensions from Google Chrome:
- Open Google Chrome, click on the Menu (three vertical dots at the top-right corner) and select More tools > Extensions.
- In the newly opened window, you will see all the installed extensions. Uninstall all suspicious extensions related to the unwanted program by clicking Remove.


Clear cache and web data from Chrome:
- Click on Menu and pick Settings.
- Under Privacy and security, select Clear browsing data.
- Select Browsing history, Cookies and other site data, as well as Cached images and files.
- Click Clear data.


Change your homepage:
- Click menu and choose Settings.
- Look for a suspicious site in the On startup section.
- Click on Open a specific or set of pages and click on three dots to find the Remove option.
Reset Google Chrome:
If the previous methods did not help you, reset Google Chrome to eliminate all the unwanted components:
- Click on Menu and select Settings.
- In the Settings, scroll down and click Advanced.
- Scroll down and locate Reset and clean up section.
- Now click Restore settings to their original defaults.
- Confirm with Reset settings.


Delete from Safari
Remove dangerous extensions:
- Open Safari, click Safari in the menu at the top-left of the screen, and select Preferences.
- Go to the Extensions tab, look for any suspicious entries, and click Uninstall to remove them.


Clear history and website data:
- Click Safari in the menu and pick Clear History.
- Set Clear to all history and confirm with Clear History.


Reset Safari:
- Click Safari in the menu and select Preferences > Advanced.
- Enable Show Develop menu in menu bar.
- From the menu bar, click Develop and select Empty Caches.


Did this guide help?
Be the first to comment