

AioSearch is a search engine that spreads as a browser extension for Google Chrome or other browsers
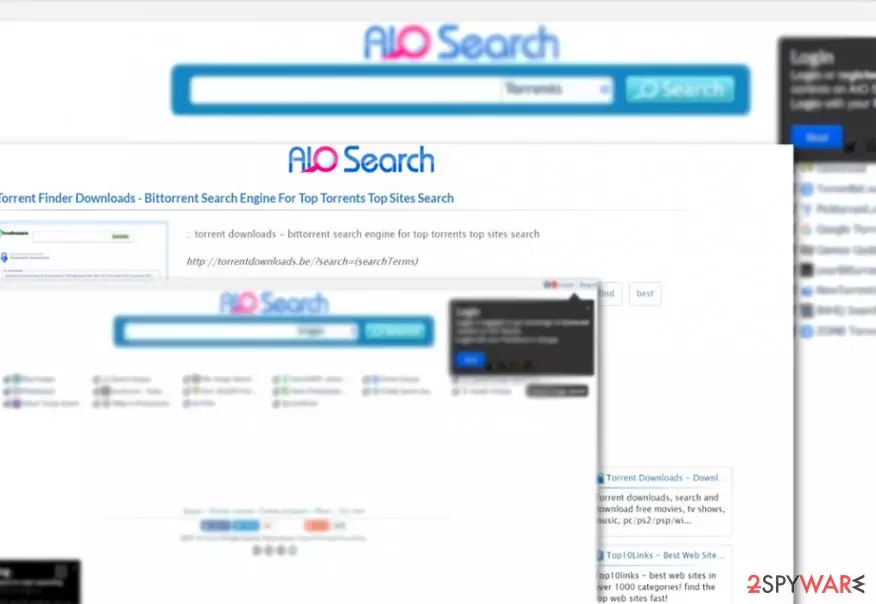
Aiosearch.com is a browser hijacker and a potentially unwanted program that spreads with the help of software bundling or via the insecure sites. The tool allegedly compiles multiple search engines like Google, Bing, Yahoo, DuckDuckGo and others. Another part of the infection, AioSearch, is a browser extension for Google Chrome, Safari, Firefox, or other browsers. The application alters new tab address, homepage (which is filled with links to unsafe torrent sites) and a new tab functionality, displaying alternative search results. Additionally, AIO Search is known to redirect users to suspicious websites and deliver intrusive ads for monetization purposes with the help of pay-per-click[1] scheme.
| Name | Aiosearch.com |
| Extension | AioSearch |
| Type | Browser hijacker |
| Related | Torrent virus |
| Distribution | Software bundling, Google web store, insecure sites |
| Main dangers | Malware installation, personal data leak |
| Elimination | Install anti-malware software or check our manual removal guide below |
| Recovery | Use FortectIntego to recover from AIO Search virus damage |
The primary theme of AioSearch is to provide thousands of links to torrent sites, in addition to legitimate search engines. It is a well-known fact that torrent sites, similarly to porn ones, are not safe to use.[2] They often lack the security precaution used by legitimate website owners and lend out ad space for malicious actors that can abuse software vulnerabilities to inject malware automatically. Therefore, AioSearch hijack should not be ignored, as navigating to unsafe sites can easily lead to malware infection.
Though AioSearch website aims to encompass everything and satisfy even the pickiest users’ needs, such excessive advertising of third parties inevitably leads to security concerns.
It is commendable that the AIO Search domain provides the privacy policy, but it contains several ambiguities. Indeed, it disclaims of collecting personal information, but considering the number of third party services stuffed into the website, your privacy still remains under the question.[3]
Users who value their privacy may proceed to Aiosearch.com removal. You can opt for automatic elimination with the help of automated tools (especially if you surfed through torrent sites) or make use of our manual instructions below. Additionally, we suggest you scan your device with the help of FortectIntego to restore the system to its healthy state.

Quantity surpasses quality
This saying perfectly defines the services promoted by Aio Search virus. Though it promotes some legitimate domains, but persistent “activities” of one tool may interfere with another – in short, you might get crammed with ads and commercial offers.
We use third-party advertising companies to serve ads when you visit our Web site. These companies may use information (not including your name, address, email address or telephone number) about your visits to this and other web sites in order to provide advertisements on this site and other sites about goods and services that may be of interest to you.
If you would like more information about this practice and to know your choices about not having this information used by these companies, please click here.
There is no surprise if you get to a corrupted domain due to AioSearch.com redirect issue. What is more, even if you a fan of gaming or can’t help downloading a movie torrent, you will soon find out that some of the offered torrent sites simply do not work.
Some of the AioSearch affiliated third parties, such as Mindspark Interactive Network which offers you ask.com services, might aggressively promote their services which result in users’ frustration. They also spy on users’ online habits quite aggressively.
Note that some of the domains may even identify your email address and pile you with spam messages. Such emails may not always be harmless.[4] Firefox and Chrome users are likely to be bombarded with the promotional offers as it offers its AIO Search extension in Chrome Web Store and offers Firefox toolbar.
Speaking of the specifically targeted countries, the search engine does manifest a preference, thus, whether you live in Denmark[5] or Czech Republic, you should get rid of the extension and toollbar right away.

Spreading the PUP in multiple ways
Since the hijacker partners with multiple search engines, torrent sites, search engine, service providers, it is not surprising if you get redirected to this domain after visiting one of the affiliated domains.
Speaking of AioSearch.com hijack, hardly you will encounter it, but you should not exclude the probability that it may travel as an optional download option attached to free application. Thus, retain vigilance while downloading any application. Choosing “Custom” or “Advanced” settings will enable you to pinpoint similar applications on time and stop their installation.
If you opt for using torrent services regardless of dangers, we suggest you take extra precaution measures:
- Use a reliable VPN (note: torrent sites may offer the VPN. NEVER download these tools and rely on official applications instead);
- Make use of ad-blocking software;
- Employ an anti-virus program;
- Scan all download files with tools like Virus Total;
- Do not download “cracks” or “keygens”;
- Update your system and the installed software to prevent hackers from exploiting its vulnerabilities.
AioSearch elimination suggestions
Since this search engine does not only alter your default browsing engine settings, but it may also lead you into accepting its browser extension and add-on, you should perform AioSearch removal with care.
Uninstall its primary search engine and delete associated browser extensions.
You can do it manually. Our below provided instructions will help you stay on track. Speaking of a faster solution, you may remove AioSearch.com virus with the assistance of malware elimination tool.
Uninstall from Windows
Uninstall from Windows 10/8:
- Type Control Panel into the Windows search box and open the result.
- Under Programs, select Uninstall a program.


Uninstall from Windows 7/XP:
- Click on Windows Start > Control Panel (Windows XP users should click on Add/Remove Programs).
- In Control Panel, select Programs > Uninstall a program.


Remove the unwanted program:
- In the Programs and Features window, look for any recently installed suspicious entries, select them, and click Uninstall.
- If User Account Control appears, click Yes to confirm, then complete the removal.


Delete from macOS
Remove the unwanted application:
- From the menu bar, select Go > Applications.
- In the Applications folder, look for any suspicious entries, then drag them to Trash (or right-click and pick Move to Trash).


Delete leftover files and folders:
- Select Go > Go to Folder.
- Enter /Library/Application Support and remove any suspicious folders related to the unwanted program.
- Repeat the same check in the /Library/LaunchAgents and /Library/LaunchDaemons folders, deleting any suspicious entries.

- Finally, empty the Trash to permanently remove the leftovers.

Reset Internet Explorer
Remove dangerous add-ons:
- Open Internet Explorer, click on the Gear icon (IE menu) on the top-right corner of the browser
- Pick Manage Add-ons.
- You will see a Manage Add-ons window. Here, look for suspicious plugins. Click on these entries and select Disable.


Change your homepage if it was altered:
- Open IE and click on the Gear icon.
- Select Internet Options.
- In the General tab, delete the Home page address and replace it by your preferred one (for example, Google.com).
- Click Apply and then select OK.


Delete temporary files:
- Press on the Gear icon and select Internet Options.
- Under Browsing history, click Delete...
- Select relevant fields and press Delete.


Reset Internet Explorer:
- Click on Gear icon > Internet options and select Advanced tab.
- Select Reset.
- In the new window, check Delete personal settings and select Reset.


Remove from Microsoft Edge
Delete unwanted extensions from MS Edge:
- Select Menu (three horizontal dots at the top-right of the browser window) and pick Extensions.
- From the list, pick the extension and click on the Gear icon.
- Click Remove.


Clear cookies and other browser data:
- Click on the Menu (three horizontal dots at the top-right of the browser window) and select Settings > Privacy, search, and services..
- Under Clear browsing data, pick Choose what to clear.
- Select Cookies and other site data and Cached images and files. (apart from passwords, although you might want to include Media licenses as well, if applicable) and click on Clear.


Restore new tab and homepage settings:
- Click the menu icon and choose Settings.
- Then find On startup section.
- Click Remove next to any suspicious startup page.
Reset MS Edge if the above steps did not work:
- Press on Ctrl + Shift + Esc to open Task Manager.
- Click on More details arrow at the bottom of the window.
- Select Details tab.
- Now scroll down and locate every entry with Microsoft Edge name in it. Right-click on each of them and select End Task to stop MS Edge from running.


Instructions for Chromium-based Edge
Delete extensions from MS Edge (Chromium):
- Open Edge and click select Settings > Extensions.
- Delete unwanted extensions by clicking Remove.


Clear cache and site data:
- Click on Menu and go to Settings.
- Select Privacy, search and services.
- Under Clear browsing data, pick Choose what to clear.
- Under Time range, pick All time.
- Select Clear now.


Reset Chromium-based MS Edge:
- Click on Menu and select Settings.
- On the left side, pick Reset settings.
- Select Restore settings to their default values.
- Confirm with Reset.
- This will disable extensions and reset startup pages but will not delete bookmarks, saved passwords, or browsing history.


Remove from Mozilla Firefox (FF)
Remove dangerous extensions:
- Open Mozilla Firefox browser and click on the Menu (three horizontal lines at the top-right of the window).
- Select Add-ons.
- In here, select the unwanted extension and click Remove.


Reset the homepage:
- Click three horizontal lines at the top right corner to open the menu.
- Choose Settings.
- Under Home, set your preferred homepage and new tab settings.
Clear cookies and site data:
- Click Menu and pick Settings.
- Go to Privacy & Security section.
- Scroll down to locate Cookies and Site Data.
- Click on Clear Data...
- Select Cookies and Site Data and Temporary cached files and pages, then click Clear.


Reset Mozilla Firefox
If clearing the browser as explained above did not help, reset Mozilla Firefox:
- Open Mozilla Firefox browser and click the Menu.
- Go to Help and then choose Troubleshooting Information.

- Under Give Firefox a tune up section, click on Refresh Firefox...
- Once the pop-up shows up, confirm the action by pressing on Refresh Firefox.



Remove from Google Chrome
Delete malicious extensions from Google Chrome:
- Open Google Chrome, click on the Menu (three vertical dots at the top-right corner) and select More tools > Extensions.
- In the newly opened window, you will see all the installed extensions. Uninstall all suspicious extensions related to the unwanted program by clicking Remove.


Clear cache and web data from Chrome:
- Click on Menu and pick Settings.
- Under Privacy and security, select Clear browsing data.
- Select Browsing history, Cookies and other site data, as well as Cached images and files.
- Click Clear data.


Change your homepage:
- Click menu and choose Settings.
- Look for a suspicious site in the On startup section.
- Click on Open a specific or set of pages and click on three dots to find the Remove option.
Reset Google Chrome:
If the previous methods did not help you, reset Google Chrome to eliminate all the unwanted components:
- Click on Menu and select Settings.
- In the Settings, scroll down and click Advanced.
- Scroll down and locate Reset and clean up section.
- Now click Restore settings to their original defaults.
- Confirm with Reset settings.


Delete from Safari
Remove dangerous extensions:
- Open Safari, click Safari in the menu at the top-left of the screen, and select Preferences.
- Go to the Extensions tab, look for any suspicious entries, and click Uninstall to remove them.


Clear history and website data:
- Click Safari in the menu and pick Clear History.
- Set Clear to all history and confirm with Clear History.


Reset Safari:
- Click Safari in the menu and select Preferences > Advanced.
- Enable Show Develop menu in menu bar.
- From the menu bar, click Develop and select Empty Caches.


Did this guide help?
Be the first to comment