

Videoommooth.com – a rogue website that automatically redirects to other unsafe pages
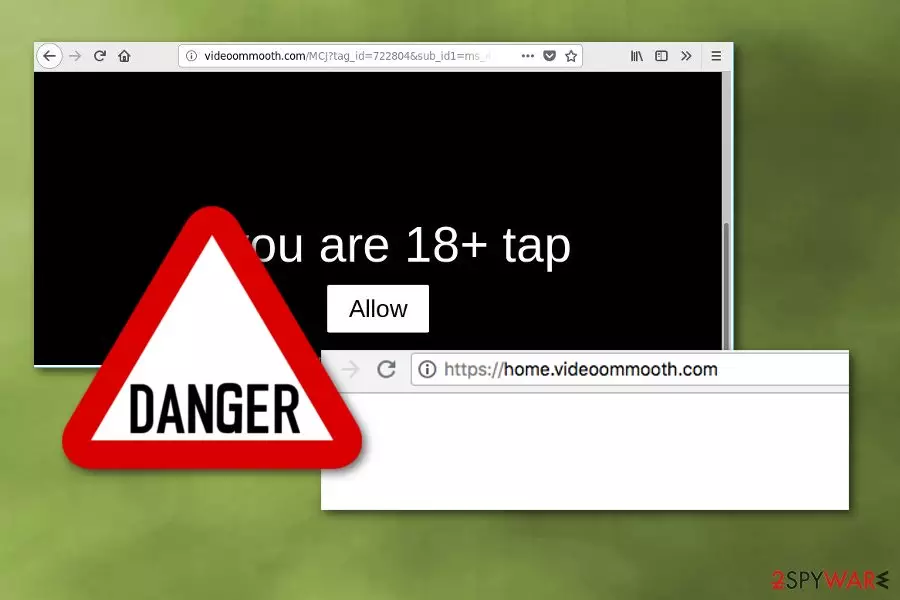
Videoommooth.com is an adware program that is designed to cause continuous pop-ups on victims' screens, asking them to click the “Allow” button. However, once you click that, you are redirected to malicious sites seeking to generate pay-per-click revenue.
This website also causes a lot of redirects that might end up with malware on the target computer systems. This activity can also significantly diminish users' browsing online and lead them to even more issues. Since the browser automatically opens lots of identical popup windows and new tabs, it becomes difficult to reach desired sites and use the device as usual.
Also, this potentially unwanted program[1] gathers various sensitive information about the victim. Your IP address, geo-location, online browsing preferences, search queries, and most viewed or visited sites can be accessed the minute this adware gets on the computer.
| Name | Videoommooth.com |
|---|---|
| Type | Adware |
| Category | Potentially unwanted program |
| Symptoms | The PUP causes redirects to rogue sites and delivers intrusive advertisements |
| Main danger | Collects information and can attract malware |
| Distribution | Bundled software, fake Flash Player updates |
| Elimination | Scan your infected device with reputable anti-malware software to remove any intruders |
| System health | Download and use FortectIntego to fix damages caused by the virus |
Adware programs infiltrate the system during the insecure installation of the freeware. This silent infiltration is additionally followed by numerous ads that appear once the affected device is rebooted. As a result, any background process associated with this website starts running automatically and affects the performance of your machine.
Videoommooth.com tends to deliver intrusive advertisements in various forms, such as pop-up ads, ads appearing in new tabs, and similar forms. Once clicked, these ads redirect victims to sponsored sites seeking to increase their visitors' traffic or sales.
However, there is no guarantee that each of such websites is virus-free. You should be extra careful with each redirect as it may end up with malware. Adware-related symptoms typically include the following signs that can be noticed on every web browser:
- Random text on your favorite sites turns into active links;
- Intrusive ads appear all over the screen, and it doesn't matter which page you are visiting;
- Various banners, pop-up windows, or blinking windows cause redirects to suspicious domains;
- Closing the newly-opened window becomes difficult because of the redirects;
- Commonly visited sites appear different;
- The article's culprit website launches every time you open your browser or a new tab;
If you notice any of these or other similar symptoms, do not wait and remove Videoommooth.com from your computer. It is essential to do as quickly as you notice any activity related to the adware. Keep in mind that tens of similar PUPs are spreading around and causing almost identical ads: Hidderswera.club, Bwplayer, Erdnt.loc, Unverf.com, and many others.
Stay away from these “push allow notifications” because the more you interact with them, the more affected your device can become. According to experts, PUP removal requires anti-malware tools such as MalwarebytesMalwarebytes and SpyHunterCombo Cleaner because of the additional programs this intruder may install while on your system.
Anti-malware programs will help you identify corrupted files and detect various malware[2] and software vulnerabilities. All you have to do is download either of these tools and perform a full system scan. Afterward, run system diagnostics with the FortectIntego PC repair tool to fix all system-related issues.

Potentially unwanted programs are bundled with freeware, shareware, and updates
Software bundling as a marketing technique is known for a while. Researchers[3] advise people to remember that it is used by virus developers too. Freeware providers and PUP developers arrange those bundles and spread them all over the internet. These packages can be found on peer-to-peer networks. So getting software, applications, or updates from there can be potentially dangerous.
During these or any other installation processes, you need to pay more attention and chose Advanced/Custom options. When opting for this method instead of the Quick or Default option, you are allowed to un-check the marks from additional programs on the list. This means that you are getting only the programs you need.
Get rid of Videoommooth.com and all the related programs
You can remove Videoommooth.com virus and get rid of its unwanted activity with the help of anti-malware tools. These programs are prepared to provide the highest protection level, no matter how advanced a PC user you are. If you cannot present yourself as an advanced PC user, we would recommend avoiding the manual removal option. It requires specific knowledge on how to reset the system to bring it back to its primary position.
It may look that the removal is difficult, but we have a few suggestions for the anti-malware programs and a step-by-step guide below. These should help you to get back to safe time online. Also, automatic virus elimination using anti-malware programs can do all the job for you.
Uninstall from Windows
Uninstall from Windows 10/8:
- Type Control Panel into the Windows search box and open the result.
- Under Programs, select Uninstall a program.


Uninstall from Windows 7/XP:
- Click on Windows Start > Control Panel (Windows XP users should click on Add/Remove Programs).
- In Control Panel, select Programs > Uninstall a program.


Remove the unwanted program:
- In the Programs and Features window, look for any recently installed suspicious entries, select them, and click Uninstall.
- If User Account Control appears, click Yes to confirm, then complete the removal.


Delete from macOS
Remove the unwanted application:
- From the menu bar, select Go > Applications.
- In the Applications folder, look for any suspicious entries, then drag them to Trash (or right-click and pick Move to Trash).


Delete leftover files and folders:
- Select Go > Go to Folder.
- Enter /Library/Application Support and remove any suspicious folders related to the unwanted program.
- Repeat the same check in the /Library/LaunchAgents and /Library/LaunchDaemons folders, deleting any suspicious entries.

- Finally, empty the Trash to permanently remove the leftovers.

Remove from Microsoft Edge
Delete unwanted extensions from MS Edge:
- Select Menu (three horizontal dots at the top-right of the browser window) and pick Extensions.
- From the list, pick the extension and click on the Gear icon.
- Click Remove.


Clear cookies and other browser data:
- Click on the Menu (three horizontal dots at the top-right of the browser window) and select Settings > Privacy, search, and services..
- Under Clear browsing data, pick Choose what to clear.
- Select Cookies and other site data and Cached images and files. (apart from passwords, although you might want to include Media licenses as well, if applicable) and click on Clear.


Restore new tab and homepage settings:
- Click the menu icon and choose Settings.
- Then find On startup section.
- Click Remove next to any suspicious startup page.
Reset MS Edge if the above steps did not work:
- Press on Ctrl + Shift + Esc to open Task Manager.
- Click on More details arrow at the bottom of the window.
- Select Details tab.
- Now scroll down and locate every entry with Microsoft Edge name in it. Right-click on each of them and select End Task to stop MS Edge from running.


Instructions for Chromium-based Edge
Delete extensions from MS Edge (Chromium):
- Open Edge and click select Settings > Extensions.
- Delete unwanted extensions by clicking Remove.


Clear cache and site data:
- Click on Menu and go to Settings.
- Select Privacy, search and services.
- Under Clear browsing data, pick Choose what to clear.
- Under Time range, pick All time.
- Select Clear now.


Reset Chromium-based MS Edge:
- Click on Menu and select Settings.
- On the left side, pick Reset settings.
- Select Restore settings to their default values.
- Confirm with Reset.
- This will disable extensions and reset startup pages but will not delete bookmarks, saved passwords, or browsing history.


Remove from Mozilla Firefox (FF)
Remove dangerous extensions:
- Open Mozilla Firefox browser and click on the Menu (three horizontal lines at the top-right of the window).
- Select Add-ons.
- In here, select the unwanted extension and click Remove.


Reset the homepage:
- Click three horizontal lines at the top right corner to open the menu.
- Choose Settings.
- Under Home, set your preferred homepage and new tab settings.
Clear cookies and site data:
- Click Menu and pick Settings.
- Go to Privacy & Security section.
- Scroll down to locate Cookies and Site Data.
- Click on Clear Data...
- Select Cookies and Site Data and Temporary cached files and pages, then click Clear.


Reset Mozilla Firefox
If clearing the browser as explained above did not help, reset Mozilla Firefox:
- Open Mozilla Firefox browser and click the Menu.
- Go to Help and then choose Troubleshooting Information.

- Under Give Firefox a tune up section, click on Refresh Firefox...
- Once the pop-up shows up, confirm the action by pressing on Refresh Firefox.



Remove from Google Chrome
Delete malicious extensions from Google Chrome:
- Open Google Chrome, click on the Menu (three vertical dots at the top-right corner) and select More tools > Extensions.
- In the newly opened window, you will see all the installed extensions. Uninstall all suspicious extensions related to the unwanted program by clicking Remove.


Clear cache and web data from Chrome:
- Click on Menu and pick Settings.
- Under Privacy and security, select Clear browsing data.
- Select Browsing history, Cookies and other site data, as well as Cached images and files.
- Click Clear data.


Change your homepage:
- Click menu and choose Settings.
- Look for a suspicious site in the On startup section.
- Click on Open a specific or set of pages and click on three dots to find the Remove option.
Reset Google Chrome:
If the previous methods did not help you, reset Google Chrome to eliminate all the unwanted components:
- Click on Menu and select Settings.
- In the Settings, scroll down and click Advanced.
- Scroll down and locate Reset and clean up section.
- Now click Restore settings to their original defaults.
- Confirm with Reset settings.


Delete from Safari
Remove dangerous extensions:
- Open Safari, click Safari in the menu at the top-left of the screen, and select Preferences.
- Go to the Extensions tab, look for any suspicious entries, and click Uninstall to remove them.


Clear history and website data:
- Click Safari in the menu and pick Clear History.
- Set Clear to all history and confirm with Clear History.


Reset Safari:
- Click Safari in the menu and select Preferences > Advanced.
- Enable Show Develop menu in menu bar.
- From the menu bar, click Develop and select Empty Caches.


Did this guide help?
Be the first to comment