

Home.dimakadima.com – a browser hijacker that you should not use
Home.dimakadima.com virus is presented as an ordinary search engine, however, it is not recommended to use since it is classified as a browser hijacker category. Alternatively known as Dima Kadima, it may attract users’ attention with links to quizzes about movies, lifestyle, television, politics, and sports. The tool also encourages installing its browser extension[1]. It also relies on Yahoo database to provide search results. Despite its positive features, it is not recommended to employ this search engine as the main browsing tool. Due to its obvious security flaws, such as sharing of your information with third parties and the absence of credentials, virus researchers classify it as a browser hijacker. Thus, it is recommended to remove home.dimakadima.com before you get frustrated with its outcomes.
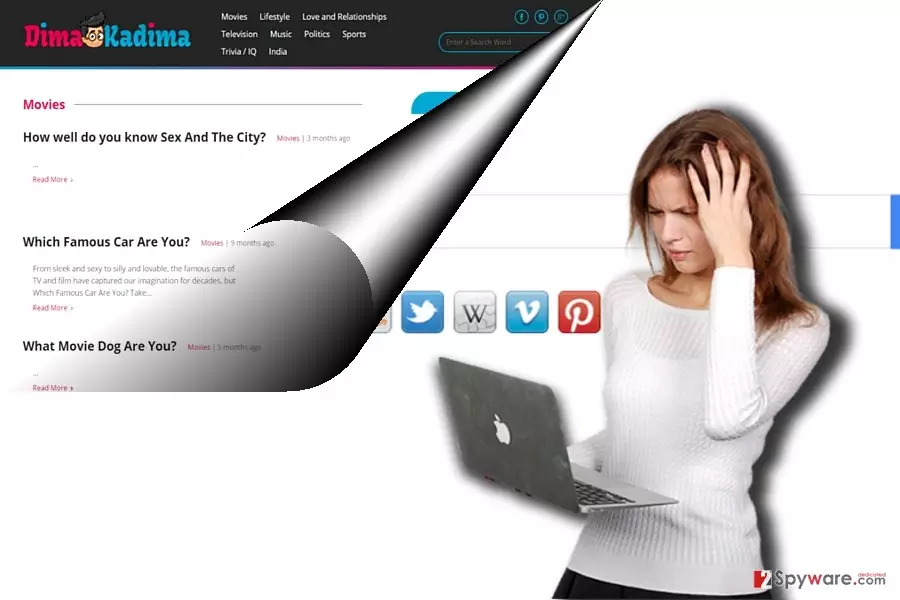
This search engine hardly differs from dozens of identical search engines. Most of them try to allure users with shortcut links to email accounts, social networks, and shopping domains. Others even offer to scan your device for possible threats. The design of Dima Kadima browsing tool is not overcrowded with ads and mentioned links so such balance may evoke a sense of reliability. Even if the search engine delivers Yahoo search results, there are several key aspects you should take into account. A privacy policy is often a document which users disregard. Nonetheless, it contains crucial information which helps identify whether it is safe to use the services of a respective application.
Likewise, you may find valuable insight about this search look if you take a look at the document. It openly states that the tool compiles personal information and may share it with business partners[2]. In that case, do not get surprised if your Inbox gets flooded with personalized commercial offers. Advertisements may not only become bothersome but they may contain highly menacing content, such as attachments corrupted with crypto-malware. What is more, while using the services of this browsing tool, various third parties may “broadcast” their advertising content to you which does not only bother the browsing quality but may lead, eventually, to your frustration. Dima Kadima search tool may endanger your privacy[3]. What is more, home.dimakadima.com redirect is an unpleasant phenomenon as well. Since you may be misled to third party websites, there is a probability that they may be poorly protected from virtual threats[4]. It is another crucial factor which may encourage you to initiate home.dimakadima.com removal. FortectIntego or MalwarebytesMalwarebytes will help you do that more effectively.
How did this search engine occupy my homepage?
In both possible cases, you may have accidentally installed it accidentally. In the first case, you may have installed it thinking that it is a reliable search tool. Alternatively, you enabled home.dimakadima.com hijack when installing a free application. You may be still wondering how it happened. Specifically, it clings to free applications. Since users carelessly hop through the installation stages, they often miss additional add-ons. In order to prevent the installation of such unwanted applications, be more vigilant[5]. On hitting the “Install” button, opt for “Custom” settings. They will reveal additional download options and enable to disrupt of the unwanted add-ons. Only when you are sure that no unnecessary add-ons will be installed, continue the installation of a preferred application.
How should I delete home.dimakadima.com?
It is not difficult to remove home.dimakadima.com regardless if you choose manual or automatic elimination. Naturally, the latter is more convenient since an anti-spyware tool detects all source and related elements and eliminates them right away. You may also check manual home.dimakadima.com removal guidelines. They will instruct how to clean possible add-ons and browser extensions. It would be recommended to reset browser settings in order to eliminate any third-party links.
Uninstall from Windows
Uninstall from Windows 10/8:
- Type Control Panel into the Windows search box and open the result.
- Under Programs, select Uninstall a program.


Uninstall from Windows 7/XP:
- Click on Windows Start > Control Panel (Windows XP users should click on Add/Remove Programs).
- In Control Panel, select Programs > Uninstall a program.


Remove the unwanted program:
- In the Programs and Features window, look for any recently installed suspicious entries, select them, and click Uninstall.
- If User Account Control appears, click Yes to confirm, then complete the removal.


Delete from macOS
Remove the unwanted application:
- From the menu bar, select Go > Applications.
- In the Applications folder, look for any suspicious entries, then drag them to Trash (or right-click and pick Move to Trash).


Delete leftover files and folders:
- Select Go > Go to Folder.
- Enter /Library/Application Support and remove any suspicious folders related to the unwanted program.
- Repeat the same check in the /Library/LaunchAgents and /Library/LaunchDaemons folders, deleting any suspicious entries.

- Finally, empty the Trash to permanently remove the leftovers.

Reset Internet Explorer
Remove dangerous add-ons:
- Open Internet Explorer, click on the Gear icon (IE menu) on the top-right corner of the browser
- Pick Manage Add-ons.
- You will see a Manage Add-ons window. Here, look for suspicious plugins. Click on these entries and select Disable.


Change your homepage if it was altered:
- Open IE and click on the Gear icon.
- Select Internet Options.
- In the General tab, delete the Home page address and replace it by your preferred one (for example, Google.com).
- Click Apply and then select OK.


Delete temporary files:
- Press on the Gear icon and select Internet Options.
- Under Browsing history, click Delete...
- Select relevant fields and press Delete.


Reset Internet Explorer:
- Click on Gear icon > Internet options and select Advanced tab.
- Select Reset.
- In the new window, check Delete personal settings and select Reset.


Remove from Microsoft Edge
Delete unwanted extensions from MS Edge:
- Select Menu (three horizontal dots at the top-right of the browser window) and pick Extensions.
- From the list, pick the extension and click on the Gear icon.
- Click Remove.


Clear cookies and other browser data:
- Click on the Menu (three horizontal dots at the top-right of the browser window) and select Settings > Privacy, search, and services..
- Under Clear browsing data, pick Choose what to clear.
- Select Cookies and other site data and Cached images and files. (apart from passwords, although you might want to include Media licenses as well, if applicable) and click on Clear.


Restore new tab and homepage settings:
- Click the menu icon and choose Settings.
- Then find On startup section.
- Click Remove next to any suspicious startup page.
Reset MS Edge if the above steps did not work:
- Press on Ctrl + Shift + Esc to open Task Manager.
- Click on More details arrow at the bottom of the window.
- Select Details tab.
- Now scroll down and locate every entry with Microsoft Edge name in it. Right-click on each of them and select End Task to stop MS Edge from running.


Instructions for Chromium-based Edge
Delete extensions from MS Edge (Chromium):
- Open Edge and click select Settings > Extensions.
- Delete unwanted extensions by clicking Remove.


Clear cache and site data:
- Click on Menu and go to Settings.
- Select Privacy, search and services.
- Under Clear browsing data, pick Choose what to clear.
- Under Time range, pick All time.
- Select Clear now.


Reset Chromium-based MS Edge:
- Click on Menu and select Settings.
- On the left side, pick Reset settings.
- Select Restore settings to their default values.
- Confirm with Reset.
- This will disable extensions and reset startup pages but will not delete bookmarks, saved passwords, or browsing history.


Remove from Mozilla Firefox (FF)
Remove dangerous extensions:
- Open Mozilla Firefox browser and click on the Menu (three horizontal lines at the top-right of the window).
- Select Add-ons.
- In here, select the unwanted extension and click Remove.


Reset the homepage:
- Click three horizontal lines at the top right corner to open the menu.
- Choose Settings.
- Under Home, set your preferred homepage and new tab settings.
Clear cookies and site data:
- Click Menu and pick Settings.
- Go to Privacy & Security section.
- Scroll down to locate Cookies and Site Data.
- Click on Clear Data...
- Select Cookies and Site Data and Temporary cached files and pages, then click Clear.


Reset Mozilla Firefox
If clearing the browser as explained above did not help, reset Mozilla Firefox:
- Open Mozilla Firefox browser and click the Menu.
- Go to Help and then choose Troubleshooting Information.

- Under Give Firefox a tune up section, click on Refresh Firefox...
- Once the pop-up shows up, confirm the action by pressing on Refresh Firefox.



Remove from Google Chrome
Delete malicious extensions from Google Chrome:
- Open Google Chrome, click on the Menu (three vertical dots at the top-right corner) and select More tools > Extensions.
- In the newly opened window, you will see all the installed extensions. Uninstall all suspicious extensions related to the unwanted program by clicking Remove.


Clear cache and web data from Chrome:
- Click on Menu and pick Settings.
- Under Privacy and security, select Clear browsing data.
- Select Browsing history, Cookies and other site data, as well as Cached images and files.
- Click Clear data.


Change your homepage:
- Click menu and choose Settings.
- Look for a suspicious site in the On startup section.
- Click on Open a specific or set of pages and click on three dots to find the Remove option.
Reset Google Chrome:
If the previous methods did not help you, reset Google Chrome to eliminate all the unwanted components:
- Click on Menu and select Settings.
- In the Settings, scroll down and click Advanced.
- Scroll down and locate Reset and clean up section.
- Now click Restore settings to their original defaults.
- Confirm with Reset settings.


Delete from Safari
Remove dangerous extensions:
- Open Safari, click Safari in the menu at the top-left of the screen, and select Preferences.
- Go to the Extensions tab, look for any suspicious entries, and click Uninstall to remove them.


Clear history and website data:
- Click Safari in the menu and pick Clear History.
- Set Clear to all history and confirm with Clear History.


Reset Safari:
- Click Safari in the menu and select Preferences > Advanced.
- Enable Show Develop menu in menu bar.
- From the menu bar, click Develop and select Empty Caches.


Did this guide help?
2 comments
NovusRRR
Who would fall for such low-quality tool? Who cares about those quizzes?
FTGeorgina
That is why it looked fishy...