

What are the worst qualities of the Search.wharkike.com?
If you have come accros this article, you are probably already infected with the Search.wharkike.com virus and are looking for its removal instructions or you simply want to learn more about how this program functions or how to prevent it’s infiltration. For your convenience, we have prepared all the information you need to known in this article. If you are looking for a quick Search.wharkike.com removal solution, though, you can automatize the process and scan your computer with virus detection software, for instance FortectIntego.
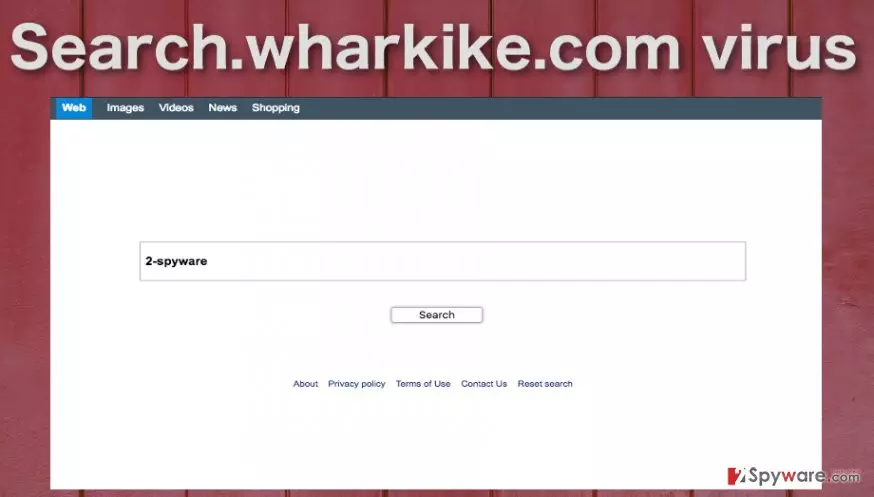
Search.wharkike.com is a browser hijacker, so you should not expect it to address you directly when it decides to enter your PC. It will most likely replace your default search engine and homepage by deception and modify your browser to boot Search.wharkike.com every time you open it. You will be forced to use this site whenever you try looking for something on the Internet. On top of it all, the search experience itself might not be quite what you would expect from a reliable search engine. In fact, you simply don’t know what to expect from this site because no additional information about it is given in the “About” section. Instead, you will be redirected to wharkike.com where you will be introduced with another suspicious software — Wharkike downloader. It can be presumed that Search.wharkike.com hijack is a part of Wharkike promotion campaign. Such assumptions have reasoning — wharkike.com site has been eliminated from Google’s search results for potentially malicious behaviour. By the way, we have managed to find a brief website description hidden in the site’s source code and it goes like this:
The search engine that helps you find exactly what you’re looking for. Find the most relevant information, video, images, and answers from all across the Web.
Sounds useful? Sadly, this search engine does quite the opposite. It makes the information search almost unbearable with all the sponsored content that it tries to stuff into the list of search results. Besides, if you use it long enough, another problem — Search.wharkike.com redirect issue — will definitely come up as well. Soon you will realize that you no longer have control over the content you are viewing and that you somehow end up on domains that seem not to be related to what you were initially looking for. Such negligent behaviour should leave you no questions about what you should do with the program. As we have mentioned in the beginning, the quickest way to remove Search.wharkike.com from an infected device is to scan it with antivirus utility, but if you are looking for some alternatives, you may as well try following manual instructions our experts have provided at the end of the article.
How is the virus distributed and can it be stopped?
There are numerous misconceptions surrounding potentially unwanted programs. Some people believe that these shady applications are full on viruses, that they can irreversibly damage the computer and that they are impossible to avoid. Technically, none of this is true. Search.wharkike.com can’t enter any device without being confirmed by the user. However, that does not mean that this confirmation should necessarily be overt. Most likely, the users will grant it unknowingly, when installing freeware or shareware programs or downloading bogus software updates. Luckily, unlike what many users think, Search.wharkike.com can be avoided. Antivirus utilities and careful attitude while browsing online might help achieve that.
How to remove Search.wharkike.com and reset your browser?
Needless to say, if you are infected, you should take care of the Search.wharkike.com removal without delay. You should not feel obliged or be pushed into downloading software you don’t want or use services that do not satisfy your needs. This means that you can, and you should remove Search.wharkike.com virus from your PC without hesitation. Below you will find the instructions on how to do it manually, while the users who decide to exterminate this malware from their computers automatically should consider our antivirus software suggestions.
Uninstall from Windows
Uninstall from Windows 10/8:
- Type Control Panel into the Windows search box and open the result.
- Under Programs, select Uninstall a program.


Uninstall from Windows 7/XP:
- Click on Windows Start > Control Panel (Windows XP users should click on Add/Remove Programs).
- In Control Panel, select Programs > Uninstall a program.


Remove the unwanted program:
- In the Programs and Features window, look for any recently installed suspicious entries, select them, and click Uninstall.
- If User Account Control appears, click Yes to confirm, then complete the removal.


Delete from macOS
Remove the unwanted application:
- From the menu bar, select Go > Applications.
- In the Applications folder, look for any suspicious entries, then drag them to Trash (or right-click and pick Move to Trash).


Delete leftover files and folders:
- Select Go > Go to Folder.
- Enter /Library/Application Support and remove any suspicious folders related to the unwanted program.
- Repeat the same check in the /Library/LaunchAgents and /Library/LaunchDaemons folders, deleting any suspicious entries.

- Finally, empty the Trash to permanently remove the leftovers.

Reset Internet Explorer
Remove dangerous add-ons:
- Open Internet Explorer, click on the Gear icon (IE menu) on the top-right corner of the browser
- Pick Manage Add-ons.
- You will see a Manage Add-ons window. Here, look for suspicious plugins. Click on these entries and select Disable.


Change your homepage if it was altered:
- Open IE and click on the Gear icon.
- Select Internet Options.
- In the General tab, delete the Home page address and replace it by your preferred one (for example, Google.com).
- Click Apply and then select OK.


Delete temporary files:
- Press on the Gear icon and select Internet Options.
- Under Browsing history, click Delete...
- Select relevant fields and press Delete.


Reset Internet Explorer:
- Click on Gear icon > Internet options and select Advanced tab.
- Select Reset.
- In the new window, check Delete personal settings and select Reset.


Remove from Microsoft Edge
Delete unwanted extensions from MS Edge:
- Select Menu (three horizontal dots at the top-right of the browser window) and pick Extensions.
- From the list, pick the extension and click on the Gear icon.
- Click Remove.


Clear cookies and other browser data:
- Click on the Menu (three horizontal dots at the top-right of the browser window) and select Settings > Privacy, search, and services..
- Under Clear browsing data, pick Choose what to clear.
- Select Cookies and other site data and Cached images and files. (apart from passwords, although you might want to include Media licenses as well, if applicable) and click on Clear.


Restore new tab and homepage settings:
- Click the menu icon and choose Settings.
- Then find On startup section.
- Click Remove next to any suspicious startup page.
Reset MS Edge if the above steps did not work:
- Press on Ctrl + Shift + Esc to open Task Manager.
- Click on More details arrow at the bottom of the window.
- Select Details tab.
- Now scroll down and locate every entry with Microsoft Edge name in it. Right-click on each of them and select End Task to stop MS Edge from running.


Instructions for Chromium-based Edge
Delete extensions from MS Edge (Chromium):
- Open Edge and click select Settings > Extensions.
- Delete unwanted extensions by clicking Remove.


Clear cache and site data:
- Click on Menu and go to Settings.
- Select Privacy, search and services.
- Under Clear browsing data, pick Choose what to clear.
- Under Time range, pick All time.
- Select Clear now.


Reset Chromium-based MS Edge:
- Click on Menu and select Settings.
- On the left side, pick Reset settings.
- Select Restore settings to their default values.
- Confirm with Reset.
- This will disable extensions and reset startup pages but will not delete bookmarks, saved passwords, or browsing history.


Remove from Mozilla Firefox (FF)
Remove dangerous extensions:
- Open Mozilla Firefox browser and click on the Menu (three horizontal lines at the top-right of the window).
- Select Add-ons.
- In here, select the unwanted extension and click Remove.


Reset the homepage:
- Click three horizontal lines at the top right corner to open the menu.
- Choose Settings.
- Under Home, set your preferred homepage and new tab settings.
Clear cookies and site data:
- Click Menu and pick Settings.
- Go to Privacy & Security section.
- Scroll down to locate Cookies and Site Data.
- Click on Clear Data...
- Select Cookies and Site Data and Temporary cached files and pages, then click Clear.


Reset Mozilla Firefox
If clearing the browser as explained above did not help, reset Mozilla Firefox:
- Open Mozilla Firefox browser and click the Menu.
- Go to Help and then choose Troubleshooting Information.

- Under Give Firefox a tune up section, click on Refresh Firefox...
- Once the pop-up shows up, confirm the action by pressing on Refresh Firefox.



Remove from Google Chrome
Delete malicious extensions from Google Chrome:
- Open Google Chrome, click on the Menu (three vertical dots at the top-right corner) and select More tools > Extensions.
- In the newly opened window, you will see all the installed extensions. Uninstall all suspicious extensions related to the unwanted program by clicking Remove.


Clear cache and web data from Chrome:
- Click on Menu and pick Settings.
- Under Privacy and security, select Clear browsing data.
- Select Browsing history, Cookies and other site data, as well as Cached images and files.
- Click Clear data.


Change your homepage:
- Click menu and choose Settings.
- Look for a suspicious site in the On startup section.
- Click on Open a specific or set of pages and click on three dots to find the Remove option.
Reset Google Chrome:
If the previous methods did not help you, reset Google Chrome to eliminate all the unwanted components:
- Click on Menu and select Settings.
- In the Settings, scroll down and click Advanced.
- Scroll down and locate Reset and clean up section.
- Now click Restore settings to their original defaults.
- Confirm with Reset settings.


Delete from Safari
Remove dangerous extensions:
- Open Safari, click Safari in the menu at the top-left of the screen, and select Preferences.
- Go to the Extensions tab, look for any suspicious entries, and click Uninstall to remove them.


Clear history and website data:
- Click Safari in the menu and pick Clear History.
- Set Clear to all history and confirm with Clear History.


Reset Safari:
- Click Safari in the menu and select Preferences > Advanced.
- Enable Show Develop menu in menu bar.
- From the menu bar, click Develop and select Empty Caches.


Did this guide help?
Be the first to comment