
Ads by TS: what it is and how to remove it
Ads by TS is the label of ads that an adware program injects into web pages, most often into Google search results, and it is linked to the RocketTab family. Uninstall the program from Windows, clean each browser, and change passwords you used while it was installed.
Facts checked October 6, 2026. Removal steps tested on Windows 11 (26H2) and checked against Microsoft's and the browser makers' current documentation.
Automatic
Get a free scan and check if your PC is infected.
Fortect finds malware, unwanted programs and the Windows damage they leave behind, and repairs it in one pass.
A scan of the PC confirms that nothing else came along with the software behind Ads by TS.
Do it yourself · free Remove Ads by TS yourself 4 steps, about 12 minutes, no software needed.
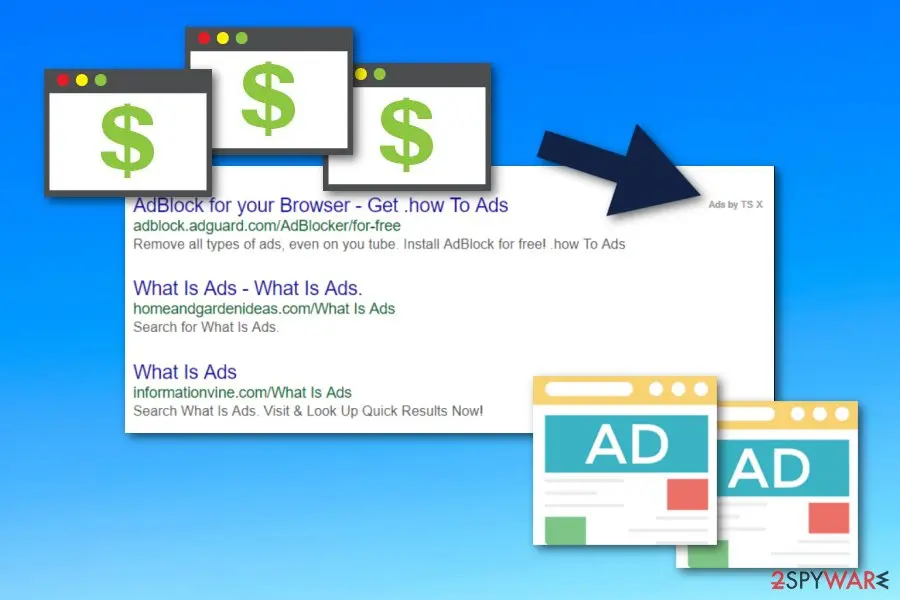
Ads by TS: summary
| Type | Adware, a potentially unwanted program that injects ads into web pages and search results; not malware that destroys files |
|---|---|
| Risk | Medium: it sees the pages you open and its ads can lead to doubtful products; no file damage reported |
| Symptoms | A label "Ads by TS" or "Powered by TS" on ads, fake results in Google searches, pop-ups and extra pages on a click |
| How to get rid of it | Uninstall the program from Installed apps, clean each browser, run Microsoft Defender full and offline scans, change passwords you used while it was installed |
| Our check (6 October 2026) | Not tested: a label, not a site, and no sample; 2018 reports, Microsoft's threat list and our 2019 pictures read |
| First seen | MalwareTips guide of 16 June 2018; our guide of 21 February 2019 |
| Removal | Scan the PC with security software to find and remove the malware and anything installed with it. Fortect scans Windows for malware and repairs the system files and settings it damaged. Remove it nowTo use the full-featured product, you have to purchase a license for Fortect. The scan is free. |
Show 10 more facts
| Detection | Microsoft Defender: no Microsoft detection name is known for Ads by TS itself; the related RocketTab family is listed as PUAAdvertising:Win32/RocketTab, and we scanned no sample |
|---|---|
| Program name seen | ts_uninstaller (MalwareTips); RocketTab (BleepingComputer, 2015) |
| Other labels | Ads powered by TS, Powered by TS, Brought to you by TS, RocketTab powered by TS |
| Distribution | Free programs with a bundled extra; infected pages and file-sharing sites (our 2019 guide) |
| Evidence | MalwareTips, the Malwarebytes forum topic, Microsoft's threat list, BleepingComputer and our 2019 pictures |
| Name | Ads by TS |
| Ads shown as | Ads injected into normal pages |
| Browsers | Chrome, Edge and Firefox |
| Damage | Pop-ups and ad pages, a slower PC, usage tracking, and links to scam pages |
| Facts checked | 6 October 2026 |
Facts checked on 6 October 2026 against MalwareTips, the Malwarebytes forum topic, Microsoft's threat list, BleepingComputer, Chrome's help and Microsoft Learn. We had no site to test and no copy of the program, so the ads, browsers and clean-up steps come from the reports and from our 2019 pictures.
What Ads by TS is, and what it is not
"Ads by TS" is a label on ads that an adware program puts into web pages, most often into Google search results. It is not a website you can visit, and it is not a notification. The older names for the same ads include "Powered by TS" and "RocketTab powered by TS".
- 1
A program arrives with something free
MalwareTips (June 2018) says adware like this is bundled with free software whose installer does not disclose the extra program. It names a program called
ts_uninstallerin the Windows list of installed apps. - 2
Ads start to appear on pages
The reader who opened the Malwarebytes forum topic in August 2018 saw fake results in every Google search, with a label "Ads by TS X" in the top right corner, in all his browsers.
- 3
Clicks open more ads
MalwareTips adds that the program also opens new pages with ads when you click a link or right-click a page, and shows coupon boxes, underlined keywords, pop-ups and banners.
- Kind of program
- Adware, a potentially unwanted program that injects ads; not a virus that destroys files
- The label
- "Ads by TS", also "Ads powered by TS", "Powered by TS", "Brought to you by TS" and "RocketTab powered by TS"
- Where people saw it
- Google search results first; MalwareTips lists coupon boxes, in-text ads, pop-ups and banners on other pages
- Browsers
- All of them at once in the Malwarebytes report (Chrome, Edge, Internet Explorer; its author had no Firefox), which points to a program in Windows and not to one extension
- Program name seen
ts_uninstallerin Windows Apps and Features (MalwareTips, 2018); the name on your PC may differ
Is Ads by TS dangerous?
What we checked on 6 October 2026
We could not test Ads by TS itself. It is a label, not an address, so our usual site test (notification request, pop-ups, redirects) has nothing to open, and we have no copy of the program. What follows is what the reports, Microsoft's threat list and our 2019 pictures show, and nothing more.
Ads by TS · reports, Microsoft entry, our 2019 pictures · 6 October 2026
- Our site testNot run. There is no domain behind the name "Ads by TS": the ads are added to pages of other sites by a program on the PC, so there is no page whose notification request or pop-ups we could record.
- The ads themselvesNot seen by us in 2026. The label, its place in the top right corner of the search results and the browsers come from the Malwarebytes forum topic of 12 August 2018, from MalwareTips (16 June 2018) and from our 2019 pictures.
- MicrosoftMicrosoft lists the family name RocketTab as PUAAdvertising:Win32/RocketTab, published 11 October 2021, and says Microsoft Defender Antivirus detects and removes it, with "technical details currently not available". The label "RocketTab powered by TS" links the two names, but we scanned no sample and do not claim every "Ads by TS" PC carries that detection.
- Detection in 2018The author of the Malwarebytes topic wrote that Malwarebytes and "many others" could neither detect nor remove it, and the topic was closed on 1 September 2018 with the adware still reported there. A scan that finds nothing therefore does not mean the PC is clean.
Not cleared One visit to nothing, since there is nothing to visit: we saw no ad ourselves. Adware can stay quiet by country, device, referrer or delay, so treat the reports as the evidence and check your own PC with the steps below.
What the reports and our 2019 guide showed, and what has changed
16 June 2018
MalwareTips writes a removal guide
It describes "Ads by TS" as adware that shows coupon boxes, in-text ads, pop-ups and banners, lists the five label variants and tells readers to uninstall
ts_uninstallerfrom Windows.12 August 2018
A reader reports it on the Malwarebytes forum
He saw fake results with the label "Ads by TS X" in the top right corner in every Google search, in all browsers. He ran the Farbar scan tool and posted its two logs, FRST.txt and Addition.txt (he wrote FIRST.txt). Our 2019 guide repeats this, and its second picture marks the label with a red box.
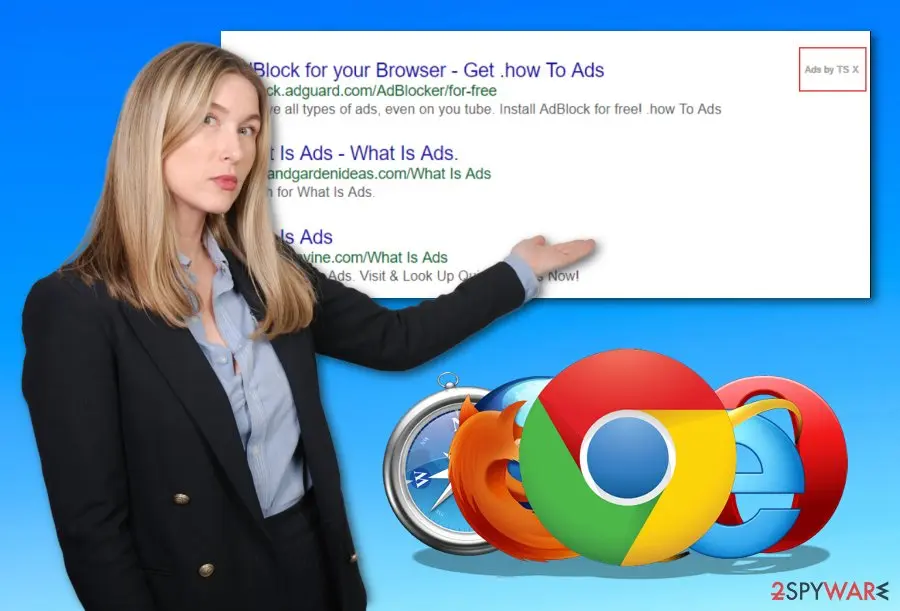
The second picture of our 2019 guide marks the label "Ads by TS X" with a red box in the top right corner of the results. The woman and the browser logos are stock art; only the red box shows something real. 14 to 21 August 2018
The clean-up does not work
A fix script, RogueKiller and a Chrome reinstall did not remove it, and the reader added that Edge and Internet Explorer were affected as well. A Mac copy mentioned in the topic was judged by the helper to be "not the same" infection.
1 September 2018
The topic is closed
The moderators closed it because of missing feedback; the reader's last word was that the adware was still there.
21 February 2019
Our guide is published
We described Ads by TS as adware that appears for people who use Google search, with the illustration shown at the top of this page.
11 October 2021
Microsoft publishes the RocketTab entry
The entry PUAAdvertising:Win32/RocketTab appears in Microsoft's threat list; it gives no technical details.
6 October 2026
We re-check the facts
No sample and no live site to test; this page keeps the guide's facts, corrects what the sources do not support and rewrites the clean-up for Windows 11 and 10.
The names the ads use
| Label on the ad | Source | What to do with it |
|---|---|---|
| Ads by TS | Our 2019 guide, MalwareTips, the Malwarebytes forum ("Ads by TS X") | Search the installed apps for ts_uninstaller and for anything you did not install |
| Ads powered by TS | Our 2019 guide, MalwareTips | Same program; a different wording of the label |
| Powered by TS | Our 2019 guide, MalwareTips | Same program; a different wording of the label |
| Brought to you by TS | Our 2019 guide, MalwareTips | Same program; a different wording of the label |
| RocketTab powered by TS | Our 2019 guide, MalwareTips | Points to the RocketTab family, which BleepingComputer described in 2015 as an ad injector |
How it gets onto a PC
The sources agree on one route: a free program whose installer carries the adware as an extra. Our 2019 guide adds infected web pages and file-sharing sites.
| Route | What you would see | How to check |
|---|---|---|
| A free program with a bundled extra (MalwareTips, BleepingComputer) | A setup with a quick option; the extra is listed only under Custom or Advanced, or in a licence text nobody reads | Settings > Apps > Installed apps, sorted by install date: look for an entry installed the same day as the free program |
| Infected or doubtful web pages (our 2019 guide) | A page that pushes a download or says a plug-in is needed | The Downloads folder and the list of installed apps |
| Peer-to-peer and similar third-party sites (our 2019 guide) | Files with unclear origin and installers full of offers | Delete installers you did not mean to run, then check Installed apps |
Do
- Treat the operating system as irrelevant to the route: adware is written for the platform it targets, and the sources we read describe Windows; the one Mac copy in the forum topic was judged to be a different infection.
Don't
- Assume a Mac or an iPhone is infected only because it shows a similar-looking ad: ads on a web page are not the same as an installed program.
The risks, from most to least serious
"Ads by TS virus" is the name people give the ads, not malware that destroys files. The risk is a program that sees and changes the pages you open, and the ads it leads you to.
- High
Pages and searches seen by a program you did not choose
A program that puts ads into every page can read the pages you open. Our 2019 guide says adware also gathers browsing information, and that it is passed on to third parties; we have no source that shows what this program sent. If you used banking or email while it was installed, change those passwords from a clean device and turn on two-factor sign-in, as the FTC advises after malware.
- Medium
Ads that lead to doubtful products and pages
MalwareTips says the ads promote toolbars, optimization utilities and other products, and that the publisher earns pay-per-click revenue. Our 2019 guide warns that redirects may lead to pages with malware. Neither source documents a specific page; the FTC advice is to type the address of a software maker rather than click an ad.
- Medium
Money for the people behind the ads
Our 2019 guide says the developers earn from cost-per-click advertising. Every click pays them, which is why clicking an ad that looks like a search result helps the adware.
- Low
Slower pages and extra data use
Ads on every page cost time, memory and data. Removing the program ends it.
Check your browser and PC
The reports describe ads and extra pages. We have no source that confirms plug-ins or a changed address bar, so the table says which is which.
| Reported change | How it showed | Status in 2026 |
|---|---|---|
| Ads in Google search results | Fake results with the label "Ads by TS X" in the top right corner | Reported in 2018 (Malwarebytes forum); not re-tested |
| Ads on other pages | Coupon boxes, underlined keywords, pop-ups and banners | Reported by MalwareTips (2018); not re-tested |
| Extra pages on a click | A new page with ads opens when you click a link or right-click a page | Reported by MalwareTips (2018); not re-tested |
| Ads in every browser | The same label in Chrome, Edge and Internet Explorer | Reported in the Malwarebytes topic (2018) |
| Browser plug-ins added | Our 2019 guide lists them | Not confirmed: the sources we read name a Windows program, not an extension |
| A changed new-tab address | Our 2019 guide lists it | Not confirmed; MalwareTips lists a changed home page only as a general sign of adware |
How to remove Ads by TS
Uninstall first, then remove what stays behind, so the ads do not come back after a restart.
Which browser shows the ads?
Remove extensions you do not recognise
Paste
chrome://extensionsinto the address bar and click Remove on anything you did not install yourself. The ads come from a program in Windows, but it may have added an extension as well.Full procedure with screenshots: Remove a browser extension
Clear the site data
Press Ctrl + Shift + Delete, choose All time, tick Cookies and other site data and Cached images and files, and click Delete data.
Reset Chrome
Open More > Settings > Reset settings > Restore settings to their original defaults and confirm with Reset settings. This resets the search engine, start page, new tab page and pinned tabs, and turns off extensions and clears cookies; bookmarks and saved passwords stay.
Full procedure with screenshots: Reset a browser and fix a hijacked search engine
Remove extensions you do not recognise
Paste
edge://extensionsinto the address bar and click Remove under anything you did not install yourself.Full procedure with screenshots: Remove a browser extension
Clear the site data
Open Settings > Privacy, search, and services > Delete browsing data > Choose what to clear, set All time, tick Cookies and other site data and Cached images and files, and click Clear now.
Reset Edge
Open Settings > Reset settings > Restore settings to their default values and confirm with Reset. Extensions are turned off and the start page goes back to default; favourites, history and saved passwords stay.
Full procedure with screenshots: Reset a browser and fix a hijacked search engine
Remove add-ons you do not recognise
Paste
about:addonsinto the address bar, open Extensions, and choose Remove from the three-dot menu of anything you did not install yourself.Full procedure with screenshots: Remove a browser extension
Clear cookies and site data
Open Settings > Privacy & Security > Cookies and Site Data > Clear Data, tick both boxes and click Clear.
Refresh Firefox
Open the menu > Help > More troubleshooting information and click Refresh Firefox. Add-ons and custom settings are removed and the home page goes back to default; bookmarks, history and passwords stay.
Full procedure with screenshots: Reset a browser and fix a hijacked search engine
Remove extensions you do not recognise
In Safari > Settings > Extensions, select anything you did not install yourself and click Uninstall. No source we read ties Ads by TS to Safari; this is a precaution for a Mac.
Clear the site data
In Safari > Settings > Privacy > Manage Website Data, remove the data of the site, or use History > Clear History > all history.
Check the Mac for apps you did not install
In Finder, choose Go > Applications, look for entries you did not install, and drag them to the Bin. In System Settings > General > Login Items & Extensions, remove unknown items. The Malwarebytes helper judged the Mac copy in the 2018 topic to be a different infection, so look for programs by their own names, not for Ads by TS.
Then, whichever browser you use
Step 1: Uninstall programs you did not mean to install
Open Settings > Apps > Installed apps in Windows 11, or Settings > Apps > Apps & features in Windows 10, and sort the list by install date. Look at what appeared around the day the problem started and uninstall every program you do not recognise or did not choose.
Free converters, PDF and video tools, "system optimizers" and unknown browsers are the usual carriers of Ads by TS. If a name is unclear, search for it before you remove it, so you do not uninstall a driver or a Windows component.
Full procedure with screenshots: Uninstall a program or app in Windows On uGetFix
Step 2: Remove it from startup
Whatever Ads by TS installed usually starts with Windows.
Open Task Manager with Ctrl + Shift + Esc, go to Startup apps in Windows 11 or the Startup tab in Windows 10, and disable what you do not know, starting with entries that have an empty Publisher column.
Open file location on the right-click menu shows the file, which helps you decide and tells you what to delete later. Disabling is safe: if something you need stops working, switch it back on.
Full procedure with screenshots: Stop apps from opening at startup On uGetFix
Step 3: Delete the folders left behind
What the uninstaller leaves behind is usually in the user folders. Open File Explorer, switch on View > Show > Hidden items (in Windows 10 View > Hidden items), and go through
%LocalAppData%,%AppData%, %ProgramData% and the two Program Files folders.Sort by Date modified and delete folders that appeared together with the problem and belong to no program you use. Folders with random names that hold
.exe,.dll, .js or .ps1 files are the strongest sign.Full procedure with screenshots: Remove what malware leaves behind in Windows
Step 4: Scan the PC, then run the offline scan
Open Windows Security > Virus & threat protection > Scan options, run a Full scan and remove everything it finds. Then select Microsoft Defender Antivirus (offline scan) and click Scan now: the PC restarts and scans before Windows loads, which finds files that hide while Windows runs.
Save your work first, because the offline scan takes about 15 minutes. Both scans are built into Windows 11 and Windows 10, and a second scanner from another vendor is a useful extra opinion.
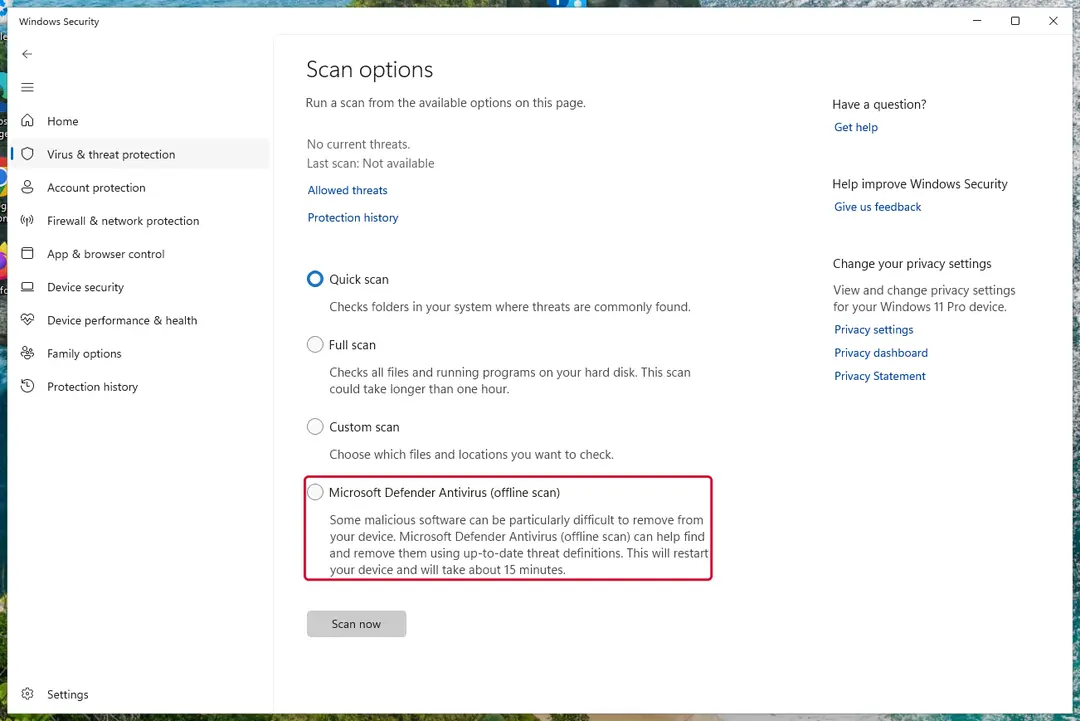
Windows 11: Windows Security > Virus & threat protection > Scan options. Full procedure with screenshots: Run a Microsoft Defender Offline scan
After removal: keep the ads from coming back
Remove the program from Windows, then check the browsers
The ads come from a program in Windows, so uninstall it first and clean the browsers second. Our 2019 guide offers either a reliable removal program or a do-it-yourself clean-up; the steps below are the second route, and the browser tabs above hold the per-browser detail.
- 1
Find the program
Open Settings > Apps > Installed apps in Windows 11 (Apps & features in Windows 10) and sort by install date. MalwareTips names
ts_uninstaller; BleepingComputer's 2015 RocketTab guide names an entry called RocketTab. Look also for anything installed on the day the ads began (Uninstall a program or app in Windows On uGetFix). - 2
Uninstall it
Select the entry, open the three-dot menu and choose Uninstall; accept User Account Control if it asks. Read each prompt, because the sources warn that some installers slip an offer into the last screen. Restart the PC afterwards.
- 3
Look for what it leaves behind
BleepingComputer's 2015 list for RocketTab names a folder
C:\Program Files (x86)\Search Extensionsand two tasks called RocketTab and RocketTab Update Task in Task Scheduler. We did not verify this on a current PC, so check, and delete only items with that exact name. - 4
Scan, then scan offline
Run a Microsoft Defender Full scan, then Microsoft Defender Offline scan (Windows Security > Virus & threat protection > Scan options), which runs outside the normal Windows kernel. Microsoft names its RocketTab detection PUAAdvertising:Win32/RocketTab.
- 5
Clean every browser
Open the extension list of each browser and profile, and clear site data. If the ads stay, reset the browser; the tabs above give the exact steps. A Chrome reinstall alone did not help in the 2018 forum topic.
- 6
Change what it may have seen
If you signed in to banking, email or shopping while the ads were on, change those passwords from a clean device and turn on two-factor sign-in.
Do
- Ask for human help if the ads stay: the Malwarebytes forum helper's route was a scan log (FRST.txt and Addition.txt) read by an expert, then a fix script written for that one PC.
- Keep the scan logs if you ask for help.
Don't
- Run a fix script from a forum post written for someone else's PC: the Farbar tool's own tutorial says to seek expert help before applying a fix when you are unsure about any item in a report.
How to keep it from happening again
Do
- Choose Custom or Advanced when a setup offers it: it lists what else will be installed, and lets you track and control each part.
- Read every screen and licence text; if one says a toolbar or an extra program will be installed, cancel and do not use that free software.
- Keep Windows, your browsers and your programs updated, and remove programs you no longer use.
- Check Installed apps now and then for anything you did not install.
- Download programs only from the developer's site or the official store.
- Close a suspicious-looking web page at once and do not go back to it.
- Keep a current backup of your files (File History or OneDrive), so an infection does not cost you your documents.
- On public networks a VPN hides your IP address from the sites you visit; it does not block ads or remove a program.
Don't
- Skip any step of a setup: the adware rides on the "Next" you click without reading.
- Install software from peer-to-peer networks and other third-party sites that do not say what a download contains.
- Click an ad that looks like a search result: the label "Ads by TS X" in the corner was the only clue.
- Trust a scan that finds nothing as proof the ads are gone: Malwarebytes and others found nothing in the 2018 report.
Questions about Ads by TS
What is Ads by TS?
Ads by TS is the label of ads that an adware program adds to web pages, most often to Google search results.
A reader on the Malwarebytes forum described it in August 2018 as fake results with the label "Ads by TS X" in the top right corner, in every browser he used. MalwareTips adds coupon boxes, underlined keywords, pop-ups and banners, and says the program arrives bundled with free software.
The same ads also appear as "Powered by TS", "Brought to you by TS" and "RocketTab powered by TS". It is a potentially unwanted program, not a website, and not a notification. We could not test it again in 2026.
Is Ads by TS a virus?
Ads by TS is not a virus in the sense of malware that destroys files, but it is adware you should remove. It injects ads, opens extra pages and, as a program that sees the pages you open, can collect what you browse.
Our 2019 guide says the creators earn from clicks and share browsing data with third parties; we cannot confirm what this program sent.
The 2018 Malwarebytes report says Malwarebytes and others did not detect it, so a clean scan is weak proof. Uninstall the program, clean each browser, run Microsoft Defender's full and offline scans, and change passwords you used while it was installed.
Why do I see Ads by TS in my Google search results?
Because a program on your PC adds fake results to the page after Google sends it. The label "Ads by TS X" sits in the top right corner of the injected result, as in the 2018 Malwarebytes report. Google does not place them:
- the same ads appeared in Chrome
- Edge and Internet Explorer for that reader
- which points to a program in Windows
- not to one browser
Open Settings > Apps > Installed apps, sort by install date and look for ts_uninstaller or anything you did not install around the time the ads began, then uninstall it and restart the PC.
How do I remove Ads by TS?
Uninstall the program first, then clean the browsers. Open Settings > Apps > Installed apps in Windows 11 (Apps & features in Windows 10), sort by install date and uninstall ts_uninstaller, or any entry you did not install, such as one named RocketTab.
Restart the PC and run a Microsoft Defender full scan, then the offline scan under Virus & threat protection > Scan options. Next remove unknown extensions in each browser, clear the site data and, if the ads remain, reset the browser; the browser tabs above give each path. Finally change the passwords you used while the ads were on.
Is Ads by TS the same as RocketTab?
They are linked by the label, but we cannot show they are the same program. One of the five wordings of the ads is "RocketTab powered by TS", and MalwareTips and our 2019 guide list it with the others.
BleepingComputer described RocketTab in 2015 as a program that injects ads into sites you visit and in Google search results, installed by free programs; Microsoft lists it as PUAAdvertising:Win32/RocketTab since 11 October 2021, with no technical details. The match is likely for the PCs that carry that label, but we scanned no sample, so check your own Installed apps.
Does Ads by TS affect a Mac, Safari or Firefox?
No source we read shows it on a Mac, in Safari or in Firefox.
The reader of the 2018 Malwarebytes topic used Chrome, Edge and Internet Explorer and had no Firefox, and he later mentioned a similar problem on a MacBook; the helper judged that Mac infection to be "not the same" as the Windows one and asked for a separate topic.
Our 2019 guide said the program can show up on both Windows and Mac; we could not support that. If a Mac shows ads, check Applications and Login Items & Extensions for programs you did not install.
Why does Ads by TS come back after I remove it?
Something that adds it is still on the PC, or you cleaned one browser and not the others. In the 2018 Malwarebytes topic a Chrome reinstall did not help, because the ads came from the Windows side and showed in other browsers too.
Uninstall the program from Installed apps, look for leftovers such as the Search Extensions folder and the RocketTab tasks BleepingComputer listed in 2015, and check every browser and profile.
Then run a Defender full scan and the offline scan. If the ads still return, ask an expert forum to read scan logs; do not run a fix script written for another PC.
What does Microsoft Defender call Ads by TS?
Microsoft does not list a detection called "Ads by TS". Its threat list has PUAAdvertising:Win32/RocketTab, published 11 October 2021 and described as detected and removed by Microsoft Defender Antivirus, without technical details.
Because "RocketTab powered by TS" is one wording of the ads, that is the name most likely to appear, but we ran no sample and cannot promise it will. In 2018 Malwarebytes, in the report we read, did not detect the ads at all, so check Installed apps yourself even if a scan reports nothing.
Can Ads by TS steal my passwords?
We found no source that says it steals passwords, but a program that injects ads into every page can see what the pages hold. MalwareTips and our 2019 guide describe ads, redirects and browsing data, not stolen logins.
You cannot see what it sent, so after removing it, change the passwords of accounts you signed in to while it was installed, starting with email and banking, from a clean device, and turn on two-factor sign-in, as the FTC advises after malware. Saved browser passwords are stored separately and do not become readable just because ads appear.
Will Fortect remove Ads by TS?
Fortect scans Windows for malware and unwanted programs and repairs the system files and settings they change, and its free scan shows what it finds on your PC before you decide anything.
For Ads by TS, follow the plan above as well: the browser steps take back permissions and settings that no scanner treats as a threat, and uninstalling the program that brought it removes the source.
Run Microsoft Defender's full scan and, if anything was found, its offline scan as a second opinion. If the symptoms are gone after the plan and both scans are clean, there is nothing more to do.
Sources
- MalwareTips: How to remove "Ads by TS" adware (16 June 2018) (read October 6, 2026)
- Malwarebytes Forums: "Ads by TS" injected in Google search results (August 2018) (read October 6, 2026)
- Microsoft Security Intelligence: PUAAdvertising:Win32/RocketTab (read October 6, 2026)
- BleepingComputer: How to remove RocketTab Ads from your computer (14 July 2015) (read October 6, 2026)
- BleepingComputer Forums: FRST Tutorial, how to use Farbar Recovery Scan Tool (read October 6, 2026)
- Google Chrome Help: Reset Chrome settings to default (no longer online) (read October 6, 2026)
- Microsoft Learn: Microsoft Defender Offline scan in Windows (read October 6, 2026)
- FTC: Malware: How to protect against, detect, and remove it (read October 6, 2026)
- Mozilla Support: Disable or remove Add-ons (read October 6, 2026)
- Microsoft Support: Uninstall or remove apps and programs in Windows (read October 6, 2026)
- Apple Support: Delete or uninstall apps on Mac (read October 6, 2026)