

Stormygreatz virus might put your computer and your security at risk
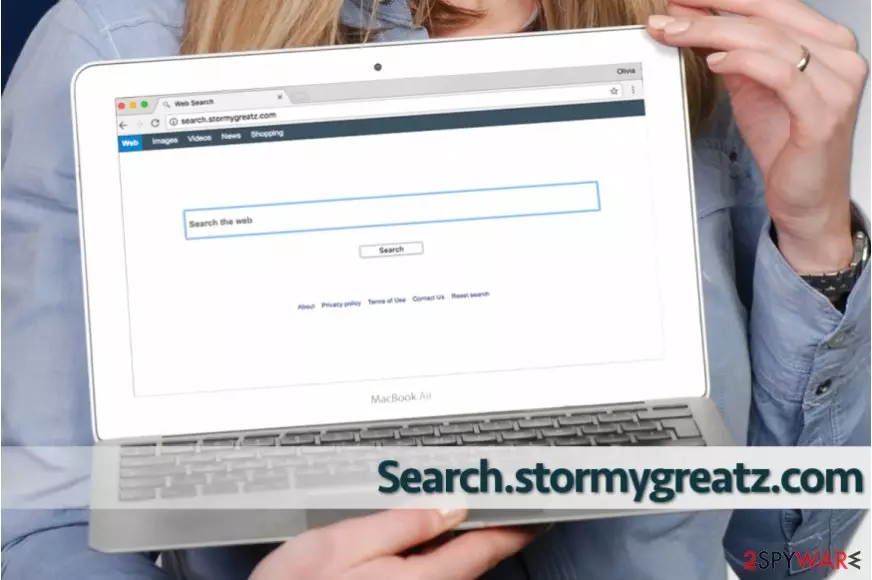
Search.stormygreatz.com is a potentially unwanted program seeking to disrupt your search sessions. The developers of Stormygreatz state that this “search engine” specializes in Mac installation service and improves user’s browsing experience. Besides, program developers and websites’ owners are promised higher revenues and better user engagement.
At first sight, the appearance might be deceptive, as it is easy to confuse it with other legal search engines, such as Google, Yahoo, Bing, and others.
Due to this delusional look of Stormygreatz and its promises of extremely simple download/installation process, I have already been lured into using this fake search engine. Unfortunately, but this can lead you to hard or almost impossible removal procedure of search.stormygreatz.com virus. If you are willing to eliminate the changes it has made to your web browsers, scan your computer with FortectIntego (for Windows) or MalwarebytesMalwarebytes (for Mac).
According to search.stormygreatz.com “About Us” section, the platform has been functioning as a successful app downloader for years. It also claims to guarantee faster downloads and optimized functionality of apps. However, Stormygreatz virus is promoted with the help of browser hijacking[1] method, and it uses download/installation set-ups that modify browser’s options without user’s permission asked.
If that is not enough, it collects browsing-related data, which usually contains personally identifiable information and may put your privacy at risk. If you are willing to remove Search.stormygreatz.com virus from your computer, follow a guide below and fix your computer.
Once the user downloads and installs the Stormygreatz, the virus tries to hijack legitimate browsers, such as Google Chrome, Safari or Mozilla Firefox and secretly modifies the default search engine, pre-set new tab site, and homepage options by assigning them to search.stormygreatz.com.
These changes may not seem significant, yet, later on, the users are not able to return, their legitimate browsers to the previous state. This problem arises because those set-ups are also designed in a way to download various potentially unwanted programs (PUPs) and other plug-ins (also known as “helper objects”) without user’s consent.
Novirus.uk experts say that these virtual annoyances tend to reassign browser options when the user tries to change them back.[2]

While the user might not notice the downloaded “helper objects,” they continually collect personally non-identifiable data, which may be sold to third-party companies and could possibly cause privacy issues. Privacy issues can arise because some of the collected data that is considered anonymous (such as your search queries) might contain personally-identifiable information.
Moreover, browser plug-ins and potentially unwanted programs (PUPs) run various tasks in the background, e.g., mining cryptocurrency[3]. It can decrease computer’s performance and expose personal data, such as information about your location, etc.
Virus is promoted using browser hijacking method
One of the most popular marketing method used to promote Stormygreatz is bundling – In other words, it means the installation of additional programs, while installing the regular apps or software. The developers are not completely honest and hide the information about future browser modifications in the Custom/Advanced options and mislead the users, who are in a rush and skip important steps of the download/install process.
The developers of Stormygreatz clearly state in the Terms of Use column “Changes to your Computer”: “You hereby grant Stormygreatz Software permission to install the Software and the Approved Offers, including collateral software required to execute such Softwares and/or Approved Offers, as determined by the relevant ISV.”. Hence, once the user downloads it, the developers have permission to make changes to the user’s computer without notifying.
Moreover, Stormygreatz states that it is not responsible for any illegal content or malware damage it may cause: “We, nor our subsidiaries, officers, affiliates and its licensors, are not liable for any damages resulting from your installation or damages caused by any form of malware or inappropriate or illegal (including copyright infringing and spamming) content.”.
Therefore, if you encountered a redirect to search.stormygreatz.com, we strongly recommend you to uninstall all suspicious apps and avoid visiting that site again.
Useful steps to remove Search.stormygreatz.com and other PUPs and avoid their installation in the future
To avoid the need of Search.stormygreatz.com removal, you have to learn how to avoid downloading the virus in the first place. We always recommend installing applications only from official sources, because as mentioned above, there is a high possibility to download the potentially unwanted programs including Stormygreatz with other free apps. It should be clear to you that the removal of such questionable applications can be complicated.
Also use only direct download URLs, since most malicious ads may seem legitimate and it is hard to determine its origins. If the ads redirect to surveys or other suspicious websites such as adult-only, online dating or gambling sites, we extremely advise to uninstall all dubious browser plug-ins/applications and avoid clicking ads in future.
However, there is a quicker way to finish Search.stormygreatz.com removal, and it requires an anti-spyware or anti-malware software. If you do not have such yet, consider installing one of the programs recommended by us.
Uninstall from Windows
Uninstall from Windows 10/8:
- Type Control Panel into the Windows search box and open the result.
- Under Programs, select Uninstall a program.


Uninstall from Windows 7/XP:
- Click on Windows Start > Control Panel (Windows XP users should click on Add/Remove Programs).
- In Control Panel, select Programs > Uninstall a program.


Remove the unwanted program:
- In the Programs and Features window, look for any recently installed suspicious entries, select them, and click Uninstall.
- If User Account Control appears, click Yes to confirm, then complete the removal.


Delete from macOS
Remove the unwanted application:
- From the menu bar, select Go > Applications.
- In the Applications folder, look for any suspicious entries, then drag them to Trash (or right-click and pick Move to Trash).


Delete leftover files and folders:
- Select Go > Go to Folder.
- Enter /Library/Application Support and remove any suspicious folders related to the unwanted program.
- Repeat the same check in the /Library/LaunchAgents and /Library/LaunchDaemons folders, deleting any suspicious entries.

- Finally, empty the Trash to permanently remove the leftovers.

Reset Internet Explorer
Remove dangerous add-ons:
- Open Internet Explorer, click on the Gear icon (IE menu) on the top-right corner of the browser
- Pick Manage Add-ons.
- You will see a Manage Add-ons window. Here, look for suspicious plugins. Click on these entries and select Disable.


Change your homepage if it was altered:
- Open IE and click on the Gear icon.
- Select Internet Options.
- In the General tab, delete the Home page address and replace it by your preferred one (for example, Google.com).
- Click Apply and then select OK.


Delete temporary files:
- Press on the Gear icon and select Internet Options.
- Under Browsing history, click Delete...
- Select relevant fields and press Delete.


Reset Internet Explorer:
- Click on Gear icon > Internet options and select Advanced tab.
- Select Reset.
- In the new window, check Delete personal settings and select Reset.


Remove from Microsoft Edge
Delete unwanted extensions from MS Edge:
- Select Menu (three horizontal dots at the top-right of the browser window) and pick Extensions.
- From the list, pick the extension and click on the Gear icon.
- Click Remove.


Clear cookies and other browser data:
- Click on the Menu (three horizontal dots at the top-right of the browser window) and select Settings > Privacy, search, and services..
- Under Clear browsing data, pick Choose what to clear.
- Select Cookies and other site data and Cached images and files. (apart from passwords, although you might want to include Media licenses as well, if applicable) and click on Clear.


Restore new tab and homepage settings:
- Click the menu icon and choose Settings.
- Then find On startup section.
- Click Remove next to any suspicious startup page.
Reset MS Edge if the above steps did not work:
- Press on Ctrl + Shift + Esc to open Task Manager.
- Click on More details arrow at the bottom of the window.
- Select Details tab.
- Now scroll down and locate every entry with Microsoft Edge name in it. Right-click on each of them and select End Task to stop MS Edge from running.


Instructions for Chromium-based Edge
Delete extensions from MS Edge (Chromium):
- Open Edge and click select Settings > Extensions.
- Delete unwanted extensions by clicking Remove.


Clear cache and site data:
- Click on Menu and go to Settings.
- Select Privacy, search and services.
- Under Clear browsing data, pick Choose what to clear.
- Under Time range, pick All time.
- Select Clear now.


Reset Chromium-based MS Edge:
- Click on Menu and select Settings.
- On the left side, pick Reset settings.
- Select Restore settings to their default values.
- Confirm with Reset.
- This will disable extensions and reset startup pages but will not delete bookmarks, saved passwords, or browsing history.


Remove from Mozilla Firefox (FF)
Remove dangerous extensions:
- Open Mozilla Firefox browser and click on the Menu (three horizontal lines at the top-right of the window).
- Select Add-ons.
- In here, select the unwanted extension and click Remove.


Reset the homepage:
- Click three horizontal lines at the top right corner to open the menu.
- Choose Settings.
- Under Home, set your preferred homepage and new tab settings.
Clear cookies and site data:
- Click Menu and pick Settings.
- Go to Privacy & Security section.
- Scroll down to locate Cookies and Site Data.
- Click on Clear Data...
- Select Cookies and Site Data and Temporary cached files and pages, then click Clear.


Reset Mozilla Firefox
If clearing the browser as explained above did not help, reset Mozilla Firefox:
- Open Mozilla Firefox browser and click the Menu.
- Go to Help and then choose Troubleshooting Information.

- Under Give Firefox a tune up section, click on Refresh Firefox...
- Once the pop-up shows up, confirm the action by pressing on Refresh Firefox.



Remove from Google Chrome
Delete malicious extensions from Google Chrome:
- Open Google Chrome, click on the Menu (three vertical dots at the top-right corner) and select More tools > Extensions.
- In the newly opened window, you will see all the installed extensions. Uninstall all suspicious extensions related to the unwanted program by clicking Remove.


Clear cache and web data from Chrome:
- Click on Menu and pick Settings.
- Under Privacy and security, select Clear browsing data.
- Select Browsing history, Cookies and other site data, as well as Cached images and files.
- Click Clear data.


Change your homepage:
- Click menu and choose Settings.
- Look for a suspicious site in the On startup section.
- Click on Open a specific or set of pages and click on three dots to find the Remove option.
Reset Google Chrome:
If the previous methods did not help you, reset Google Chrome to eliminate all the unwanted components:
- Click on Menu and select Settings.
- In the Settings, scroll down and click Advanced.
- Scroll down and locate Reset and clean up section.
- Now click Restore settings to their original defaults.
- Confirm with Reset settings.


Delete from Safari
Remove dangerous extensions:
- Open Safari, click Safari in the menu at the top-left of the screen, and select Preferences.
- Go to the Extensions tab, look for any suspicious entries, and click Uninstall to remove them.


Clear history and website data:
- Click Safari in the menu and pick Clear History.
- Set Clear to all history and confirm with Clear History.


Reset Safari:
- Click Safari in the menu and select Preferences > Advanced.
- Enable Show Develop menu in menu bar.
- From the menu bar, click Develop and select Empty Caches.


Did this guide help?
Be the first to comment