

Hide My Searches – a questionable search engine that claims to encrypt the search queries for ensuring privacy
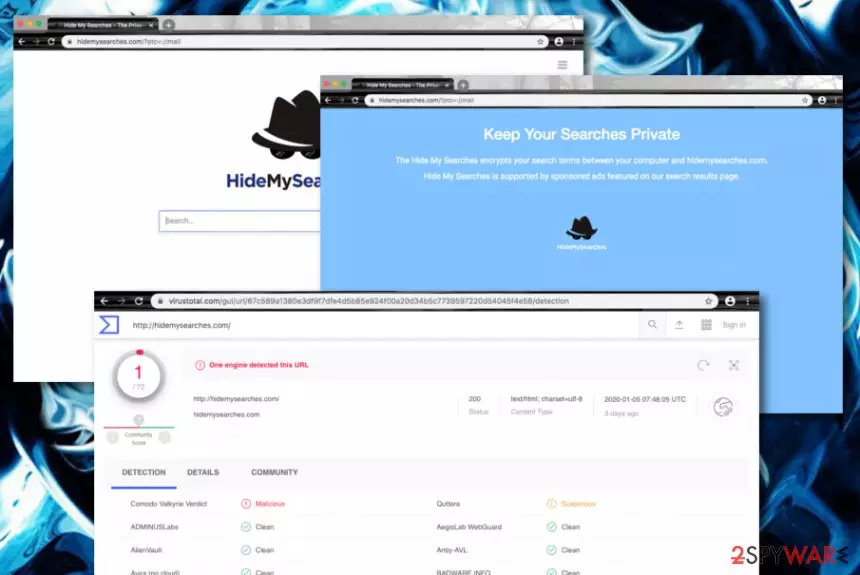
Hide My Searches is recognized as a browser hijacker that puts privacy as its mission. If you visit the hidemysearches.com website you will be provided with attractive claims that your searches will get encrypted and all search query information will expire after a half an hour. You might see this type of feature beneficial but this function is not worth the cost that you will have to pay later while dealing with browser hijacking activities. Hide My Searches virus is a name given to this app as it applies unwanted changes to the default search provider, homepage, and new tab URL locations.
Hide My Searches is a suspicious search engine and this means that the search results that come from this provider can be misleading or completely false. As a result, you might not even find what you are looking for. All the promised advanced security features are not worth the unwanted changes and fake search results as you can successfully and safely continue using a legitimate search engine such as Google, Yahoo, or Bing.[1]
| Name | Hide My Searches |
|---|---|
| Category | Browser hijacker/potentially unwanted program |
| Developer | Eightpoint Technologies Ltd. that is an affiliate of Polarities Technologies Ltd. |
| Similar apps | There are many other similar applications lurking out in the cybersphere. The same company and its affiliates have developed other browser-hijacking programs such as myloginhelper.com, Watch Tv Now, My Weather Radar, search.orbituarysearchtab.com, etc. |
| Changes | Once the hijacking process happens, your web browsers will experience some changes regarding the default search provider, homepage, and new tab URL zone |
| Activities | Besides modifying web browsers, the PUP can also display advertising content, redirect the users to affiliate websites, inject other suspicious programs, and collect browsing-related information |
| Deletion | Using automatical software should be very helpful for the elimination process of the browser hijacker. However, if you are interested in the manual removal technique, go to the end of this web page and you will find instructions there |
| Fix tip | If you have found some system compromisation on your computer, try repairing the corrupted objects with a tool such as FortectIntego |
Hide My Searches is a program that has been developed by an affiliate (Eightpoint Technologies Ltd.) of a well-known company – Polarity Technologies Ltd. This firm and its affiliates are known for releasing many browser-hijacking applications such as search.obituarysearchtab.com, myloginhelper.com, My Weather Radar, Watch Tv Now, and others.
Hide My Searches extension can be downloaded directly from the official Google Chrome web store. However, people are not very likely to get this type of product when they learn about its activities. So most of the time browser hijackers come in a bundle with other programs such as free pdf converters, download managers, and similar software.
Continuously, Hide My Searches can deliver sponsored advertisements on the user's computer system. This browser hijacker might try to get you involved in various surveys, questionnaires, and scams. To not take any deals that come from this PUP[2] seriously and especially do not provide any personal/credential information if you are asked to.

Nevertheless, intense and intrusive advertising activities that come from Hide My Searches can start overusing your computer's resources. As a result, you might find your web browsers, other software, and the entire system struggling. Additionally, you might recognize the CPU power level rising over 60%.
Even though Hide My Searches claims that the developers do not collect the user's IP address, the app might still record other browsing-related information such as recently viewed search queries, places accessed on the Internet, and so on. The developer claim that such data is collected for improving product performance, however, this type of information is most of the time passed on to other parties for income or used in targeted advertising campaigns:
We store aggregated search data and error log data to improve product performance, but never store IP addresses or unique user identifiers in connection with such data in order to ensure that none of the information collected in connection with your search activity is personally identifiable information (as such term is commonly understood in the United States without reference to any applicable state laws).
Hide My Searches can also get the user involved in redirecting activities. These sessions are often used for placing the users on other promoted sources and providing them with offers and deals. However, there is a dangerous side to this type of activity too. In some cases, you might land on a malware-laden location and receive a virtual parasite on your PC.
Additionally, Hide My Searches can bring other potentially unwanted programs to the computer system and web browsers. The browser hijacker might carry other hijacking apps, adware, scareware, and sometimes malware such as spyware. The longer you keep the browser-hijacking app on your system, the bigger the risk of additional infiltration.
Hide My Searches removal is a way to solve all of your problems. After you eliminate the PUP, your browser setting should be restored back to their previous states and your default search engine should come back. Also, you should spot no more rogue processes and files on your machine, and the app itself will be disabled and terminated.

Hide My Searches remove is a topic often searched by various users. The process involves downloading and installing a reliable antimalware program and running a full system scan with the tool. Afterward, the program will remove the cyber threat and make sure that no additional components are left on your computer system.
If you decide to remove Hide My Searches by yourself, we have provided some step-by-step guidelines at the end of this article. There you will learn how to clean web browsers such as Internet Explorer, Microsoft Edge, Mozilla Firefox, Google Chrome, and Safari from suspicious extensions, add-ons, and plug-ins.
Bundled software is likely to distribute PUPs
Experts from Virusai.lt[3] claim that a deceptive technique known as “bundling” is the most common method when it comes to browser hijacker and other PUP distribution. The developers are aware that many users do not pay attention to the downloading and installing process, so the inject the browser hijacker in an entire software package.
When the freeware[4] is downloaded to the computer system, the PUP is also successfully delivered. Those who have Recommended/Quick settings should change them to Custom/Customized as this option allows tracking all incoming downloads and deselecting all the components that you do not want to see on your computer system.
Furthermore, browser hijackers can get delivered through other sources such as unsecured third-party websites that come filled with numerous advertisements and hyperlinks. You should prevent yourself from proceeding to web pages that are marked as unsafe. Also, get a reliable antimalware tool that will protect your browsing.
The removal process of Hide My Searches virus
Hide My Searches virus is a tricky program that will try to convince about its handy functionality and bring unwanted changes in the background. If you spot such signs of infection (search engine, new tab URL, homepage modifications), it is time to think about the elimination process of the bogus product.
Use reliable antivirus tools to remove Hide My Searches from your operating system. Note that the browser hijacker might have added bogus tasks to the Task Manager, included suspicious keys to the Registry. All of these locations need to be cleaned, otherwise, the adware might enable itself again within the next startup process.
Hide My Searches removal can also be carried out in another way. If you are an advanced user, you can try using the manual step-by-step guidelines that have been added to the end of this article. Just make sure that you refresh and clean not only your operating system but also check all web browsers such as Chrome, Explorer, Safari, that got hijacked during the browser hijacker attack.
Uninstall from Windows
Uninstall from Windows 10/8:
- Type Control Panel into the Windows search box and open the result.
- Under Programs, select Uninstall a program.


Uninstall from Windows 7/XP:
- Click on Windows Start > Control Panel (Windows XP users should click on Add/Remove Programs).
- In Control Panel, select Programs > Uninstall a program.


Remove the unwanted program:
- In the Programs and Features window, look for any recently installed suspicious entries, select them, and click Uninstall.
- If User Account Control appears, click Yes to confirm, then complete the removal.


Delete from macOS
Remove the unwanted application:
- From the menu bar, select Go > Applications.
- In the Applications folder, look for any suspicious entries, then drag them to Trash (or right-click and pick Move to Trash).


Delete leftover files and folders:
- Select Go > Go to Folder.
- Enter /Library/Application Support and remove any suspicious folders related to the unwanted program.
- Repeat the same check in the /Library/LaunchAgents and /Library/LaunchDaemons folders, deleting any suspicious entries.

- Finally, empty the Trash to permanently remove the leftovers.

Reset Internet Explorer
Remove dangerous add-ons:
- Open Internet Explorer, click on the Gear icon (IE menu) on the top-right corner of the browser
- Pick Manage Add-ons.
- You will see a Manage Add-ons window. Here, look for suspicious plugins. Click on these entries and select Disable.


Change your homepage if it was altered:
- Open IE and click on the Gear icon.
- Select Internet Options.
- In the General tab, delete the Home page address and replace it by your preferred one (for example, Google.com).
- Click Apply and then select OK.


Delete temporary files:
- Press on the Gear icon and select Internet Options.
- Under Browsing history, click Delete...
- Select relevant fields and press Delete.


Reset Internet Explorer:
- Click on Gear icon > Internet options and select Advanced tab.
- Select Reset.
- In the new window, check Delete personal settings and select Reset.


Remove from Microsoft Edge
Delete unwanted extensions from MS Edge:
- Select Menu (three horizontal dots at the top-right of the browser window) and pick Extensions.
- From the list, pick the extension and click on the Gear icon.
- Click Remove.


Clear cookies and other browser data:
- Click on the Menu (three horizontal dots at the top-right of the browser window) and select Settings > Privacy, search, and services..
- Under Clear browsing data, pick Choose what to clear.
- Select Cookies and other site data and Cached images and files. (apart from passwords, although you might want to include Media licenses as well, if applicable) and click on Clear.


Restore new tab and homepage settings:
- Click the menu icon and choose Settings.
- Then find On startup section.
- Click Remove next to any suspicious startup page.
Reset MS Edge if the above steps did not work:
- Press on Ctrl + Shift + Esc to open Task Manager.
- Click on More details arrow at the bottom of the window.
- Select Details tab.
- Now scroll down and locate every entry with Microsoft Edge name in it. Right-click on each of them and select End Task to stop MS Edge from running.


Instructions for Chromium-based Edge
Delete extensions from MS Edge (Chromium):
- Open Edge and click select Settings > Extensions.
- Delete unwanted extensions by clicking Remove.


Clear cache and site data:
- Click on Menu and go to Settings.
- Select Privacy, search and services.
- Under Clear browsing data, pick Choose what to clear.
- Under Time range, pick All time.
- Select Clear now.


Reset Chromium-based MS Edge:
- Click on Menu and select Settings.
- On the left side, pick Reset settings.
- Select Restore settings to their default values.
- Confirm with Reset.
- This will disable extensions and reset startup pages but will not delete bookmarks, saved passwords, or browsing history.


Remove from Mozilla Firefox (FF)
Remove dangerous extensions:
- Open Mozilla Firefox browser and click on the Menu (three horizontal lines at the top-right of the window).
- Select Add-ons.
- In here, select the unwanted extension and click Remove.


Reset the homepage:
- Click three horizontal lines at the top right corner to open the menu.
- Choose Settings.
- Under Home, set your preferred homepage and new tab settings.
Clear cookies and site data:
- Click Menu and pick Settings.
- Go to Privacy & Security section.
- Scroll down to locate Cookies and Site Data.
- Click on Clear Data...
- Select Cookies and Site Data and Temporary cached files and pages, then click Clear.


Reset Mozilla Firefox
If clearing the browser as explained above did not help, reset Mozilla Firefox:
- Open Mozilla Firefox browser and click the Menu.
- Go to Help and then choose Troubleshooting Information.

- Under Give Firefox a tune up section, click on Refresh Firefox...
- Once the pop-up shows up, confirm the action by pressing on Refresh Firefox.



Remove from Google Chrome
Delete malicious extensions from Google Chrome:
- Open Google Chrome, click on the Menu (three vertical dots at the top-right corner) and select More tools > Extensions.
- In the newly opened window, you will see all the installed extensions. Uninstall all suspicious extensions related to the unwanted program by clicking Remove.


Clear cache and web data from Chrome:
- Click on Menu and pick Settings.
- Under Privacy and security, select Clear browsing data.
- Select Browsing history, Cookies and other site data, as well as Cached images and files.
- Click Clear data.


Change your homepage:
- Click menu and choose Settings.
- Look for a suspicious site in the On startup section.
- Click on Open a specific or set of pages and click on three dots to find the Remove option.
Reset Google Chrome:
If the previous methods did not help you, reset Google Chrome to eliminate all the unwanted components:
- Click on Menu and select Settings.
- In the Settings, scroll down and click Advanced.
- Scroll down and locate Reset and clean up section.
- Now click Restore settings to their original defaults.
- Confirm with Reset settings.


Delete from Safari
Remove dangerous extensions:
- Open Safari, click Safari in the menu at the top-left of the screen, and select Preferences.
- Go to the Extensions tab, look for any suspicious entries, and click Uninstall to remove them.


Clear history and website data:
- Click Safari in the menu and pick Clear History.
- Set Clear to all history and confirm with Clear History.


Reset Safari:
- Click Safari in the menu and select Preferences > Advanced.
- Enable Show Develop menu in menu bar.
- From the menu bar, click Develop and select Empty Caches.


Did this guide help?
Be the first to comment